If you are printing with a DTG, then this application is vital to your print process when using Riverr.
There are a lot of different features and options in this application, so we will break it into bite-sized pieces for you.
First things first, lets download that application.
Installation
1. Go to Settings>Integrations in your Riverr account.
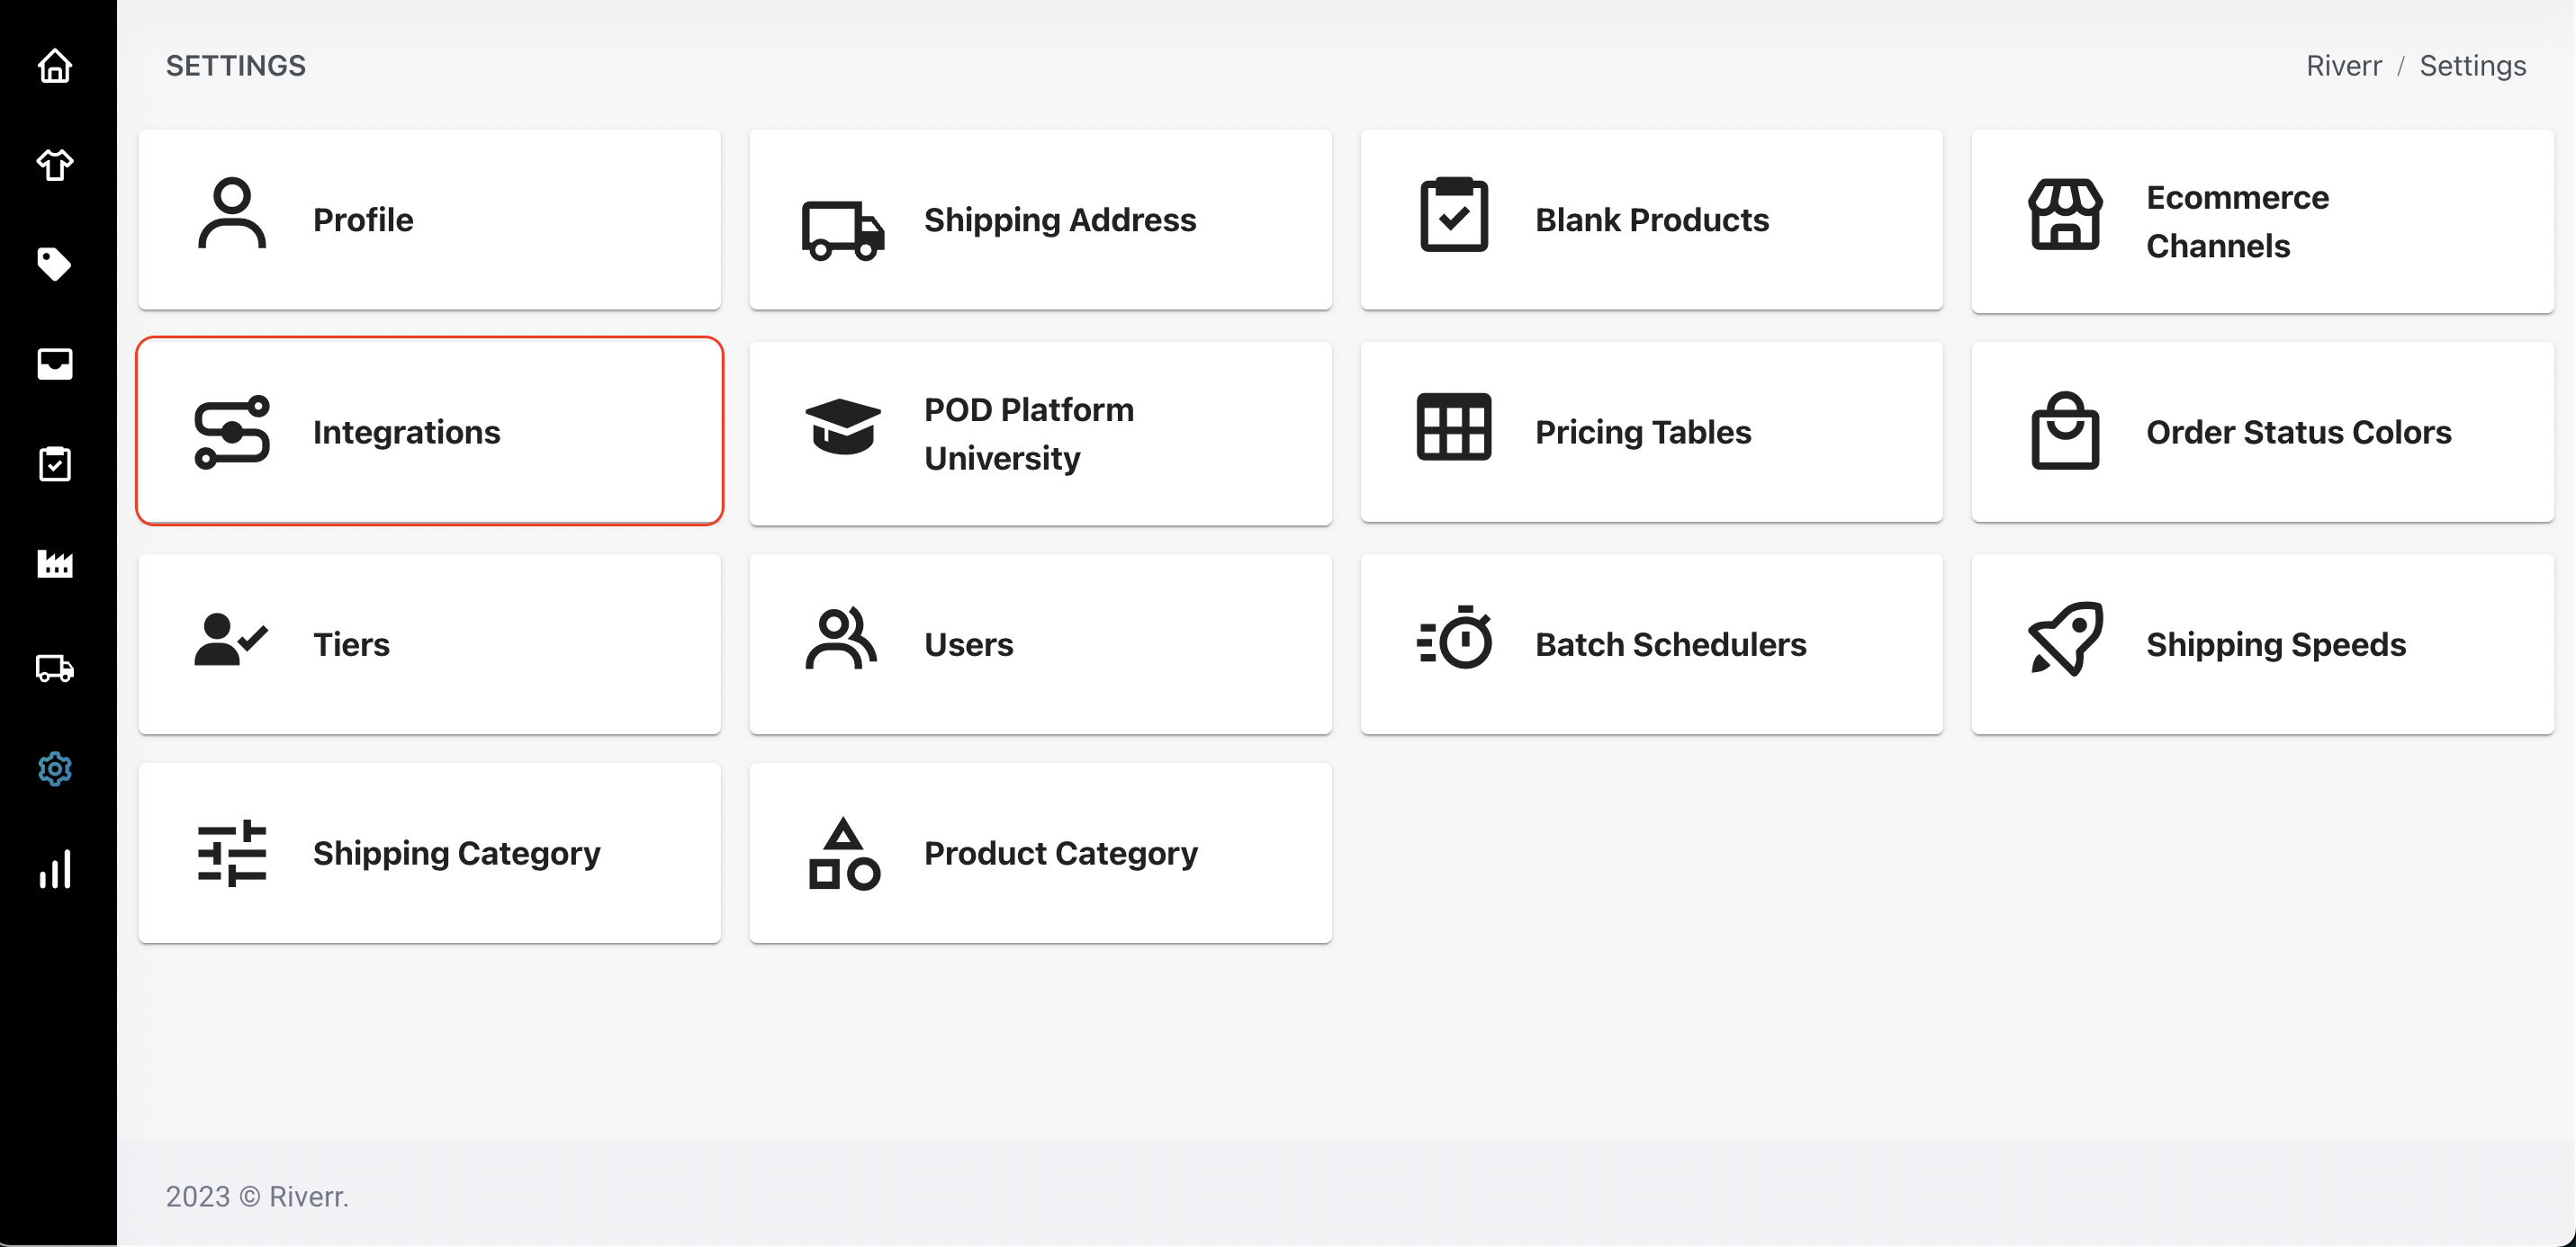
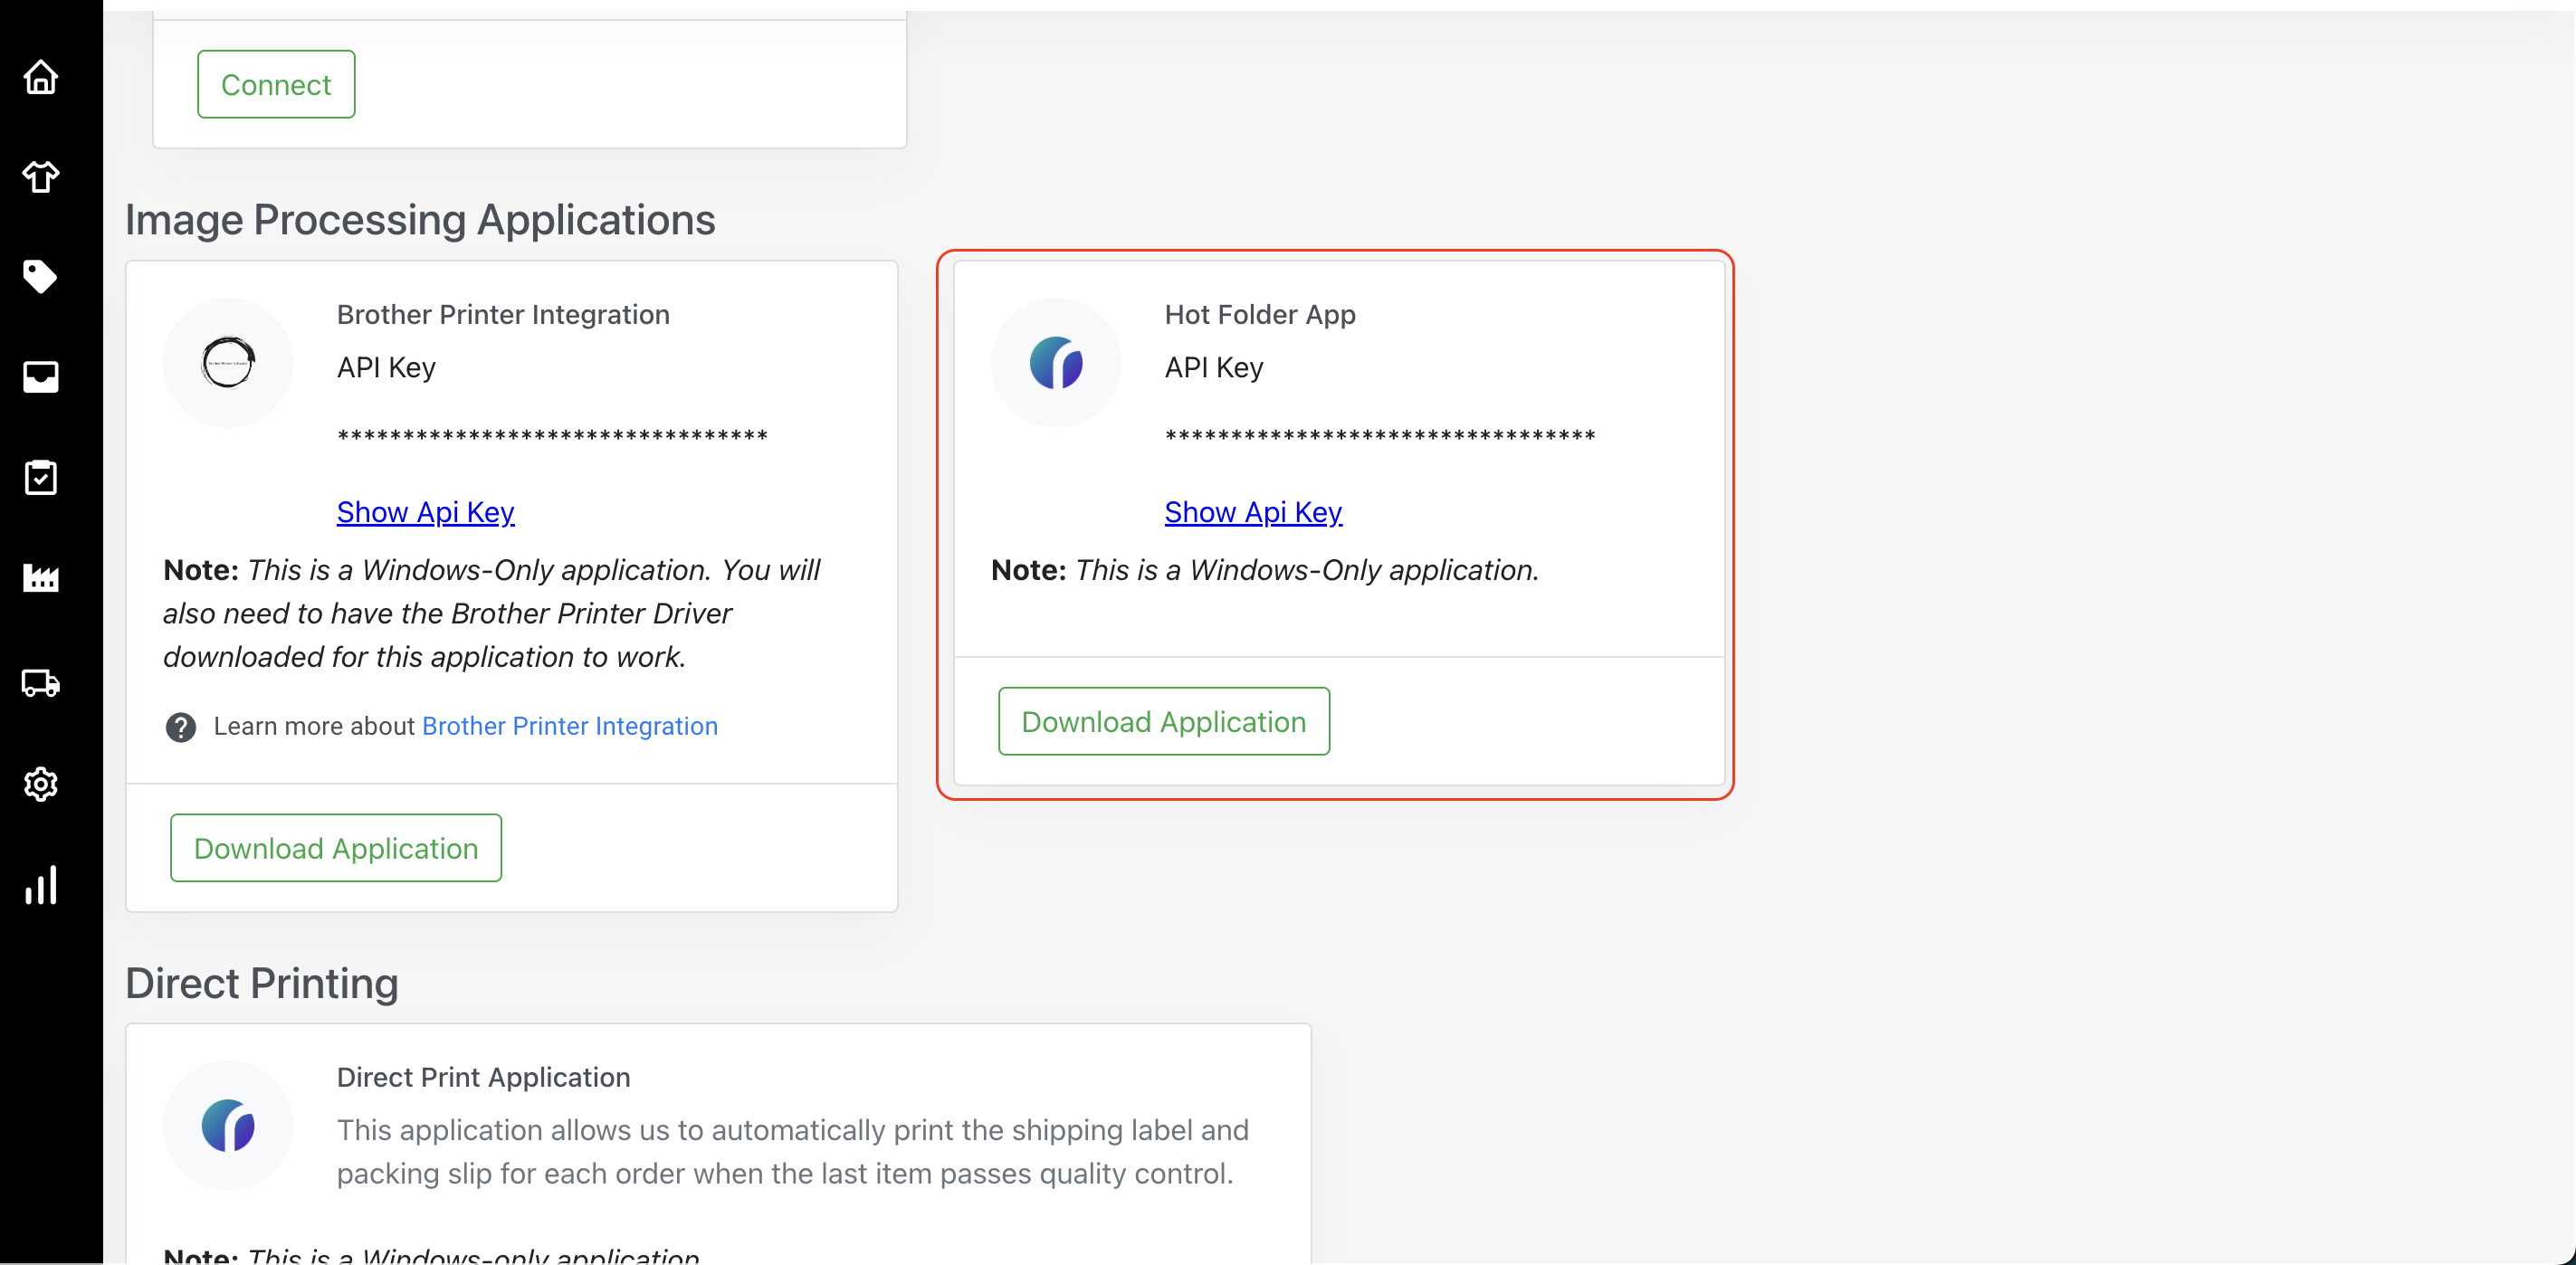
2. From the Integrations tab, download the "Hot Folder Application." Then you will need to copy the api key that is given on that card.
3. Next we will install the application.
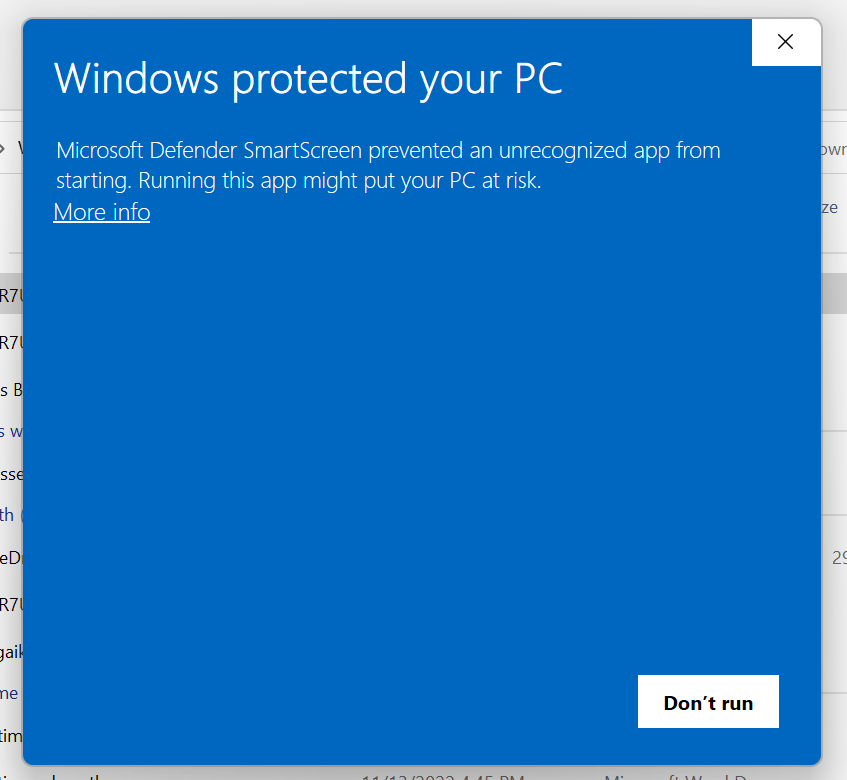
After the application is downloaded, you will see this popup. Choose "More Info."
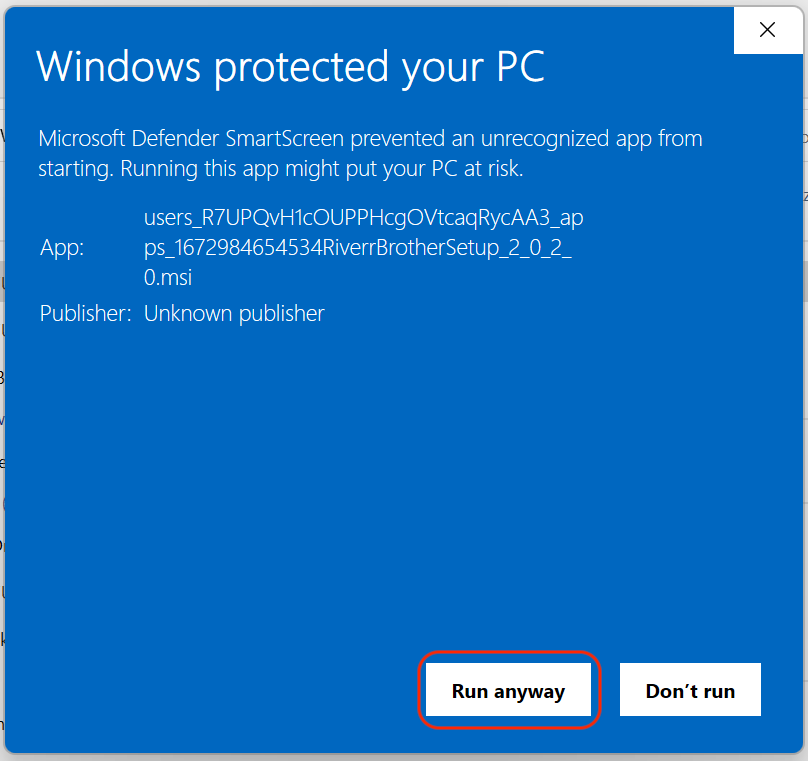
Click "Run Anyway."
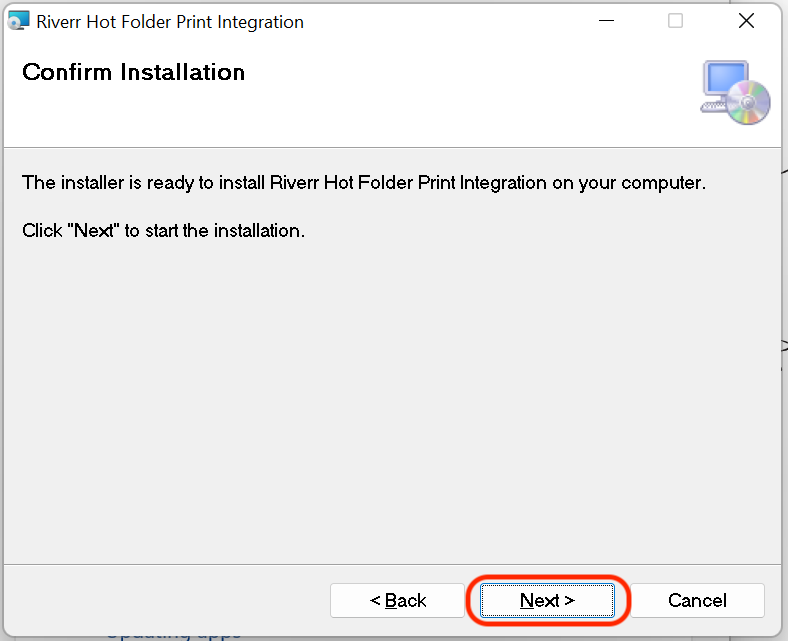
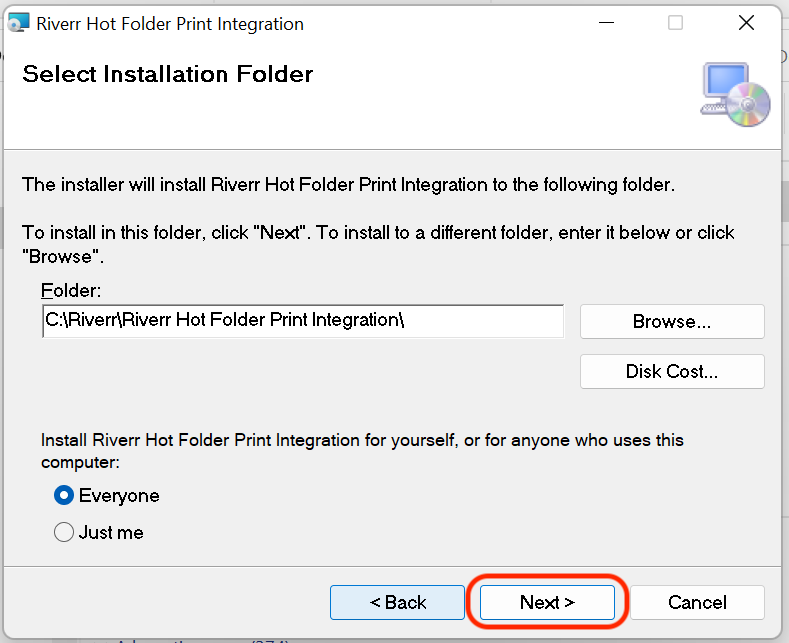
Next you will see the installer. Walk through the following steps to install the application to your computer:
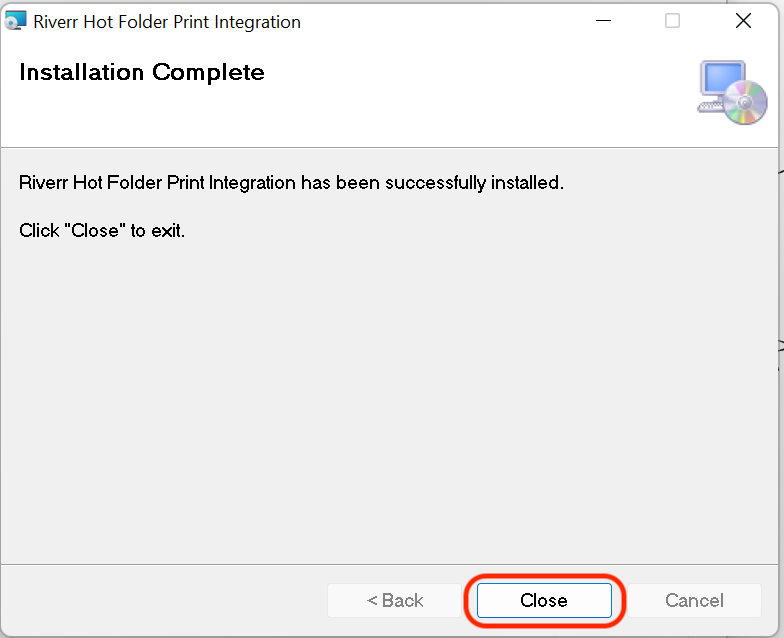
Done! Now the application will open for you. It should look like this:

4. Navigate to the section that says "Placement Mapping"
5. Add your API key that you copied and click "Reload data from server"
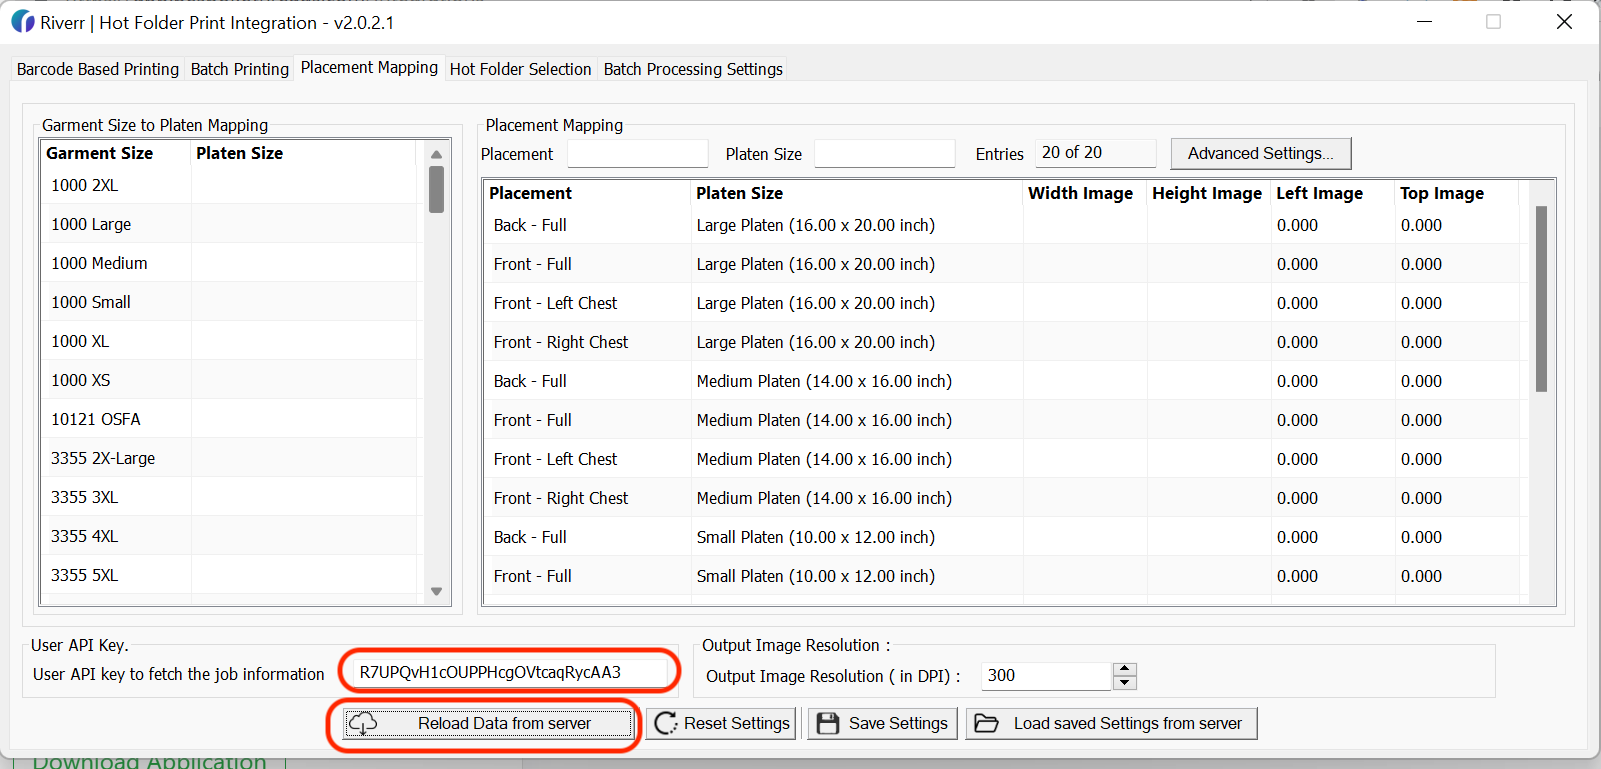
Now we will begin creating your settings for the print files that will come through this application. We will start with the platen sizes.
6. Set Your product sizes with the appropriate platen
After you load the data from the server, it will pull in all of the sizes from your Riverr account. You will need to choose a platen size to map to the product sizes.
7. Create your max print areas for each platen and each placement.
a. First you will map the "Max width."
b. Then you will map the "Max Height."
c. Map the offset for the top and left side of the platen.
*Note: The button that says "Advanced Settings" allows you to create max print areas for every product size. This is not mandatory but will give you even further control on the size of each image.
8. Save your settings.
The application will then ask you if you would like to save the settings to the server as well. This feature is useful if you have more than one printer because it means that when you download the application to your next printer and click the button "Load saved settings from server" it will import all of the settings that you just finished creating.
*Note: If you save the settings to the server, it will overwrite the previous settings. Make sure this is what you want to do!
9. Connect your Hot Folders
a. Navigate to the "Hot Folder Selection" tab
b. Click on the folder icon on the right side of the application.

c. Connect the appropriate hot folder for that platen size and color mode.
*Note: We identify colors in images automatically and assign them to the correct print mode. There is nothing you need to do to make this happen.
d. Save your settings.
That's it! Now you are ready to start using this application. Click on "Barcode Based Printing" and scan your first barcode.
Want to pre-rip your files for even faster printing? Check out this article on pre-ripping:
Pre-Ripping your print files