By default, Riverr rips your images on the fly when sending them to your printer or hot folder. This generally works well for users, but some print shops like to "pre-rip" files so they are ready instantly when they are called to the printer.
We will show you how you can pre-rip these files and save them to a folder that will be called when the printer is ready for the file.
Before we get started, though, a quick note on the difference between the Hot Folder App and the Brother Printer App when it comes to ripping locally:
Both applications pre-rip the files and send them to a folder of your choice, but they are saved differently. For the Brother App, it saves the image as a print-ready ARX file. For the Hot Folder App, it processes the image but retains it as a PNG. This is because the Hot Folder will take care of the color settings and file type when it is sent there.
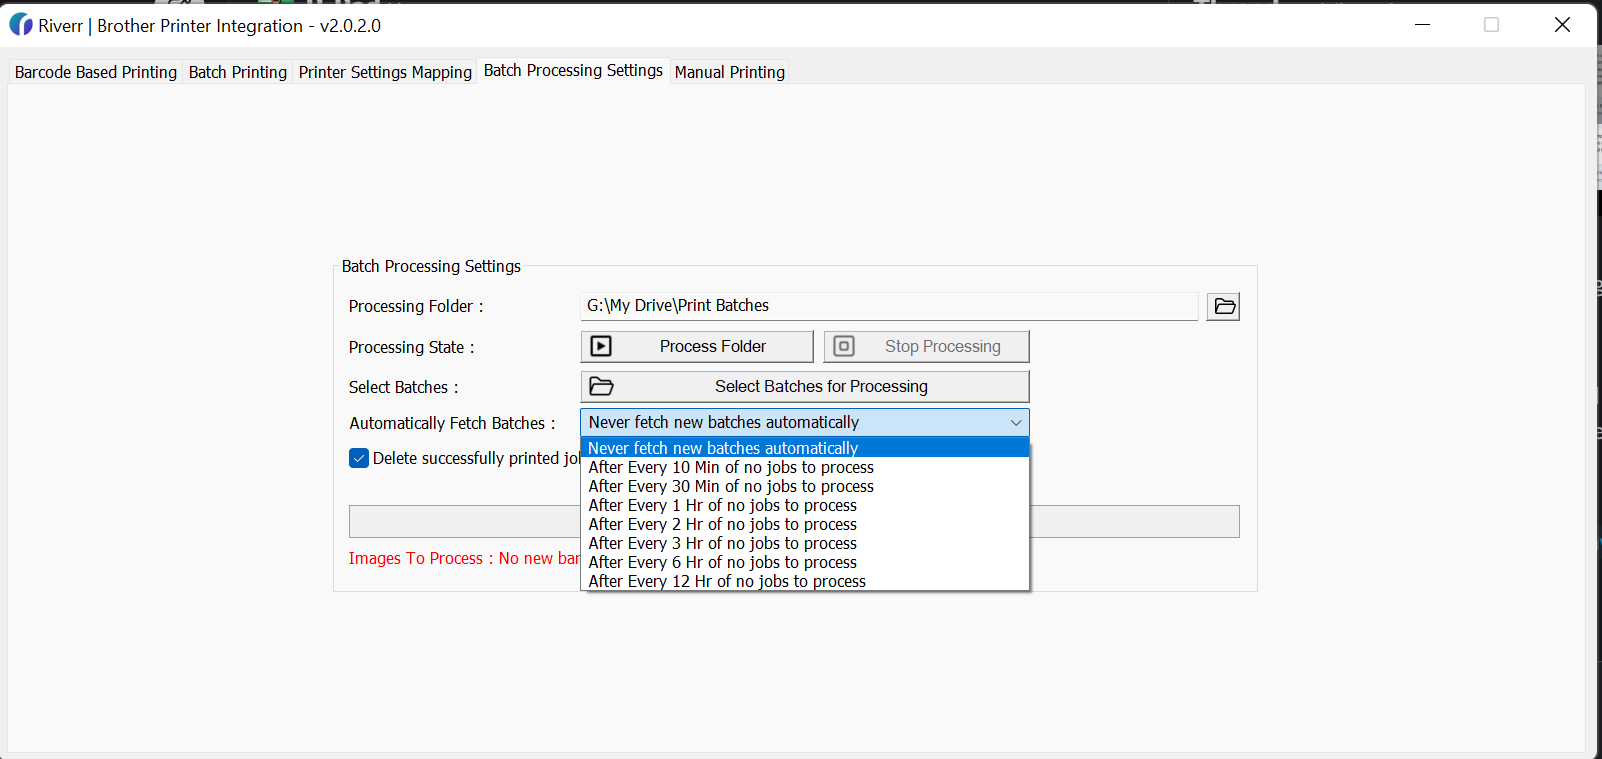
1. After starting the application, click on the tab at the top that says "Batch Processing Settings"
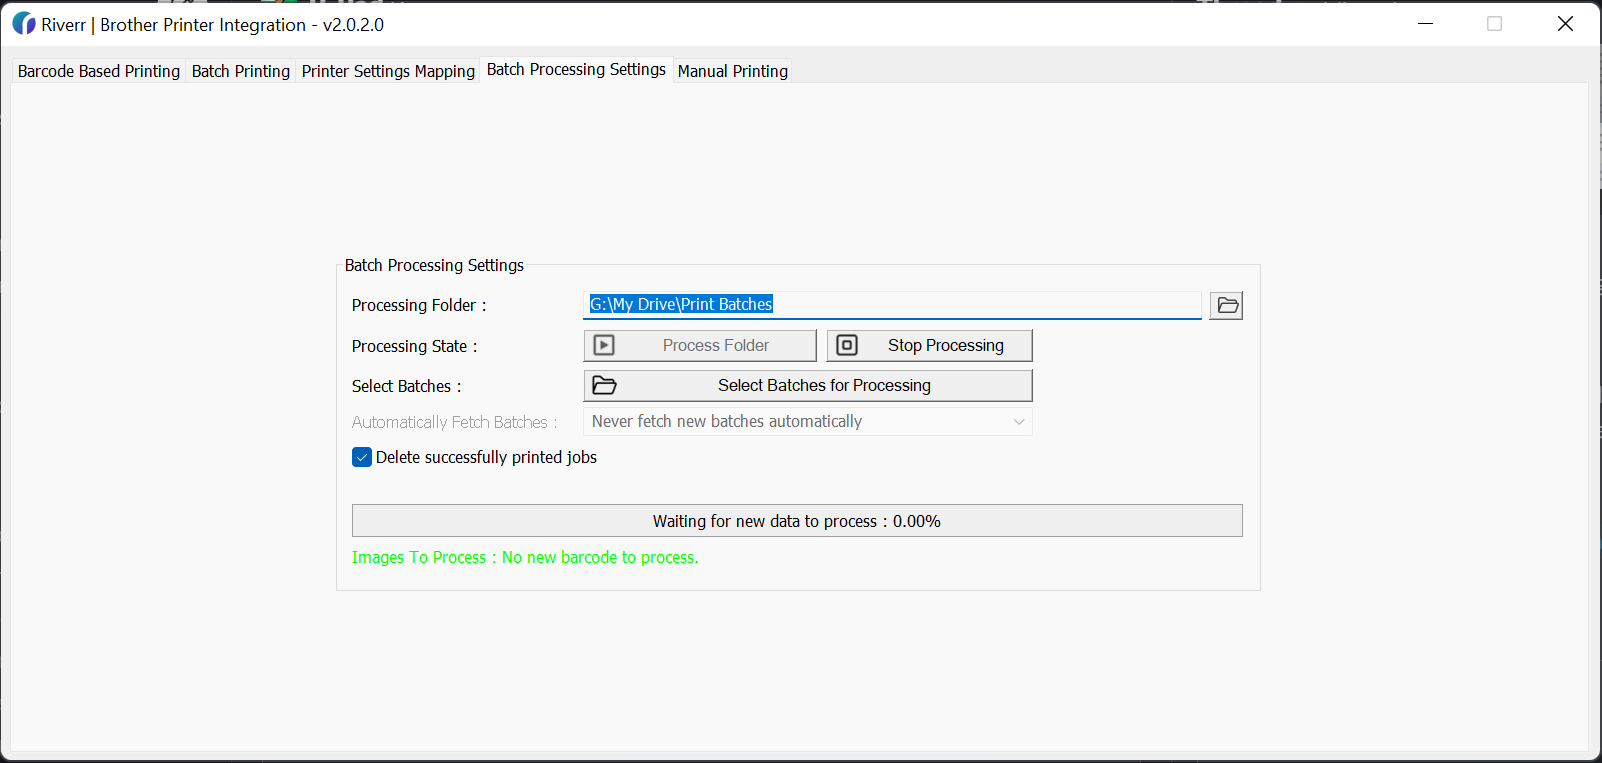
2. Decide where you would like to save the ripped files.
You can either save them to a local folder or a cloud folder. The cloud folder will allow you to pull the images from multiple computers in your print shop.
3. Select the batches you would like to rip.
This popup will show you all of the pending batches that you currently have.
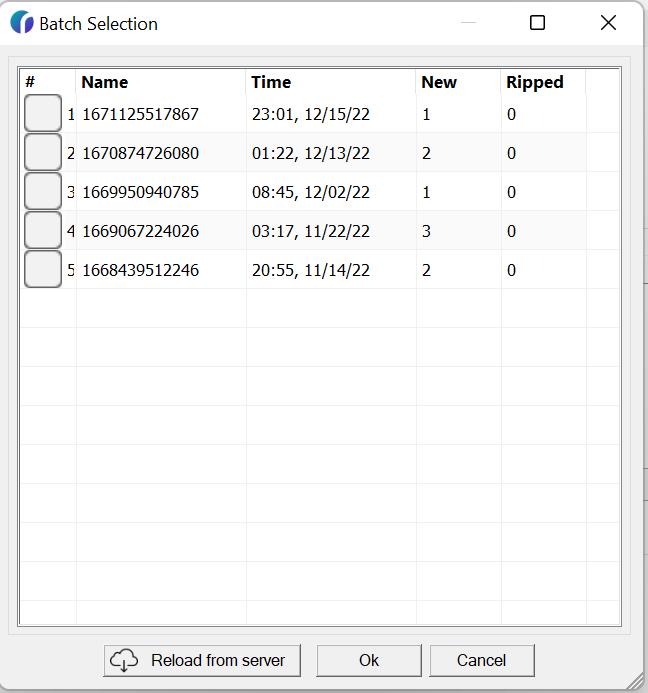
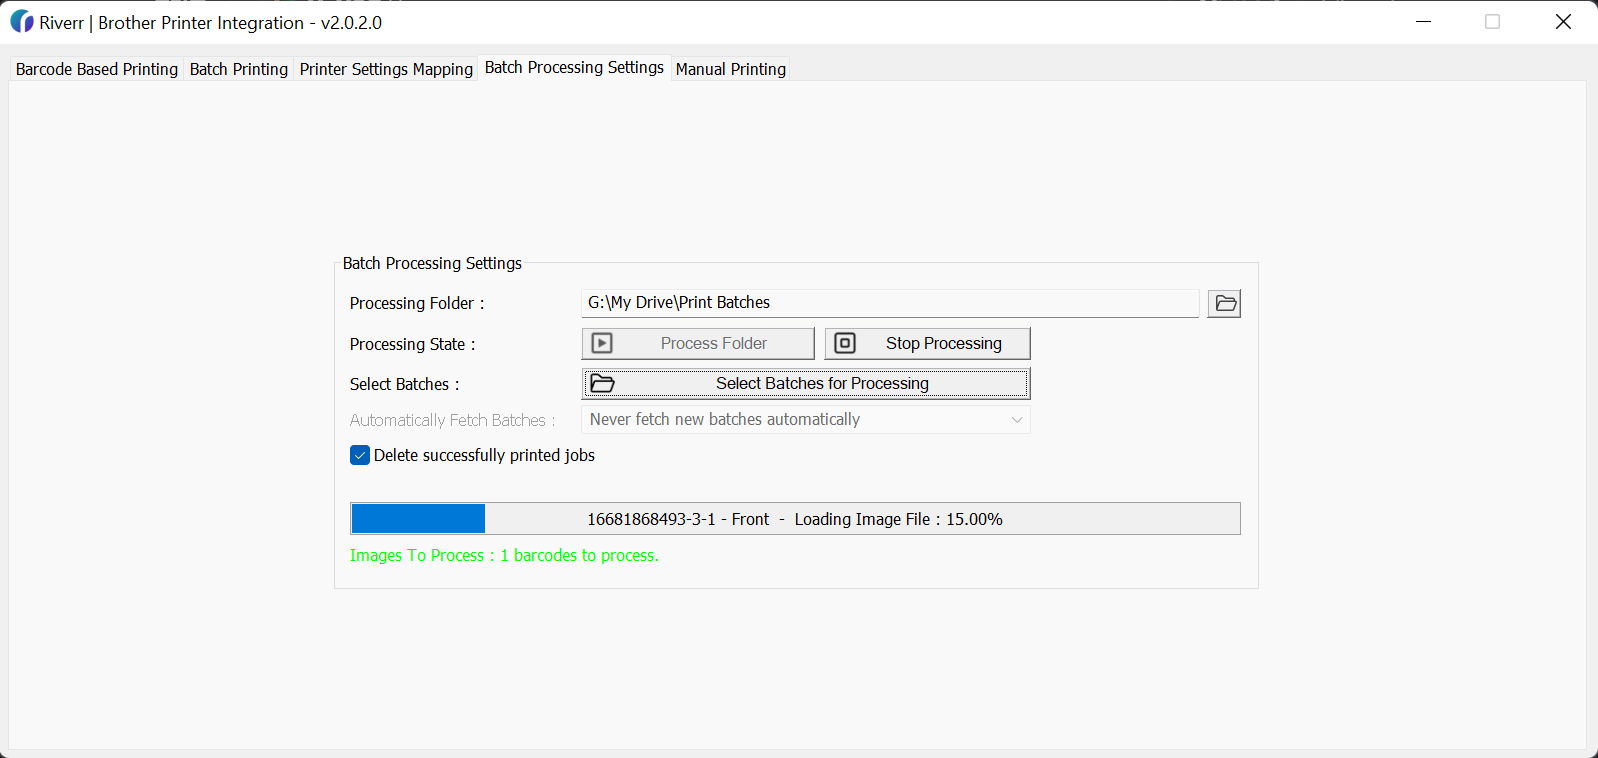
4. After selecting the batch and clicking "OK," the batch will begin to rip and send the files to the folder that you selected.
*Note: Checkmark the box that says "Delete successfully printed jobs" if you would like to clear images after they have been printed. If you would like to keep them there, then remove the checkmark.
5. Optional: Automate the ripping process
If you would like to automate this process and know that you want to send all files to the ripped folder, then follow these steps:
a. Click on "Stop Processing"
b. Select the interval at which you would like the application to check for new batches.
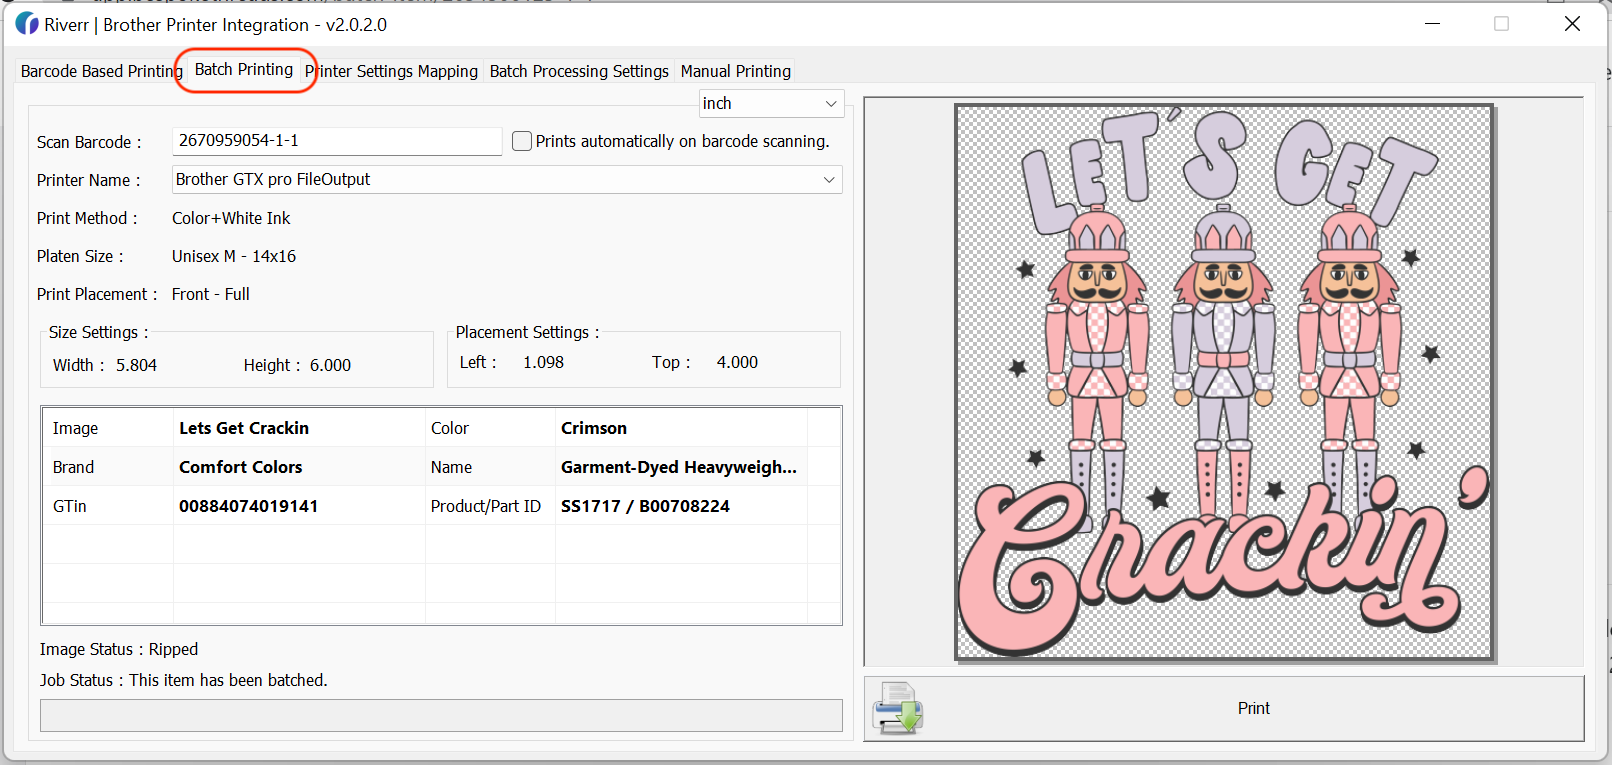
6. Navigate to the "Batch Printing" tab to scan and print the files after they have been ripped and saved to the desired folder.