If you have been in the print industry for any length of time, you will know a lot about price tables and their importance in pricing jobs. The downside is that it can become complicated and confusing very quickly, especially if you have multiple print methods available to your customers. Although this is not a particularly fun part to set up, once it is finished it should be an area that takes care of itself until you are ready to raise your prices again.
Below we will explain how the price tables in Riverr work. They are pretty straightforward for the most part, but we will attempt to explain each input and type to ensure that you are actually charging the price that you would like to.
Types
There are currently 3 different types of price tables:
- Screen Printing: Based on quantity and amount of colors in the artwork.
- DTG, DTF, Sublimation: Based on quantity and also if the shirt is white or dark.
- Embroidery: Based on quantity and number of stitches.
Screen Printing
The screen printing price table is very versatile in allowing you to price your services. We created a built-in color detection system that will help you users to identify the number of colors in the image that they are uploading, decreasing the chance that they will give an incorrect input.
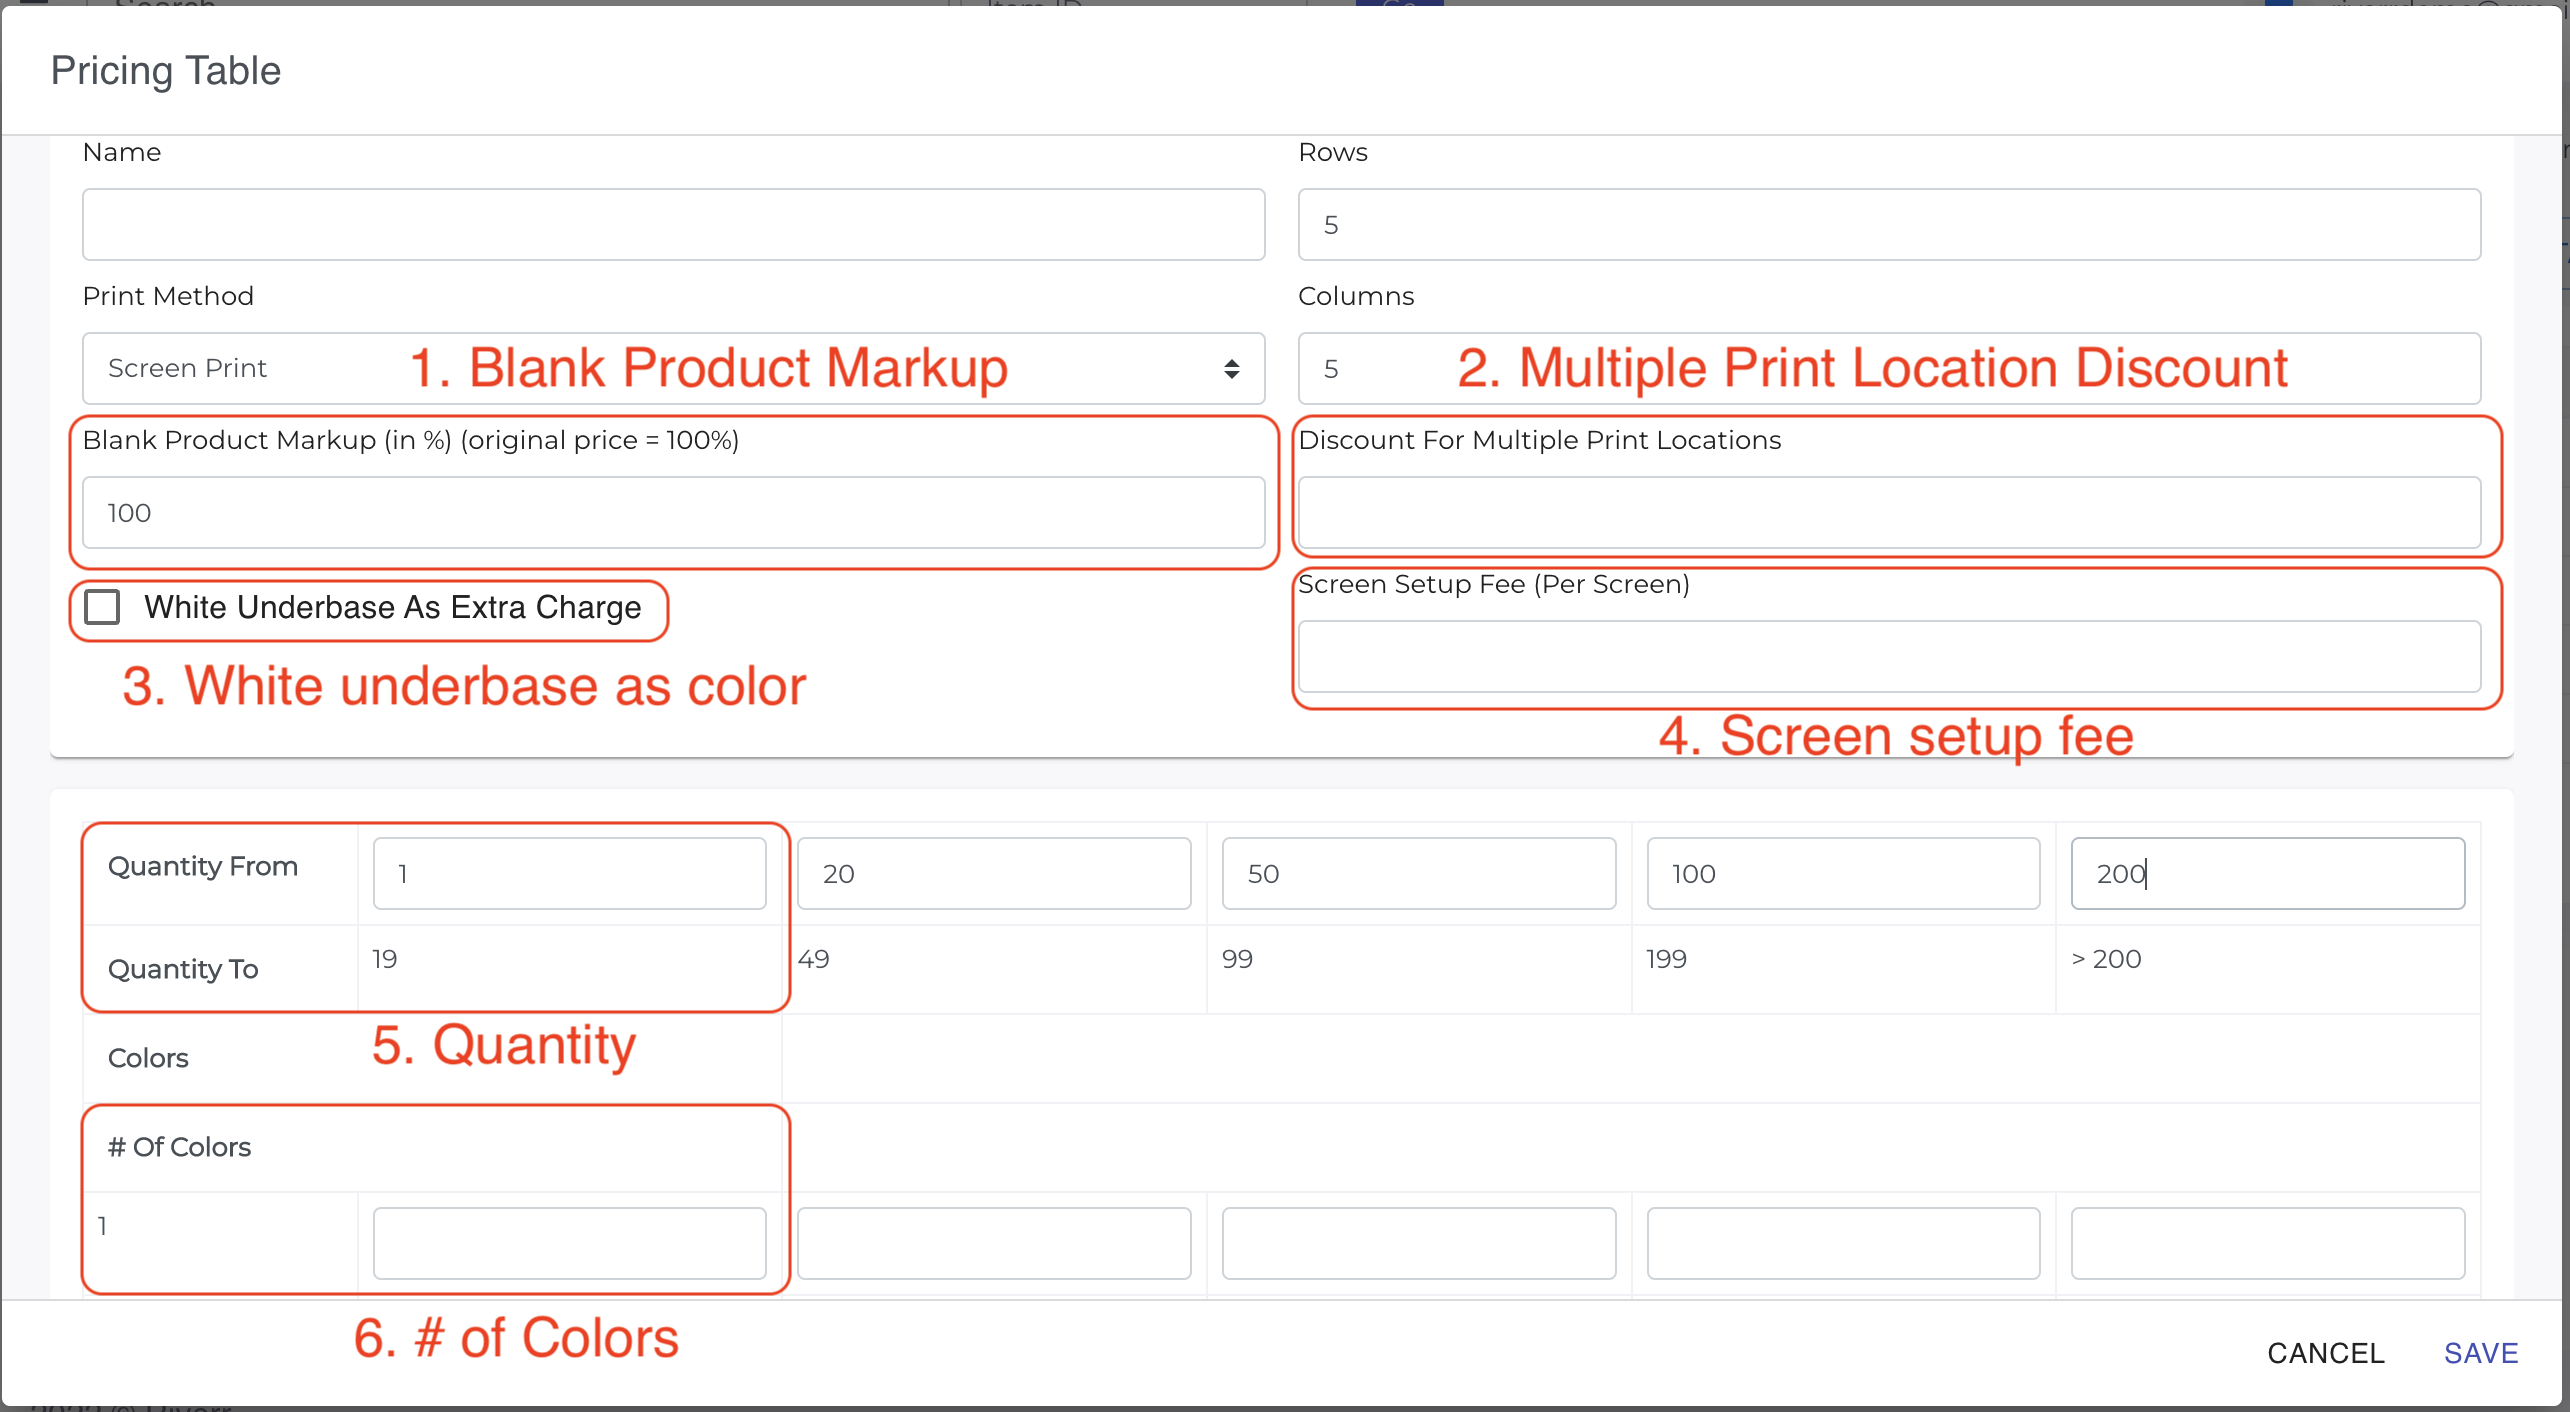
Along with the color pricing, below are the other options you have when creating pricing for your screen printing services:

1. Blank Product Markup
The blank product markup allows you to markup the price that you pay for the blank items that you are printing on. Quick note: 100% is the default and means that there is no markup on the item, so any markup should be above 100%. So for example, if you wanted to add a 10% markup on the blank product, then you would place 110% in this box.
2. Multiple Print Location Discount
If you would like to create a discount to your users when they have multiple print locations on the same item, then you can create that discount here. The discount will only be applied to subsequent print locations and only to the print price itself.
3. White underbase as color
This toggle allows you to decide if the white underbase will be counted as a color when calculating print pricing.
4. Screen setup fee
Setting up screens takes time. If you create a price for this, then the user will be charged this extra amount times the number of colors in the print file.
5. Quantity
The more you order, the less you pay! Create price breaks here to keep your profitability with small orders and award the larger orders with a nice discount.
6. # of Colors
The number of colors in the print file is very important to all the screen printers out there. Like we said above, when a customer uploads an image they will be shown the colors in the image and be asked how many of those colors they would like to use for printing. This will allow you to actually allow your customers to check out knowing that the order will be priced correctly and you will not need to have a lot of back and forth with them to figure this out.
DTG, DTF, Sublimation
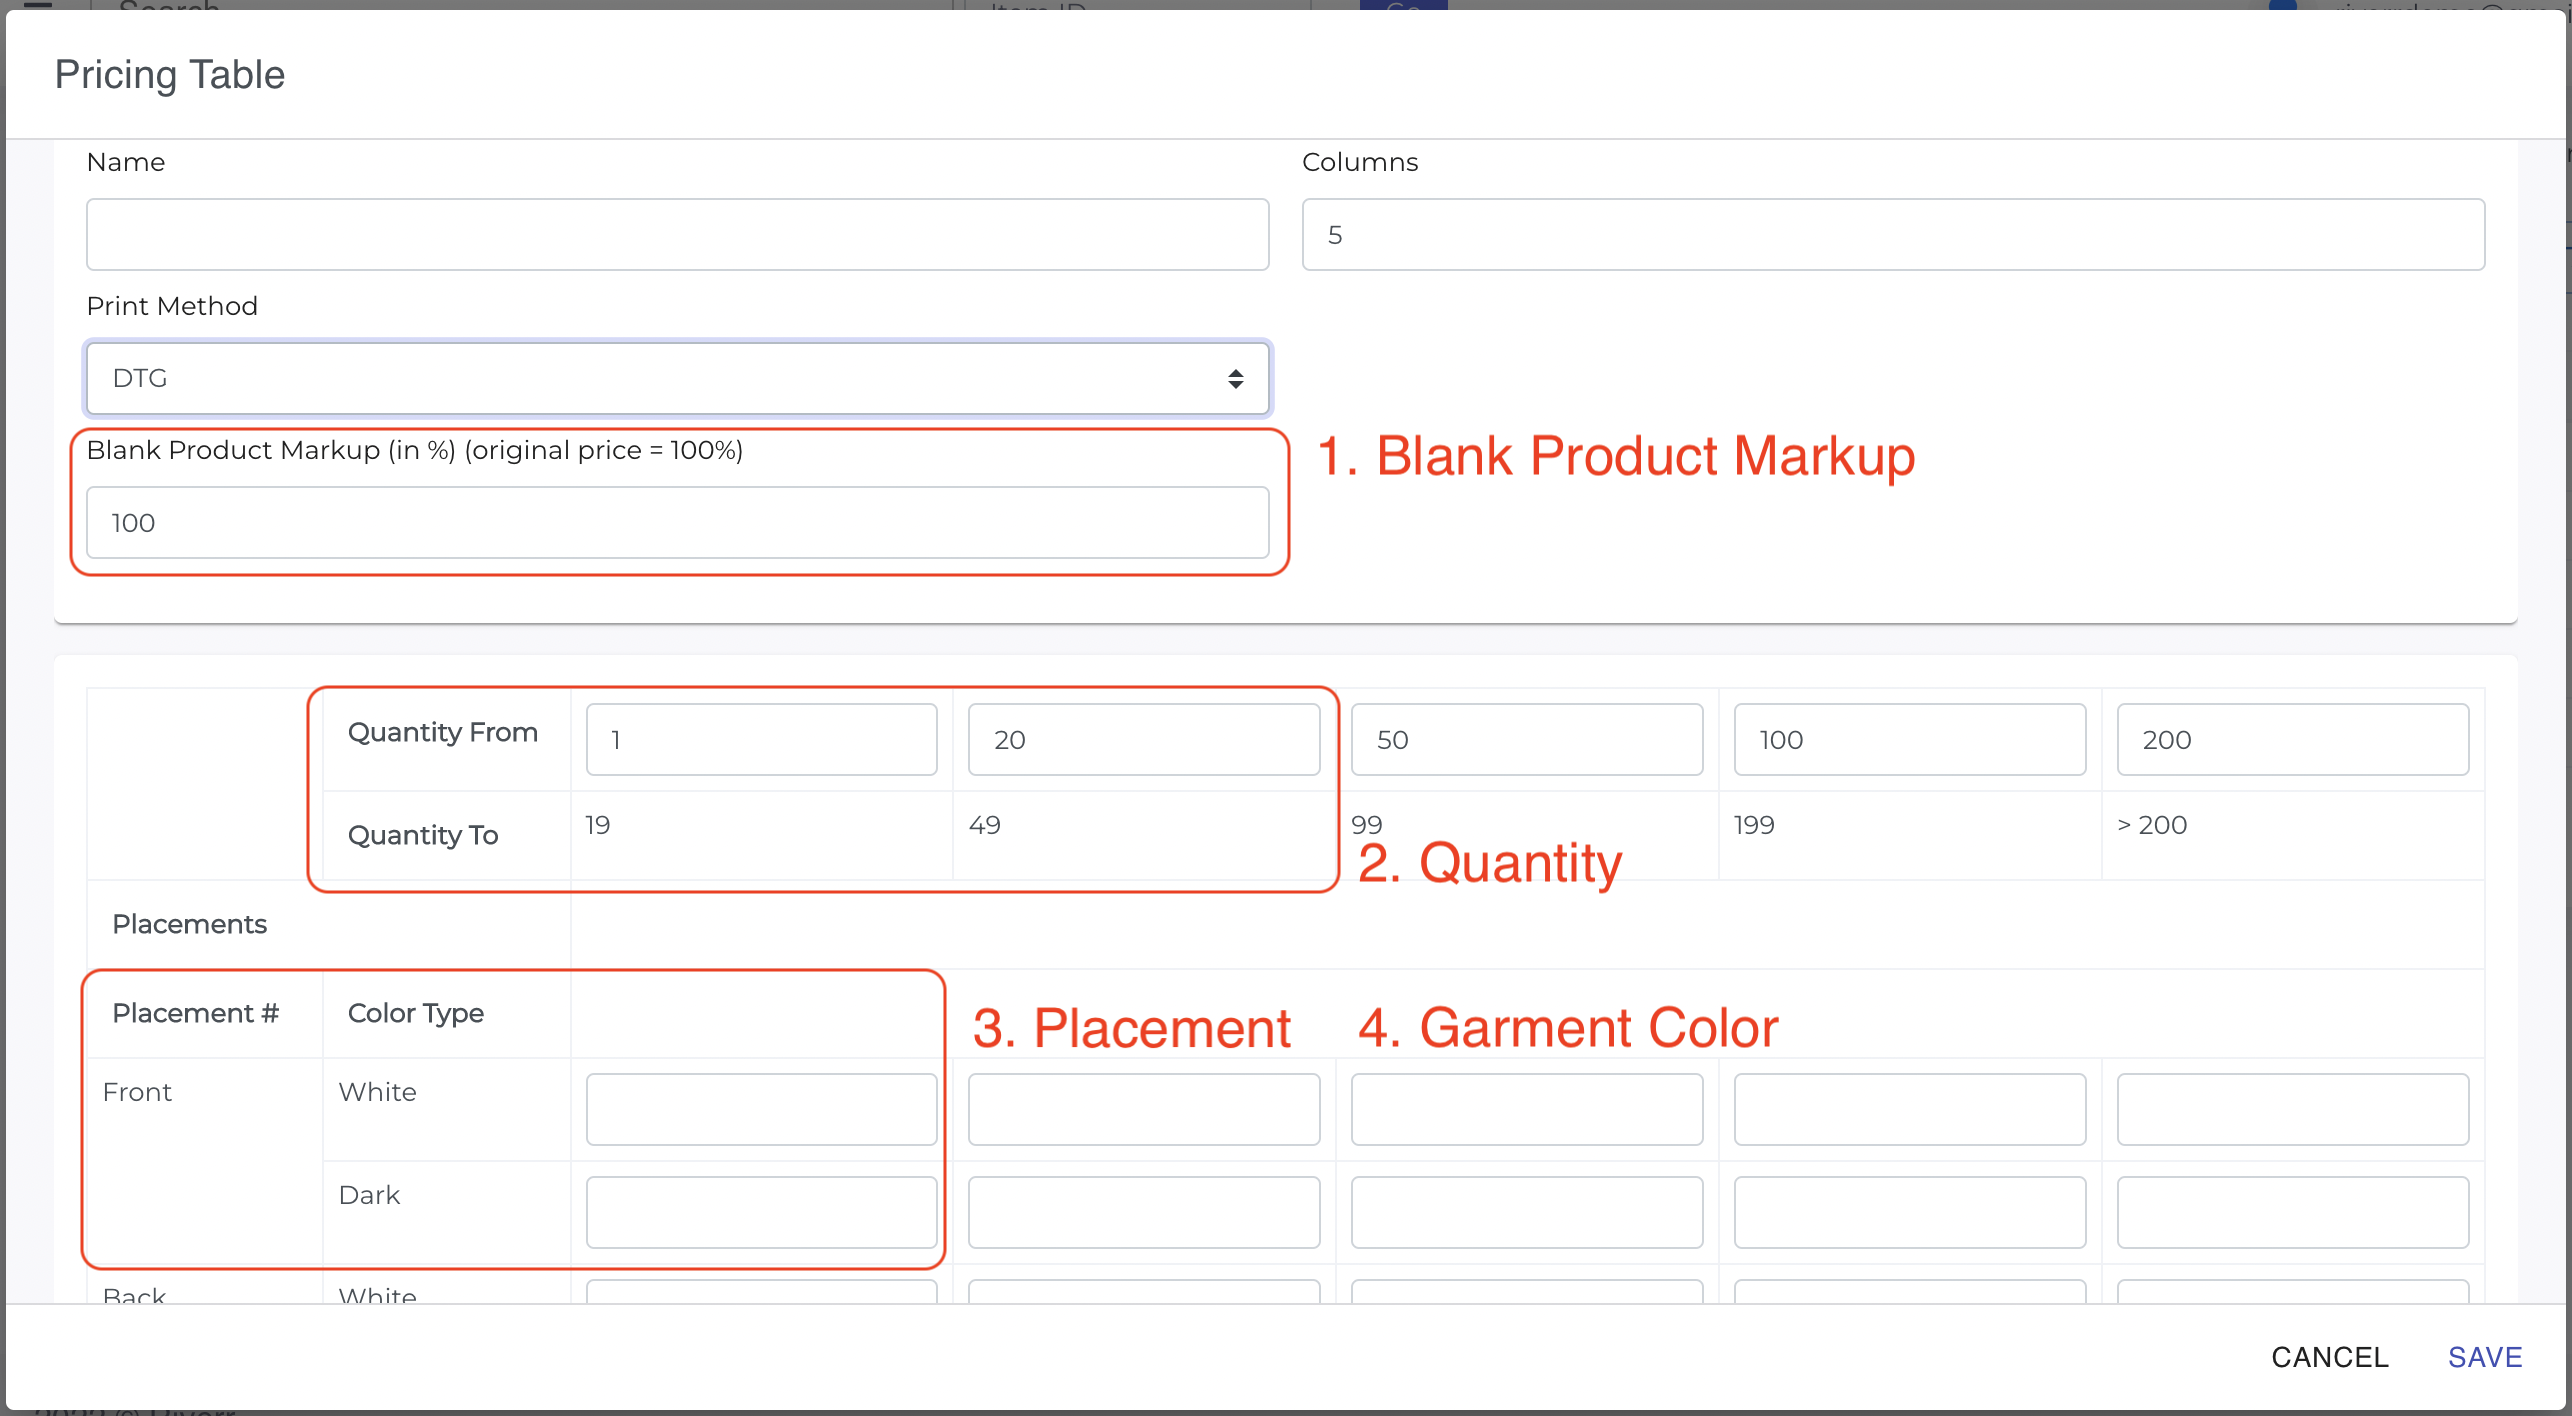
This price table also focuses on quantity, but unlike screen printing, in the DTG world we don't really care a whole lot about how many colors are in the image. There are a few other items that are more important for us to know: 1. Where will the print be located on the item? 2. What is the color of the shirt? Below we will show you how and where to set these prices:

1. Blank Product Markup
The blank product markup allows you to markup the price that you pay for the blank items that you are printing on. Quick note: 100% is the default and means that there is no markup on the item, so any markup should be above 100%. So for example, if you wanted to add a 10% markup on the blank product, then you would place 110% in this box.
2. Quantity
The more you order, the less you pay! Create price breaks here to keep your profitability with small orders and award the larger orders with a nice discount.
3. Placement
Different placements call for different prices. Front, back, sleeve, tag…you can price all of it exactly how you want.
4. Garment Color
If your garment is “White,” then it will be placed into a different category from other shirt colors. This is because often there is less work and supplies needed (pretreat, ink) for white shirts, and some shops like to pass this discount on to their customers.
Embroidery
Embroidery is a beast of its own, and we have spent a lot of time building out the workflow process for this print type. Our main goal is to accurately estimate the number of stitches, so that you can allow users to checkout directly from your website, without having to get the image digitized before giving a quote.
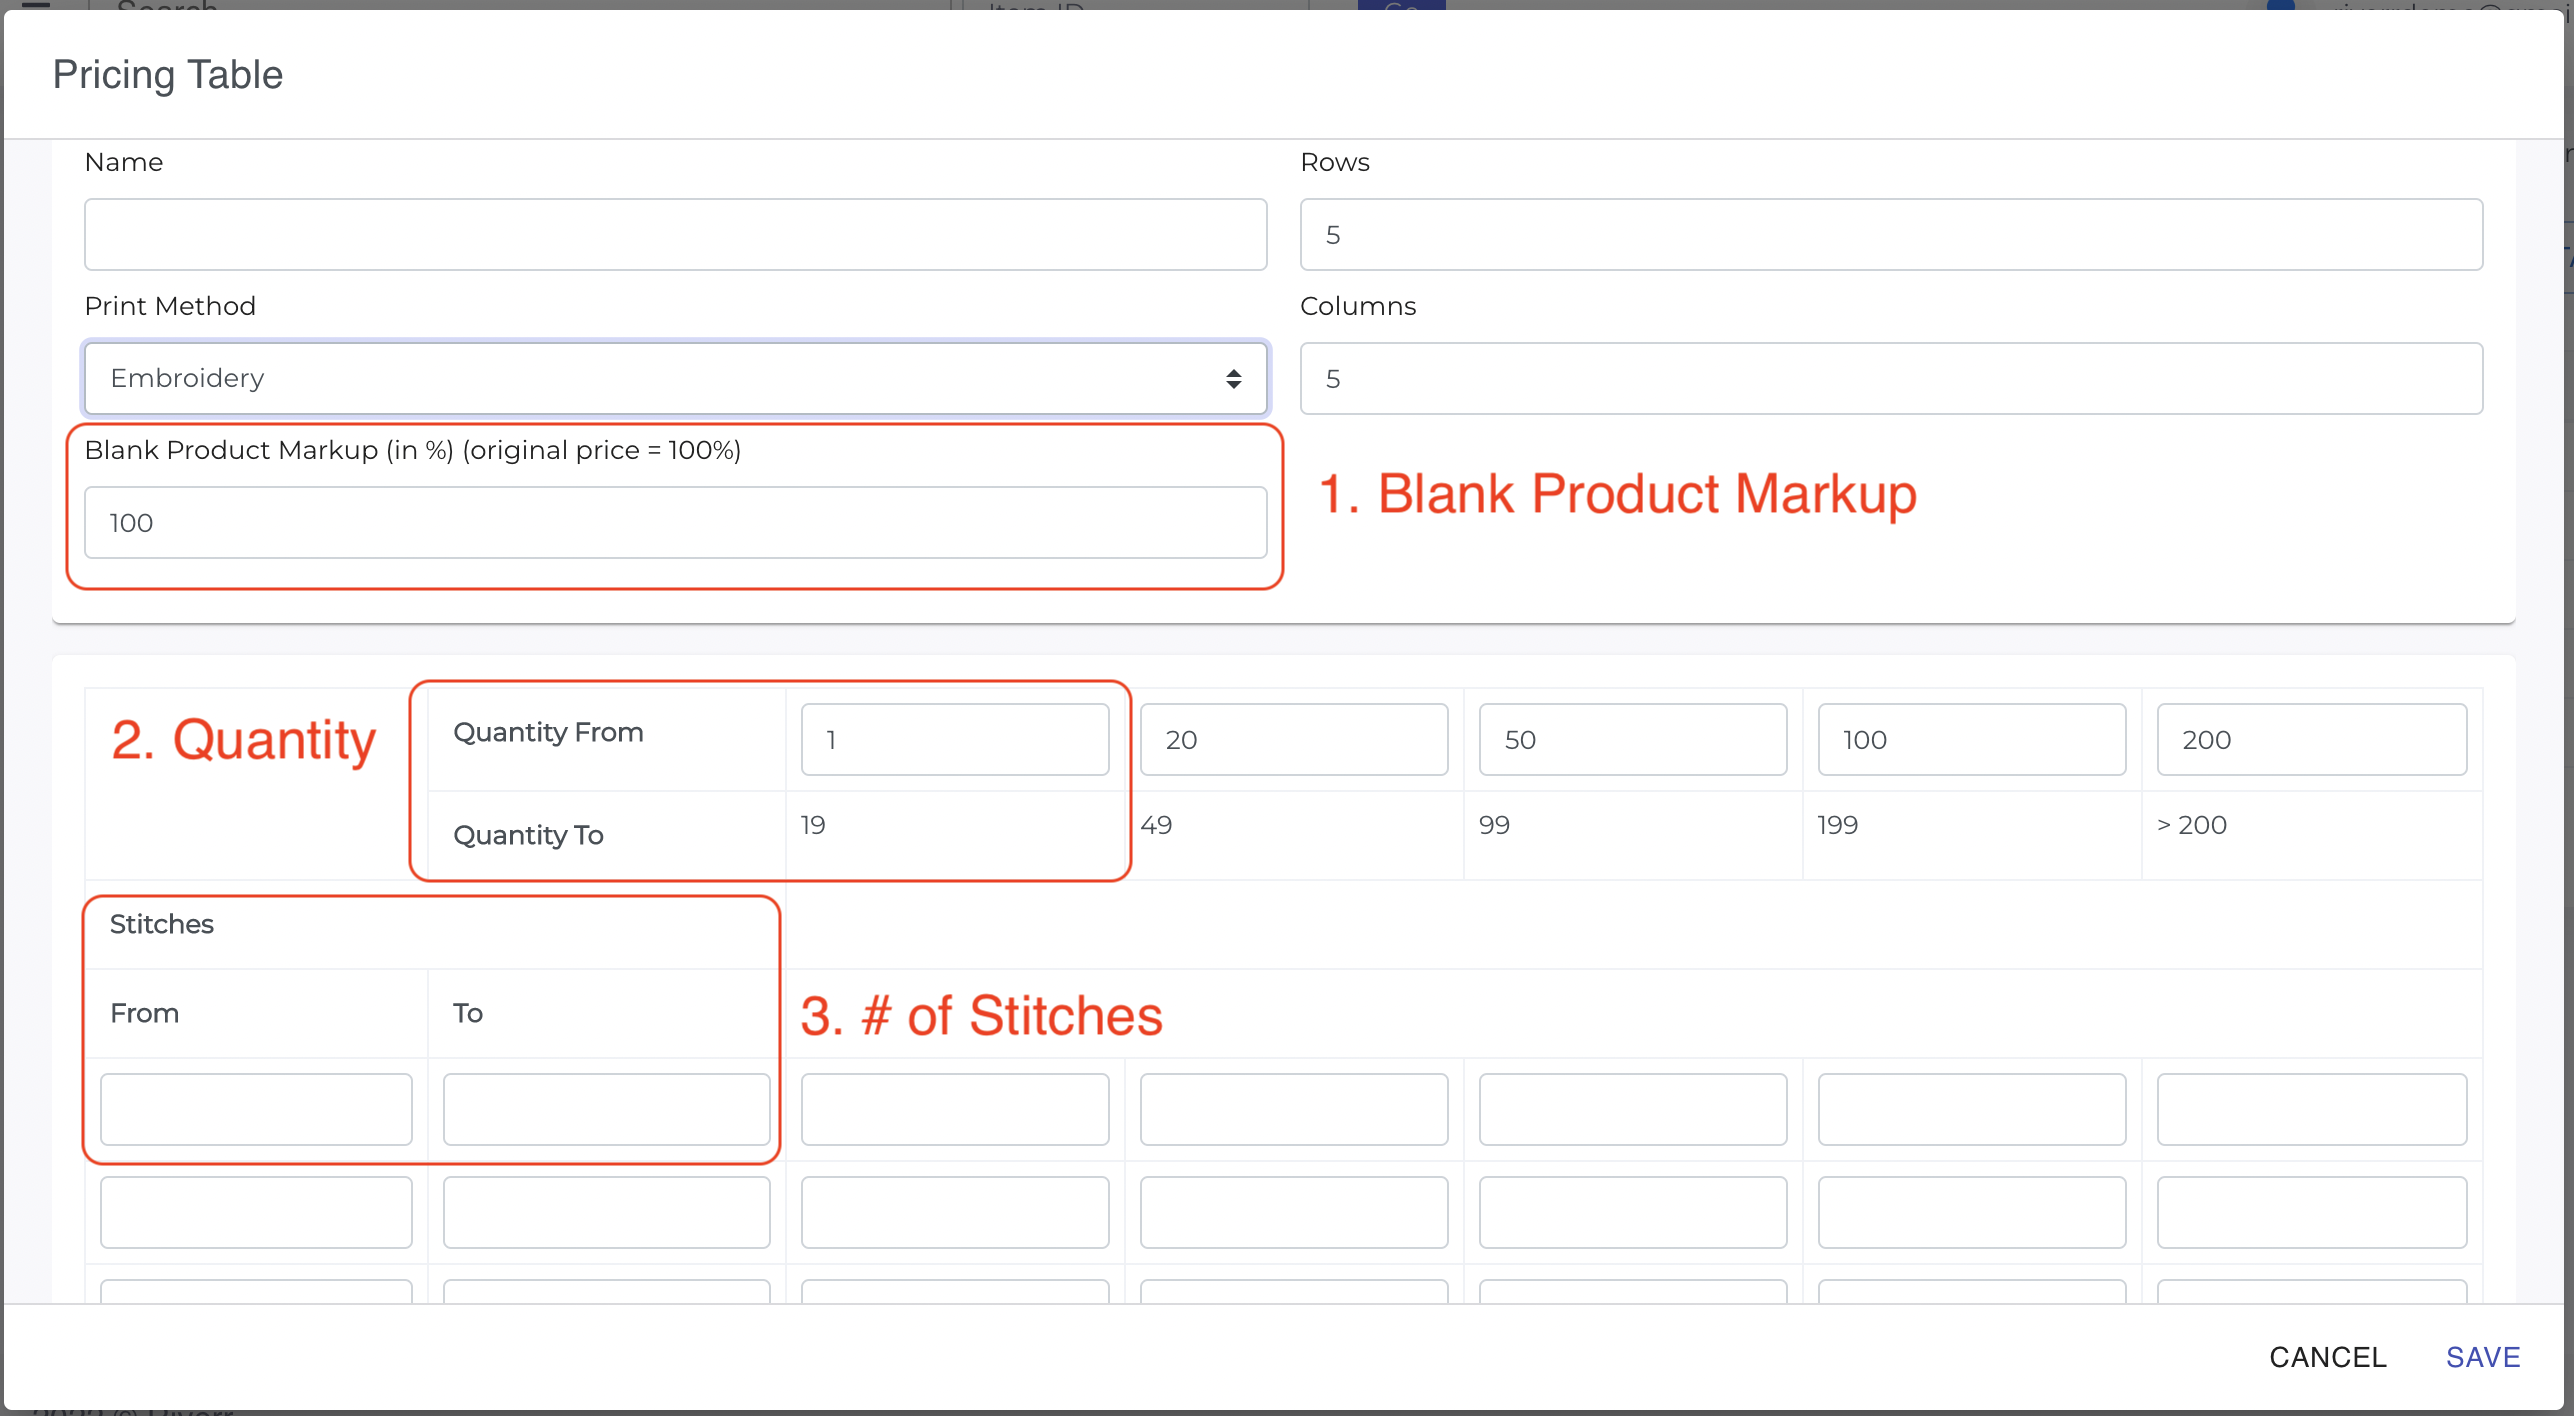
We have created an api that recreates an uploaded image and estimates the number of stitches for the given image. Because of this api, we can create a price table with stitches and quantity as the inputs, and automatically create an accurate price for your customer and allow them to check out there and then! Here is what the price table looks like:

1. Blank Product Markup
The blank product markup allows you to markup the price that you pay for the blank items that you are printing on. Quick note: 100% is the default and means that there is no markup on the item, so any markup should be above 100%. So for example, if you wanted to add a 10% markup on the blank product, then you would place 110% in this box.
2. Quantity
The more you order, the less you pay! Create price breaks here to keep your profitability with small orders and award the larger orders with a nice discount.
3. # of Stitches
We already explained this above in detail, but the number of stitches will be automatically determined and our system will use your price table to assign a price based on the stitch estimation. They will then be able to check out directly and the image will be sent to you.
Still have questions regarding price tables? Please reach out to us at [email protected]. We are always happy to help.