*Note: This documentation is for our Platform users who would like for sellers to have the ability to connect directly with their white label account. This is not needed for app.Riverr.app users.
In order to create a public app in Shopify, you will first have to create a Shopify Partner account. You can create one here: https://www.shopify.com/partners.
Please make us owners of the app as well so that we can help when needed.
*Note: When you are creating your first app, Shopify will ask you to pay a one time $99 fee.
Now let's get started making this app!
1. Navigate to the "Apps" tab
2. Click on "Create App"
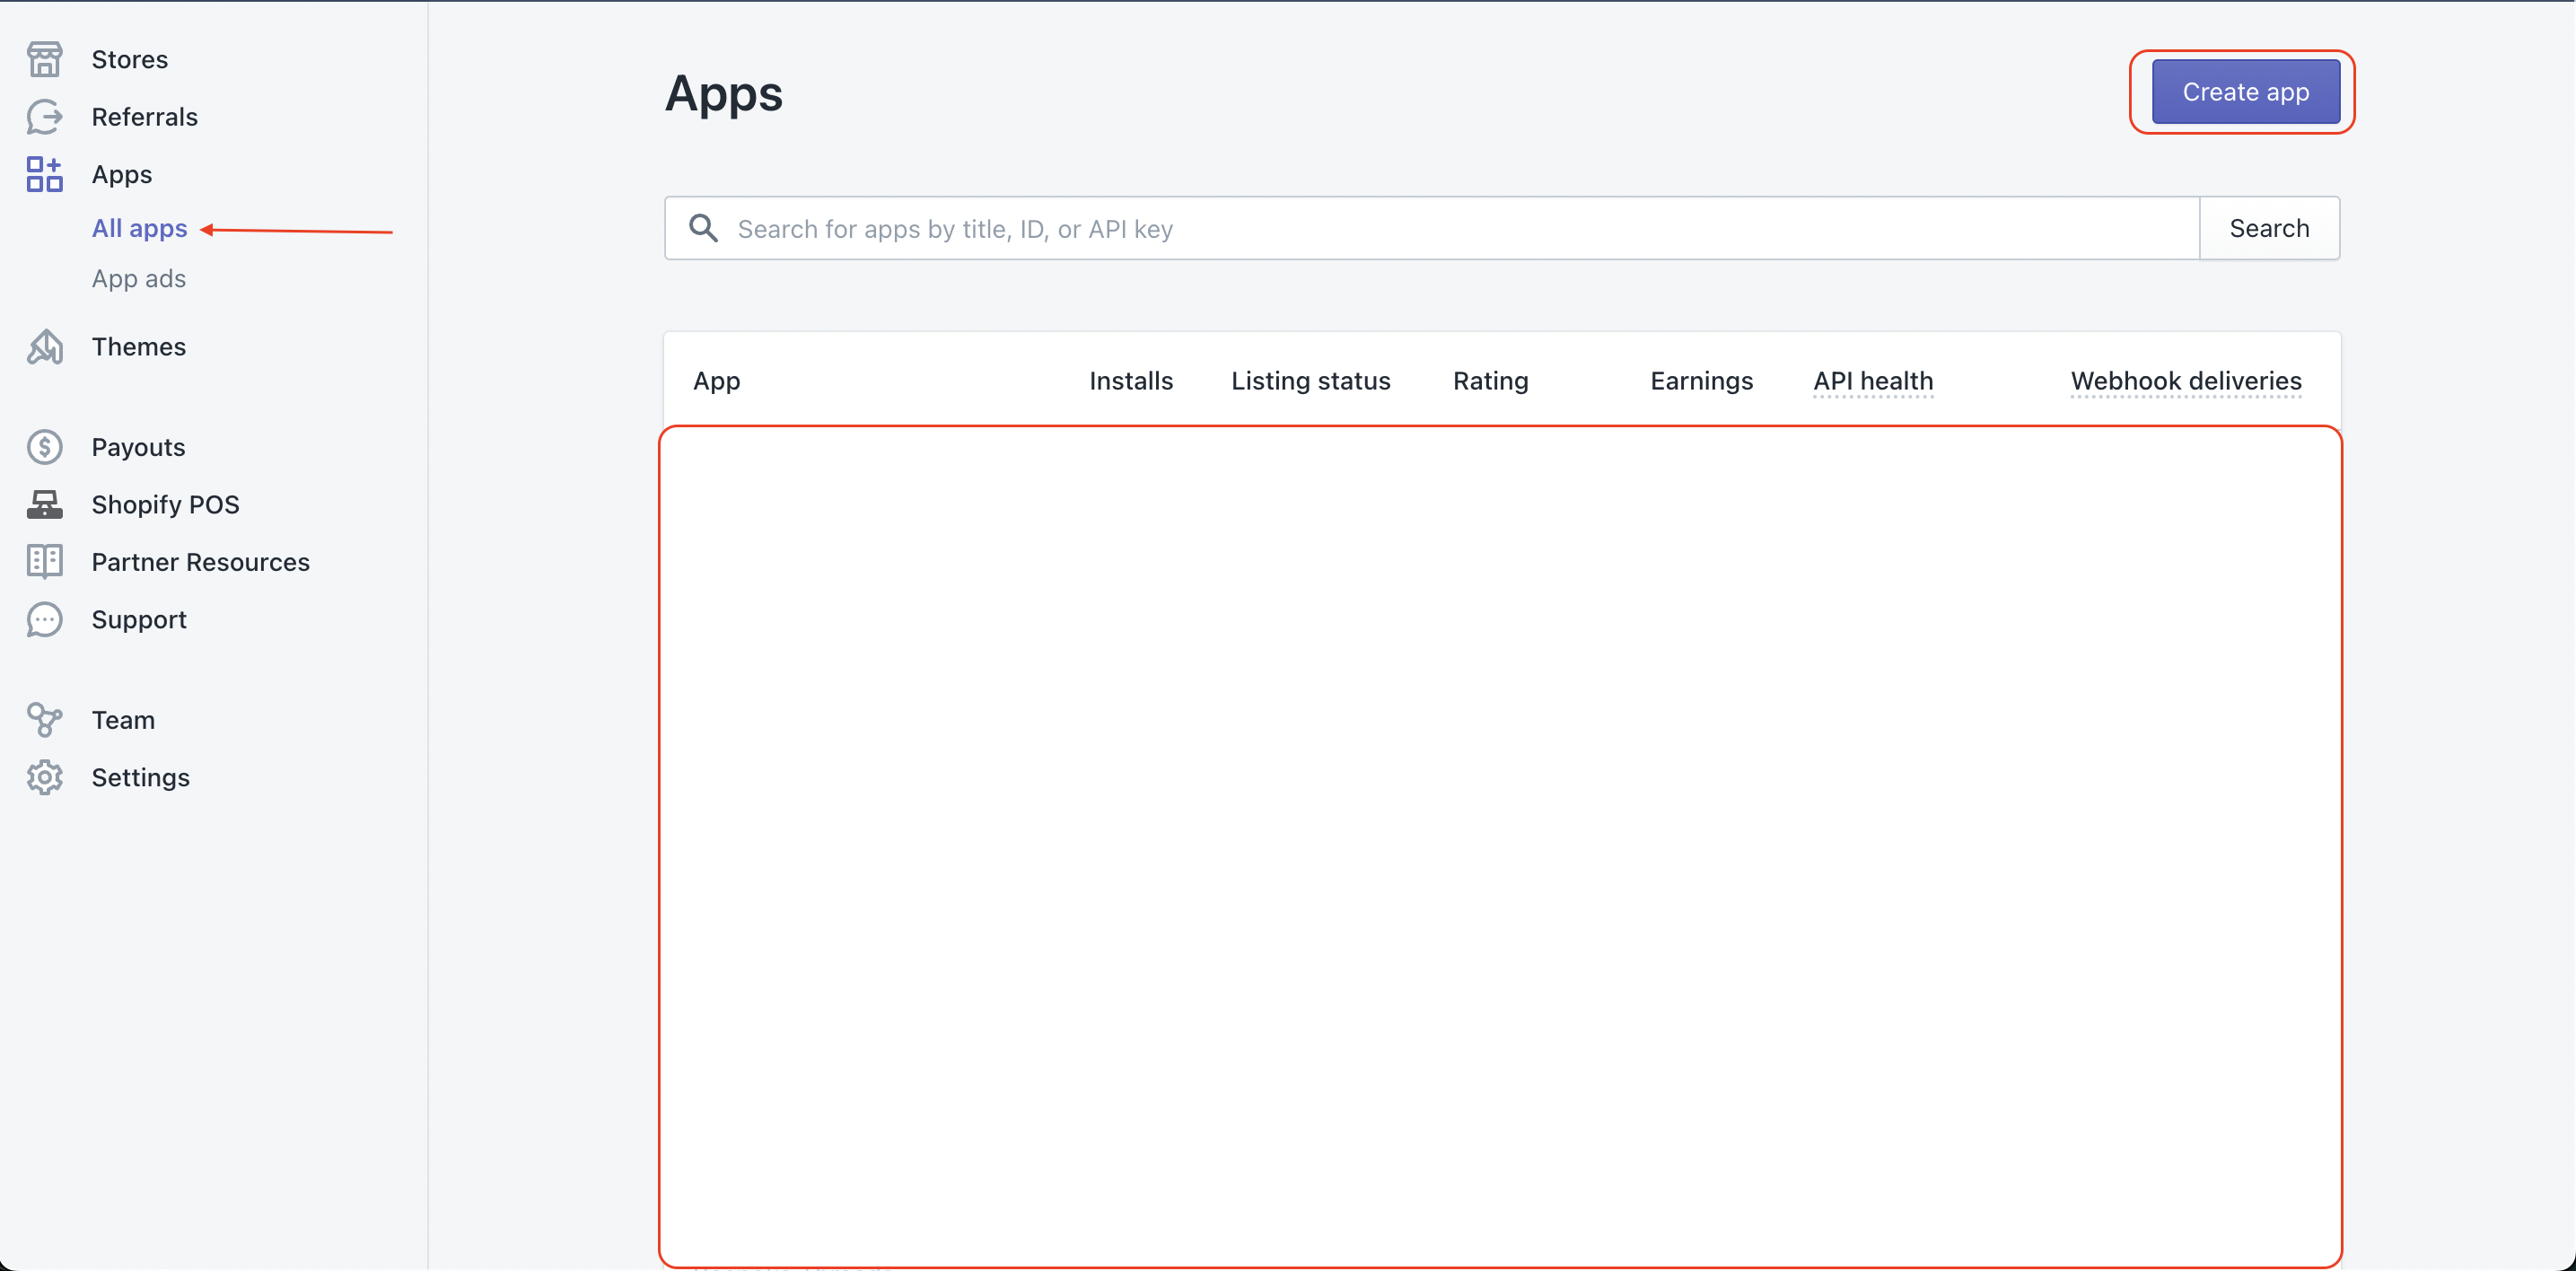
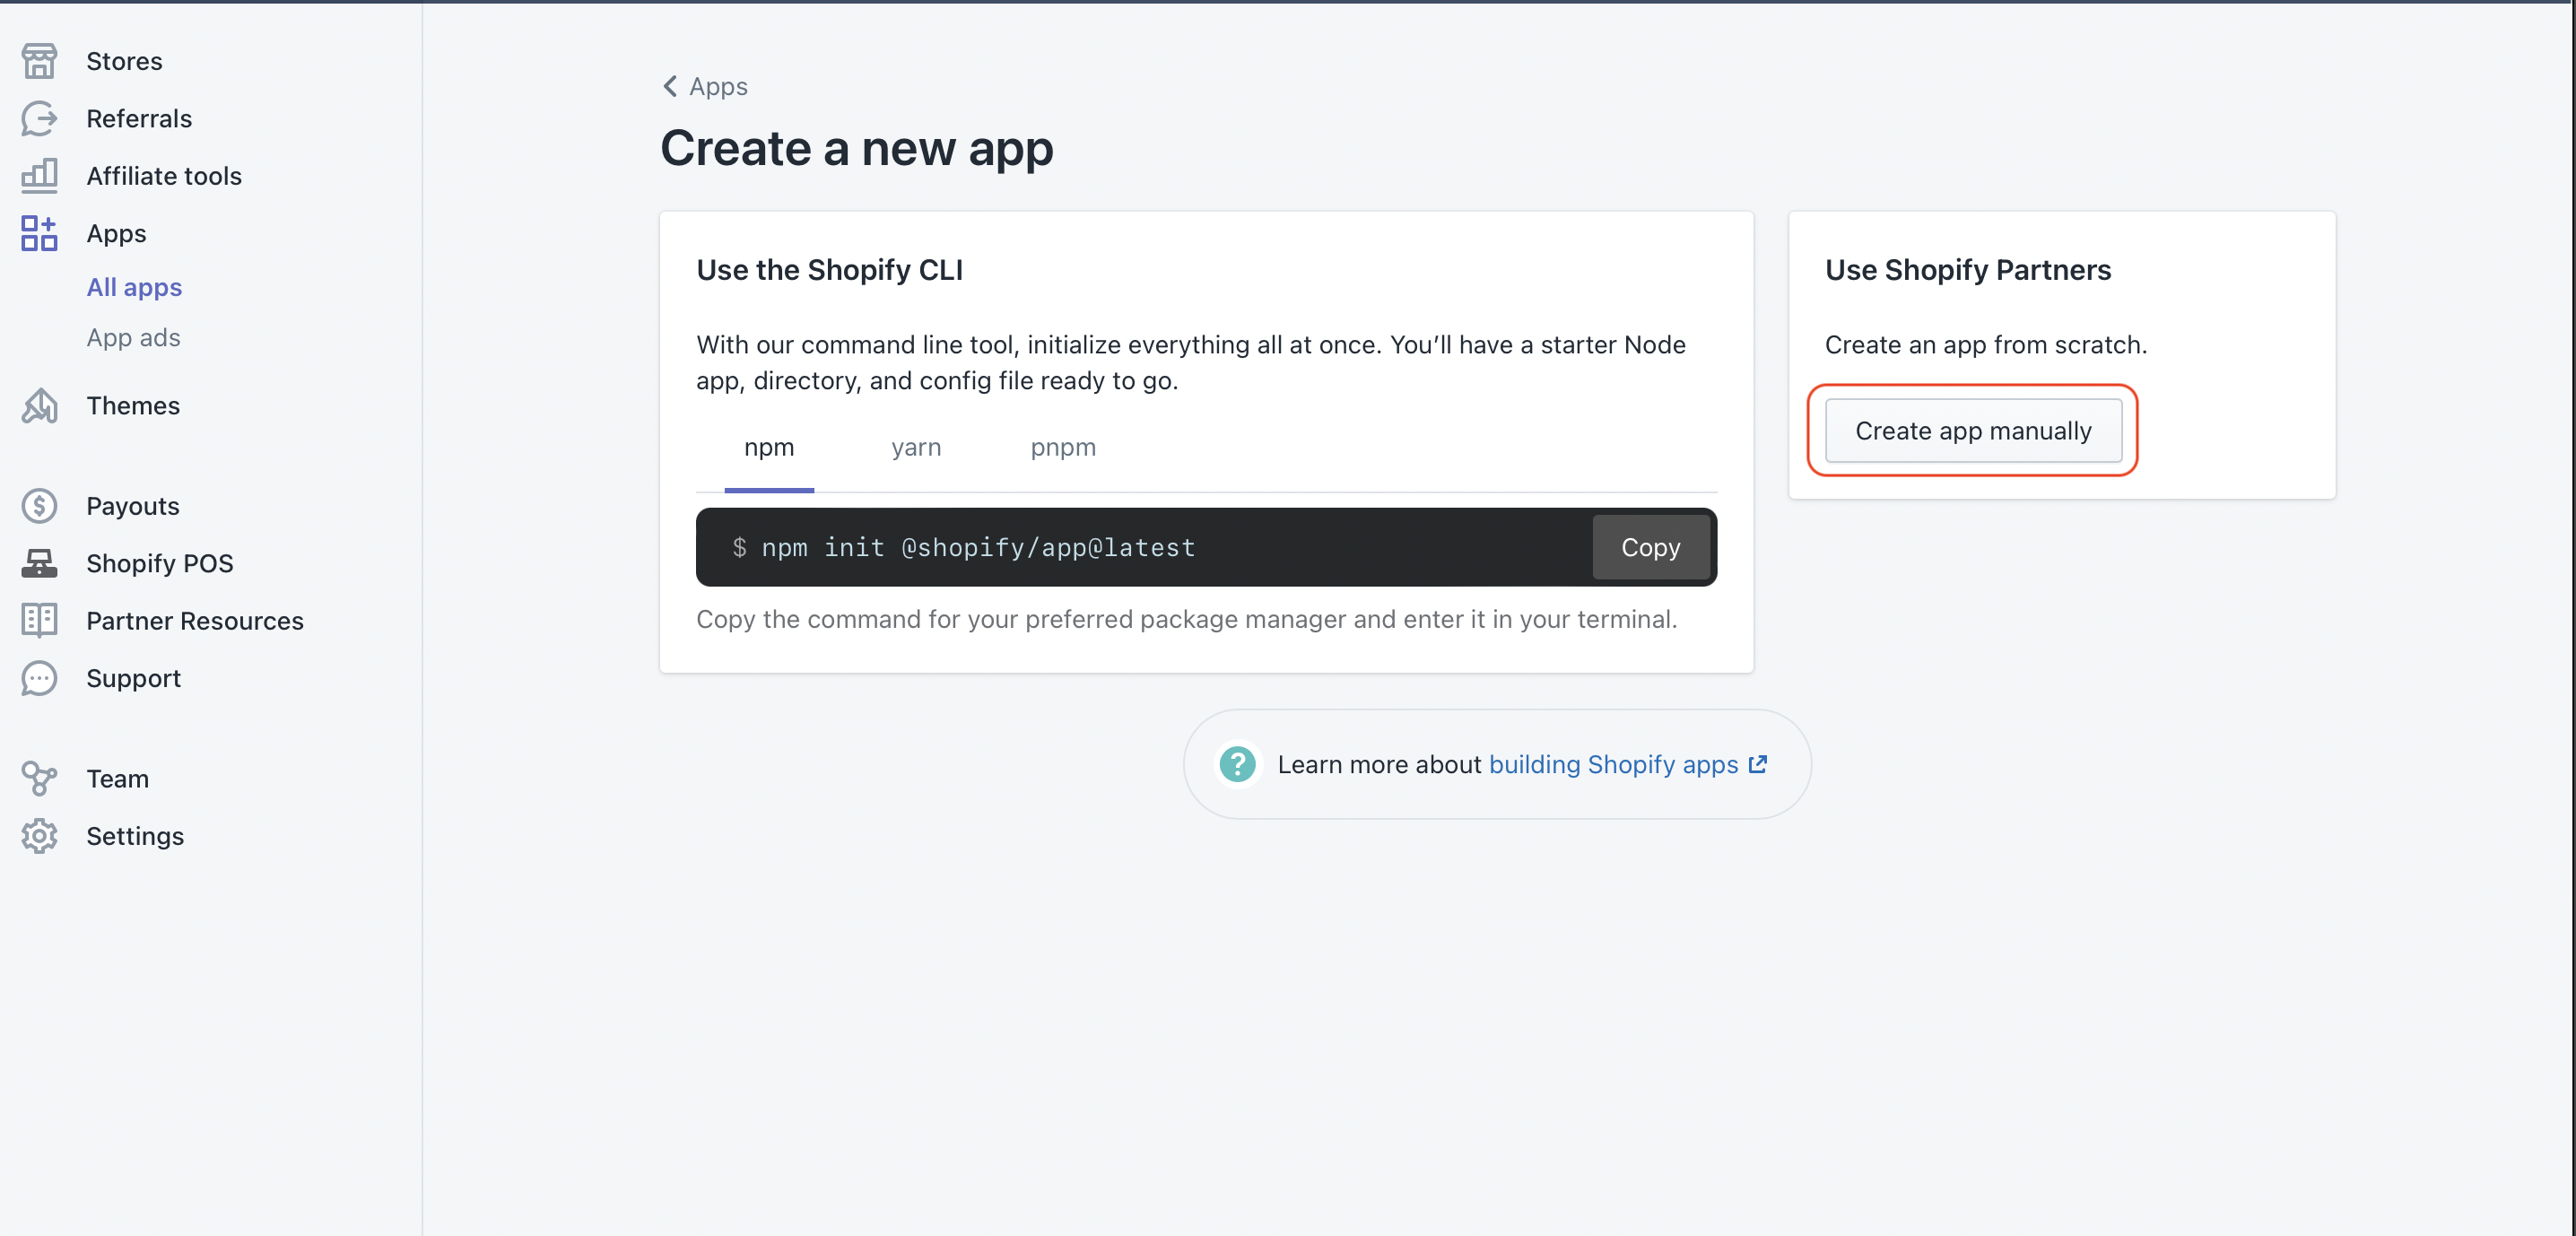
3. Click “Create app manually”
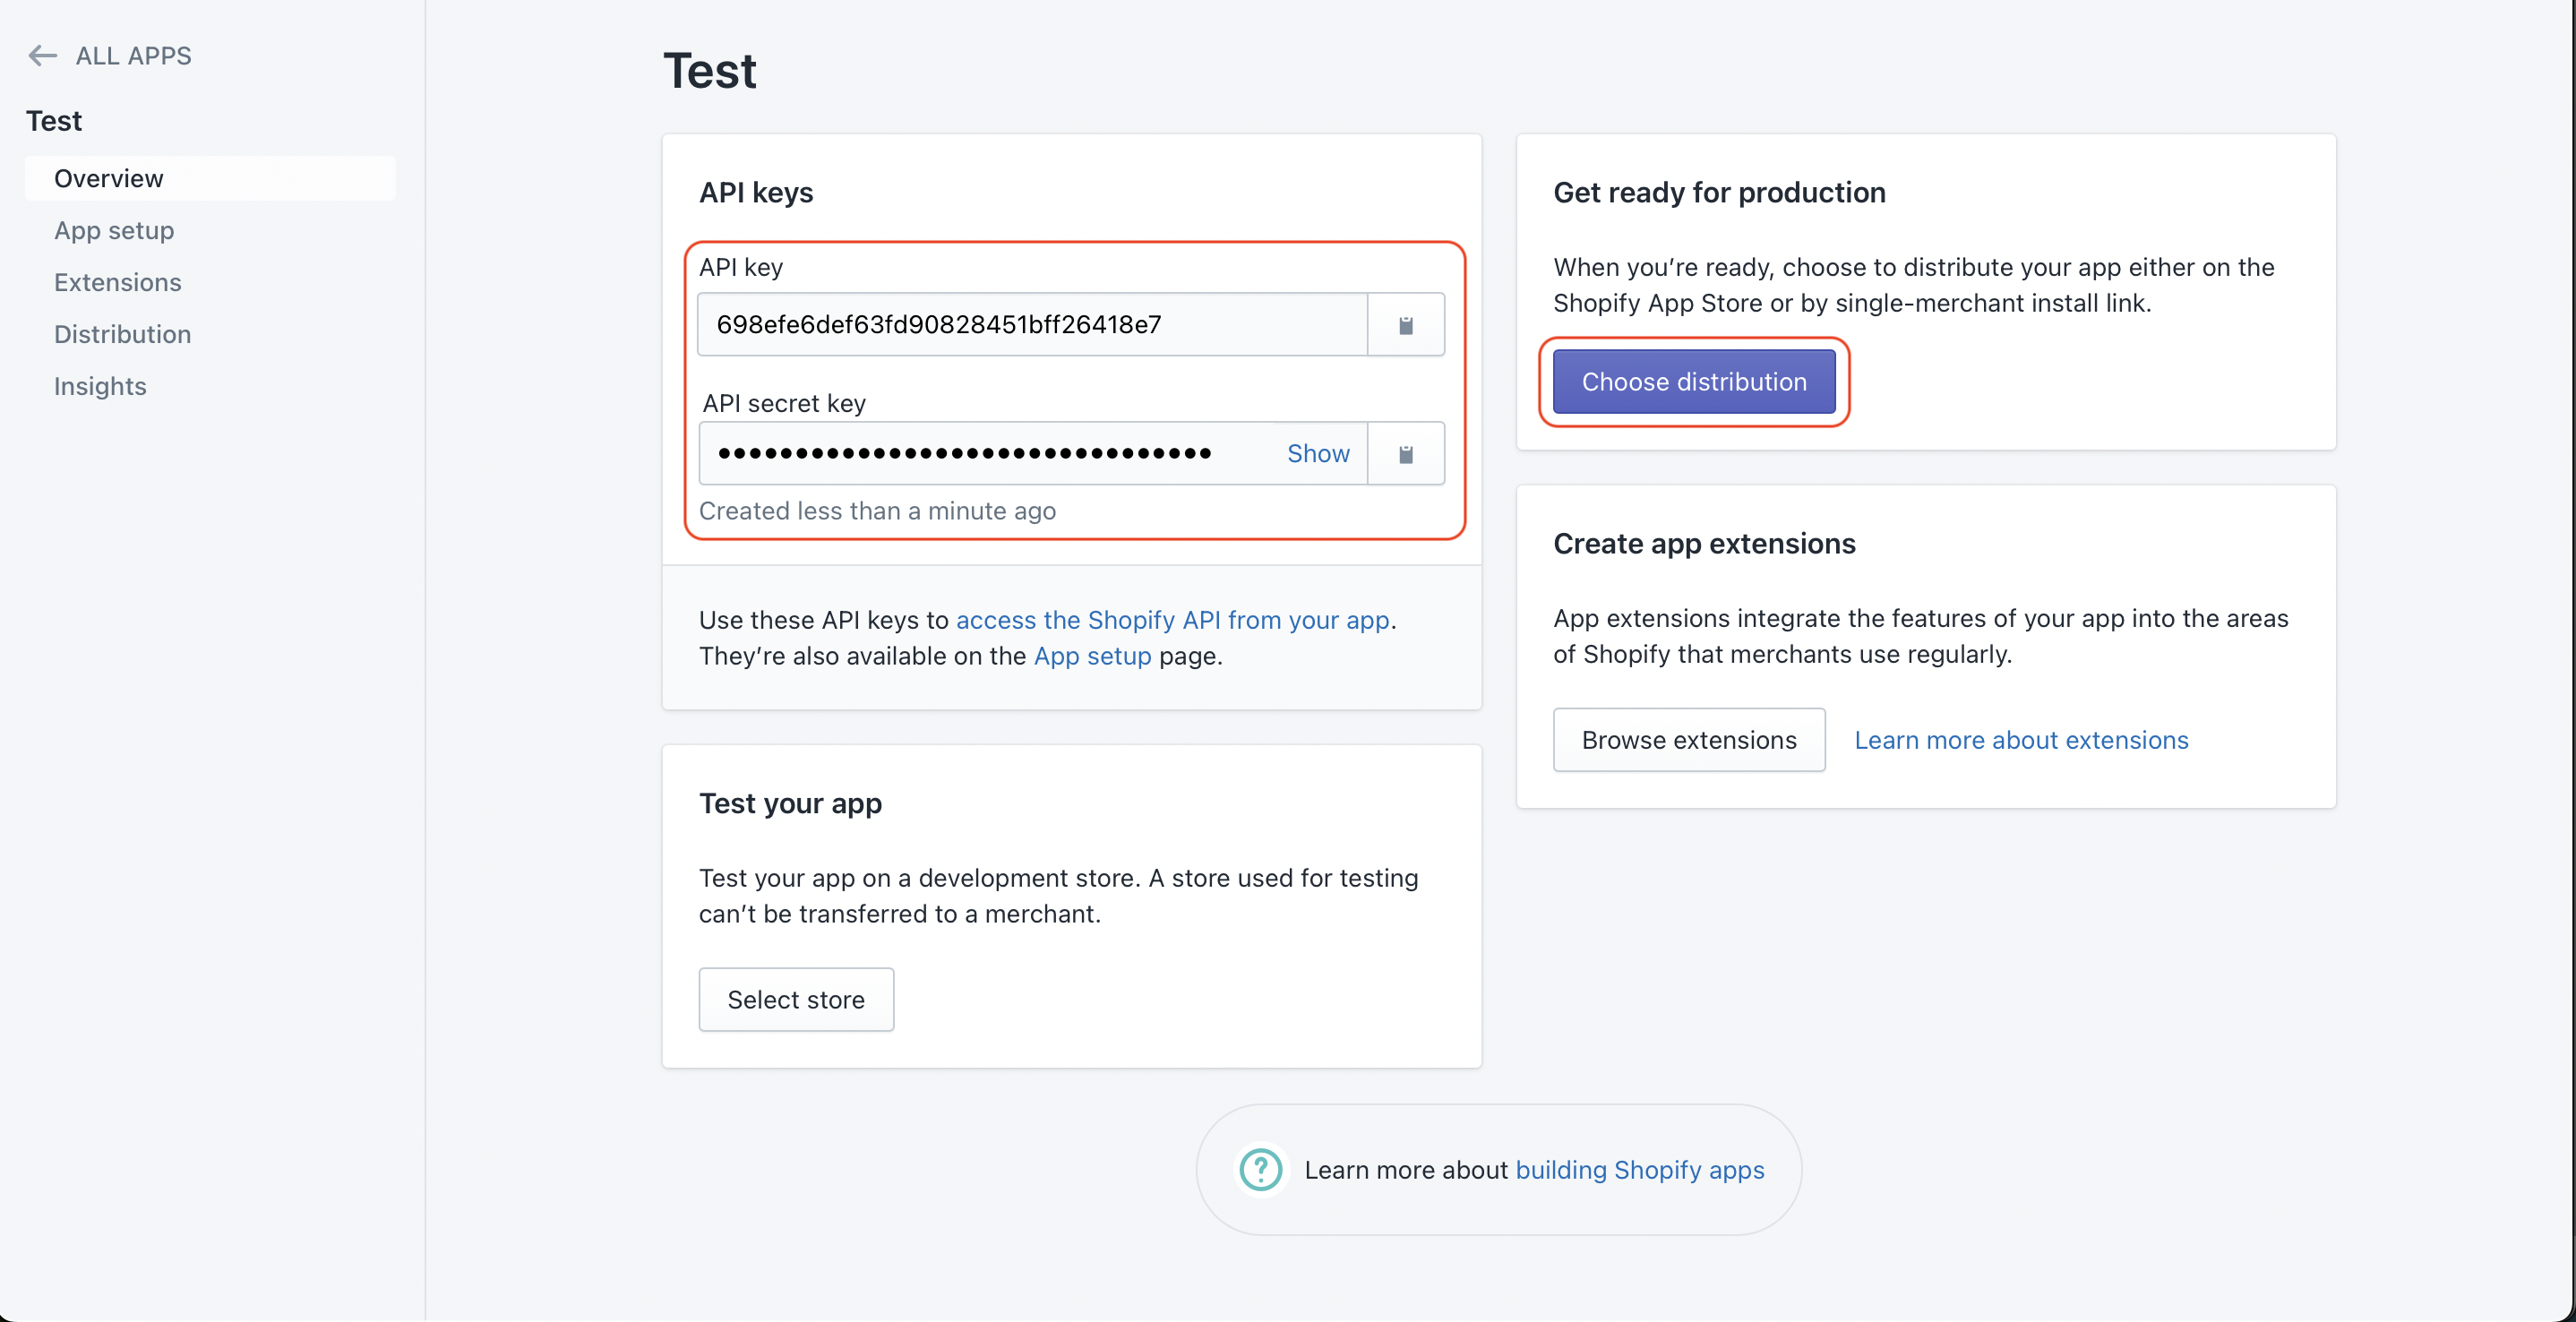
4. Copy the api keys and paste them to your Riverr dashboard. Then click “Choose distribution”
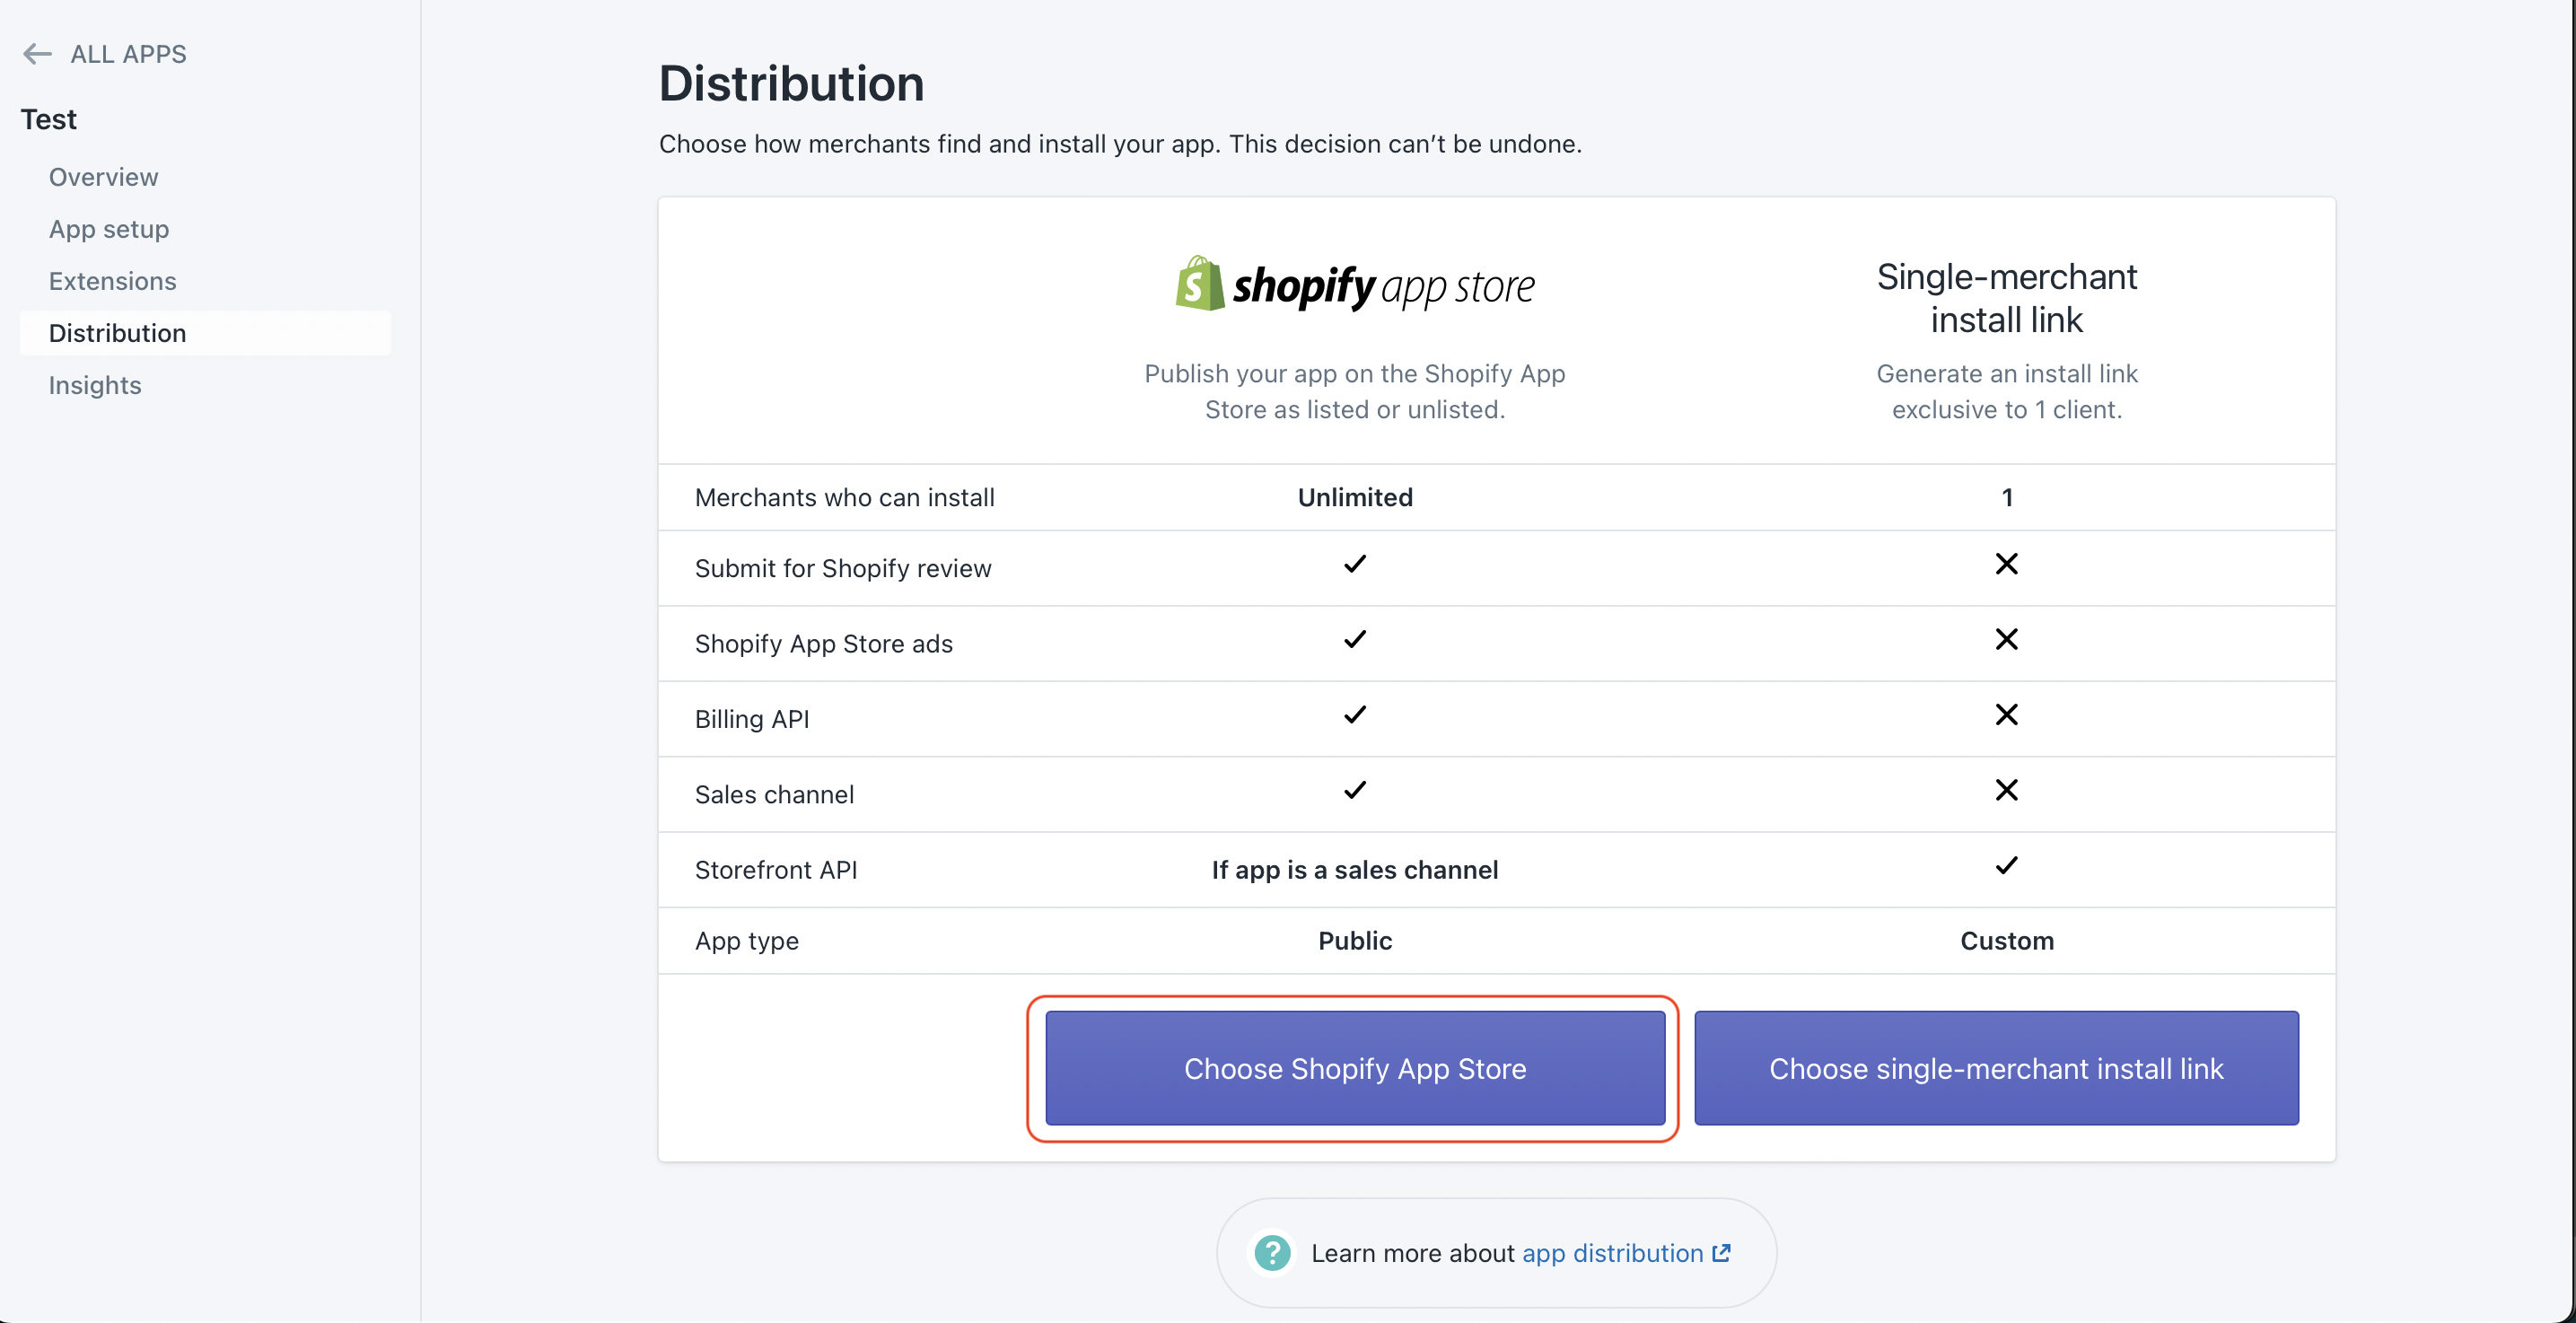
5. Click “Choose Shopify App Store”
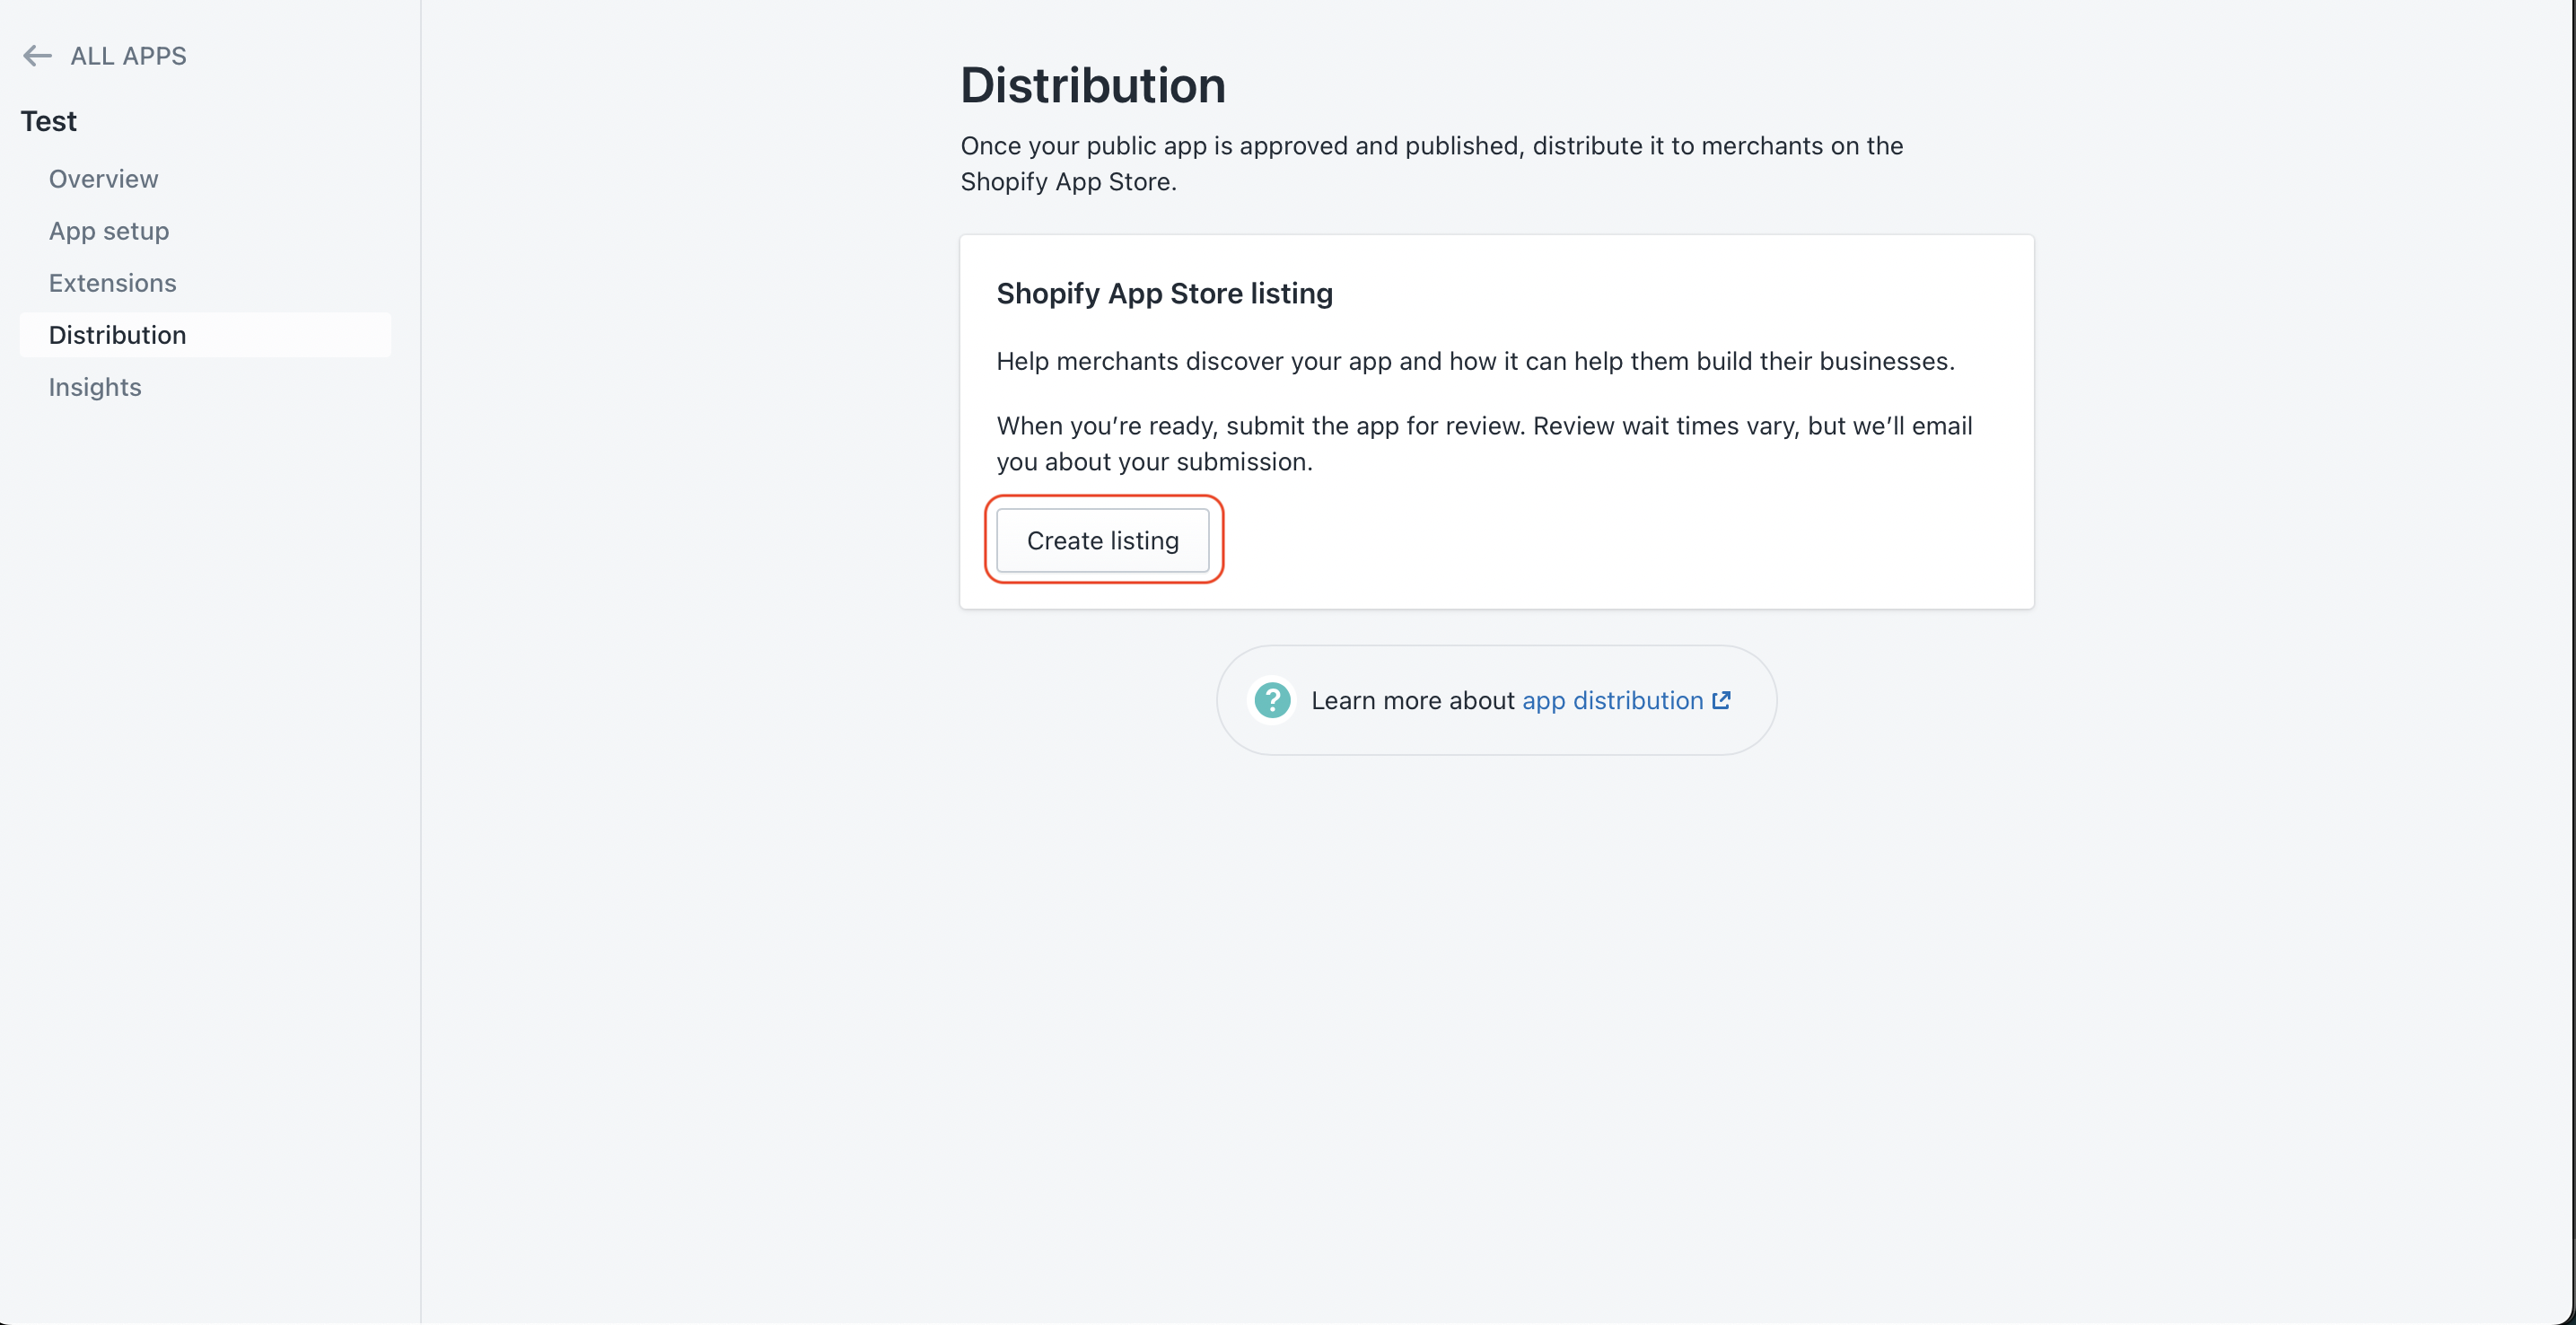
6. Click “Create Listing
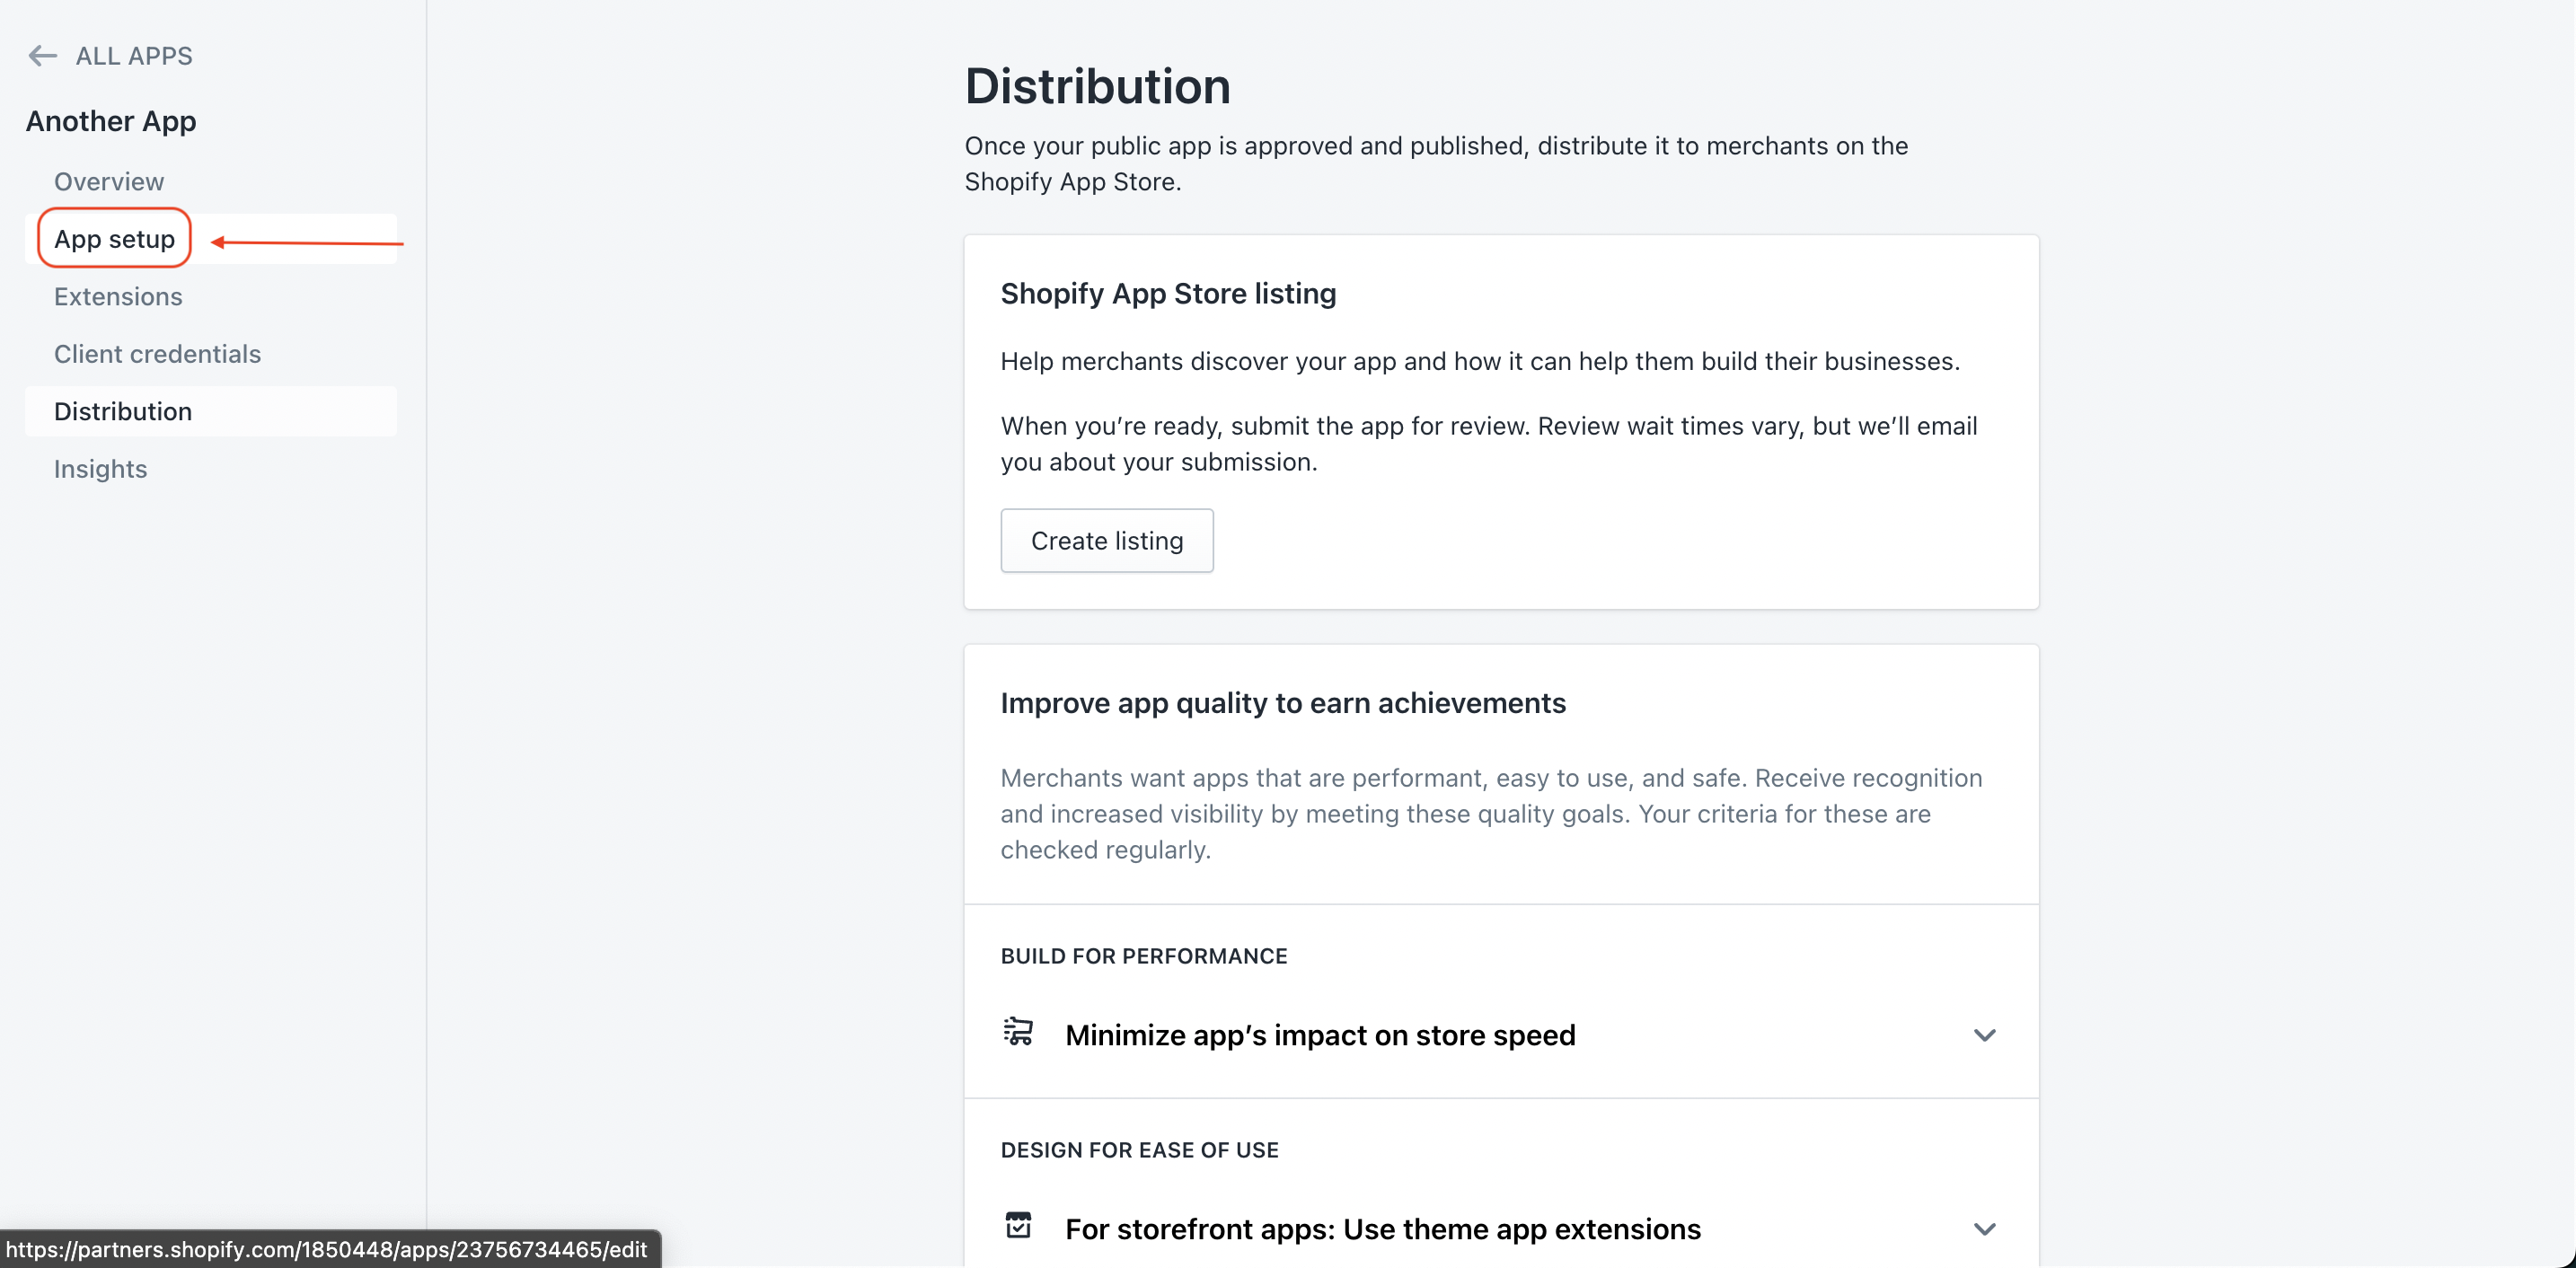
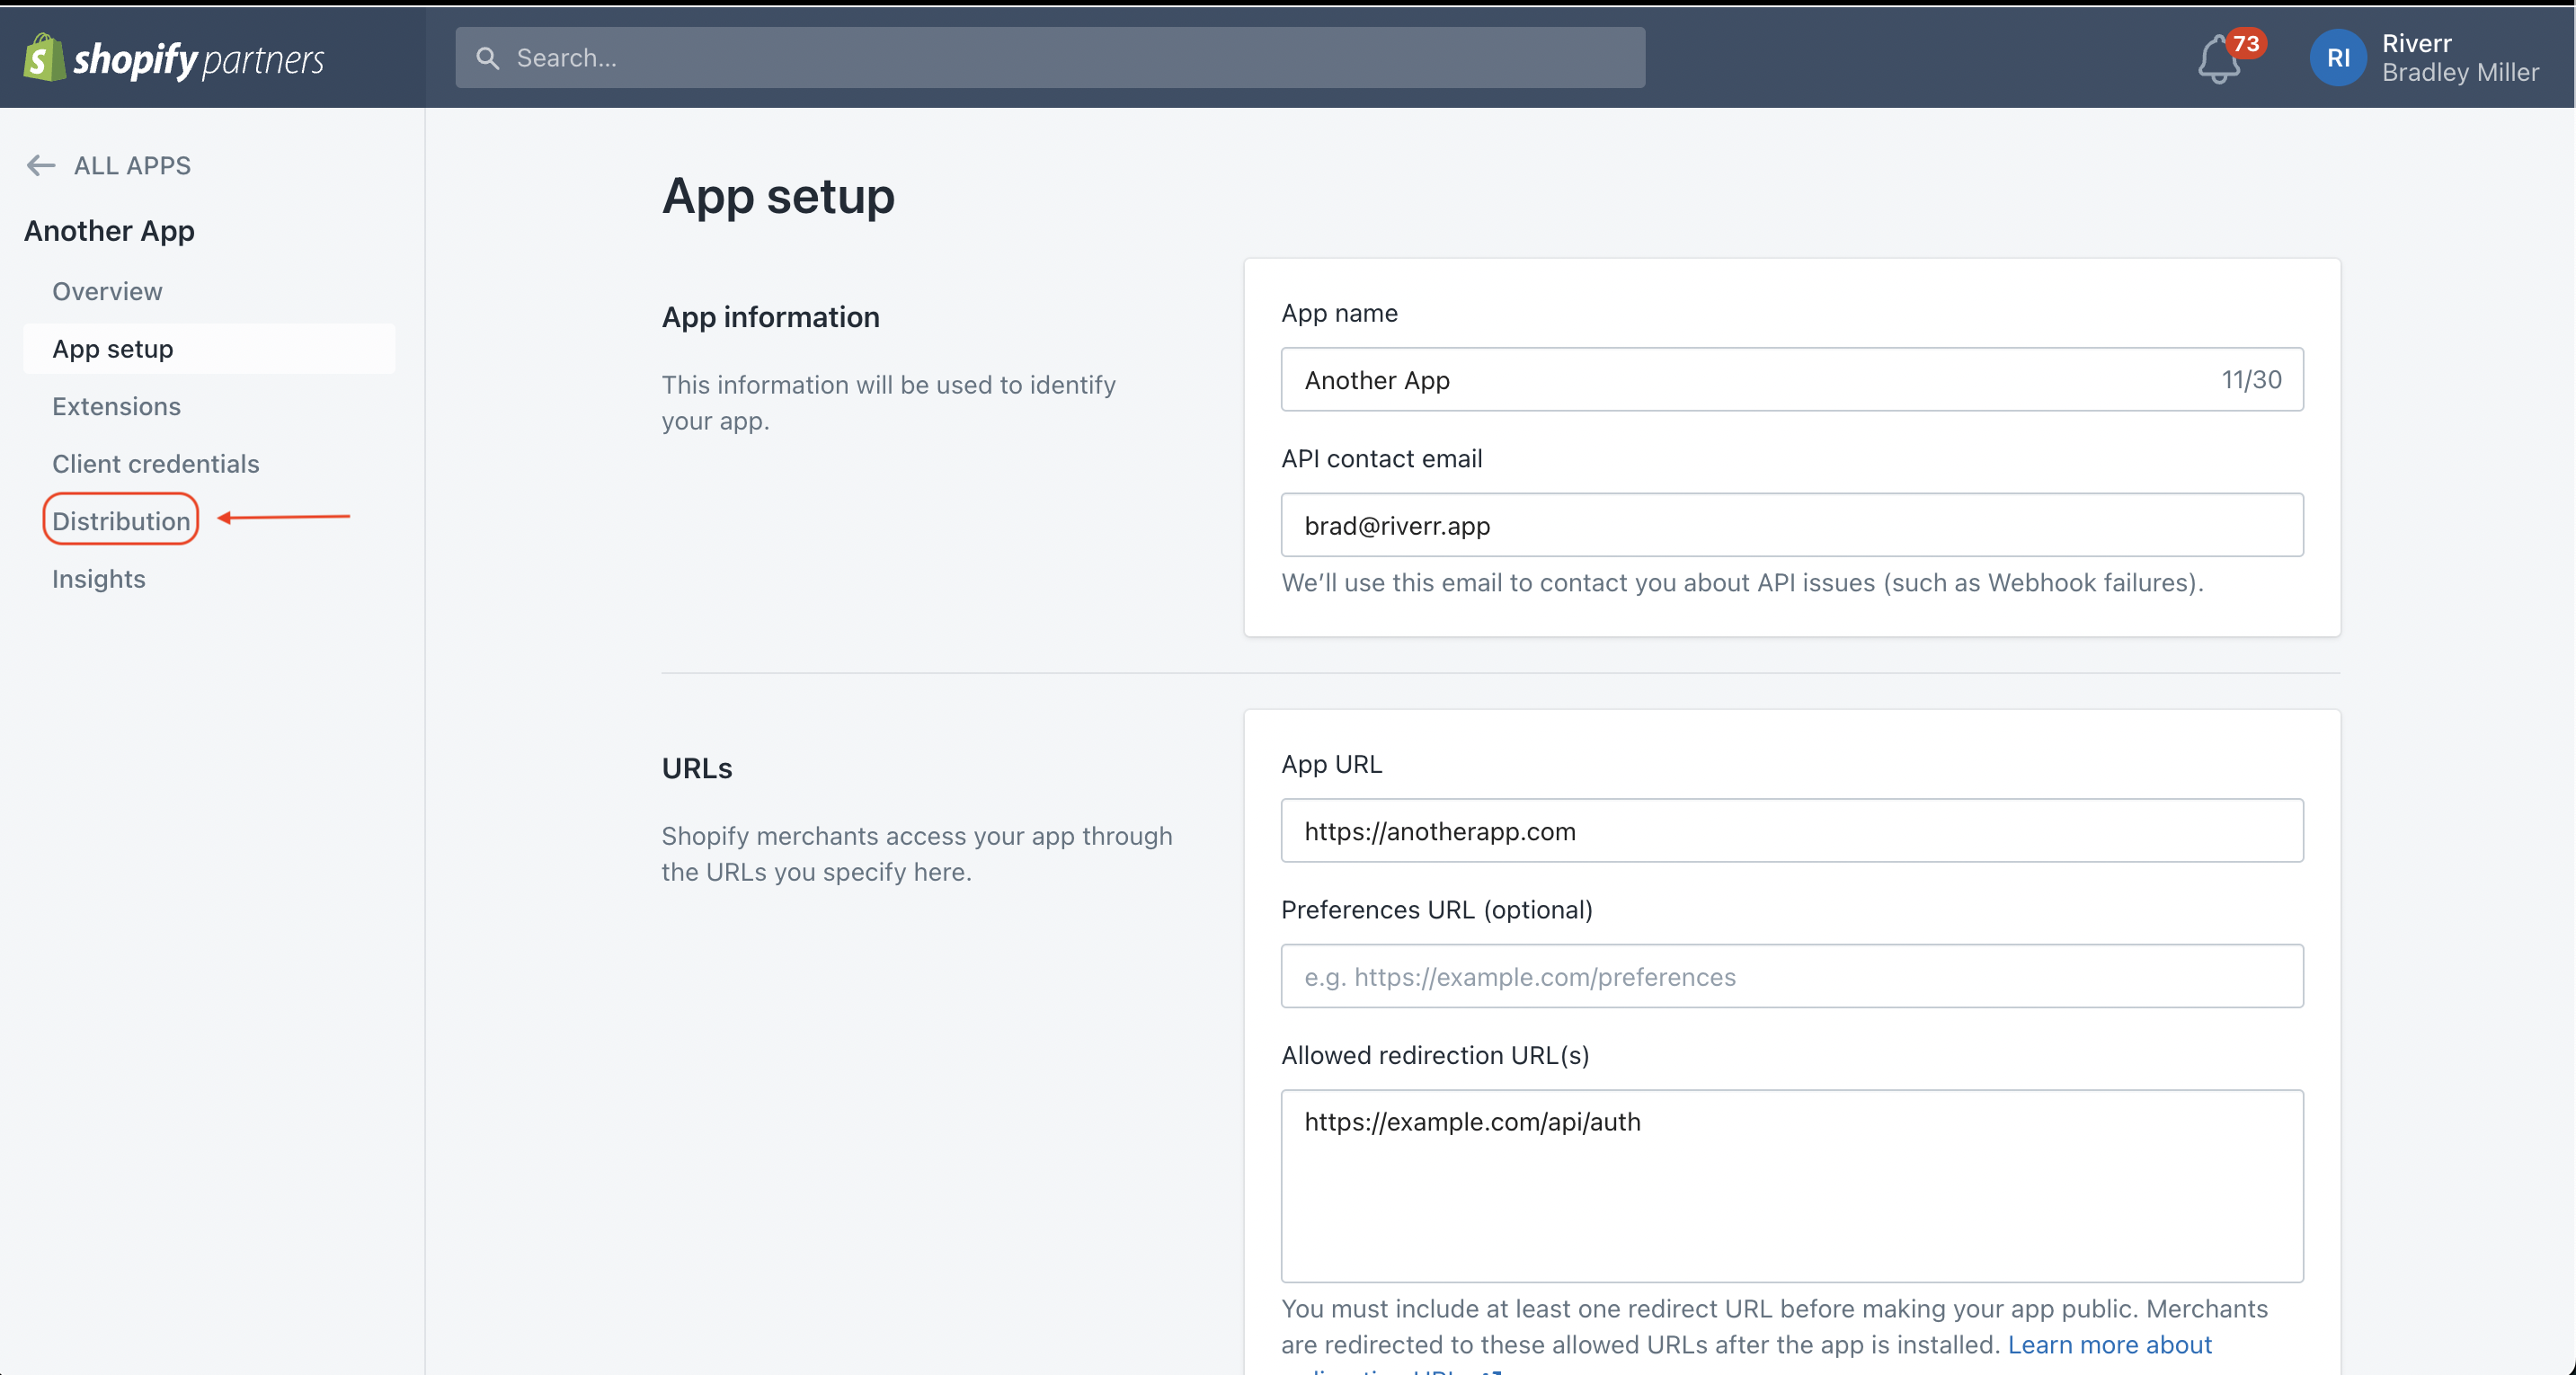
7. Click “App Setup"
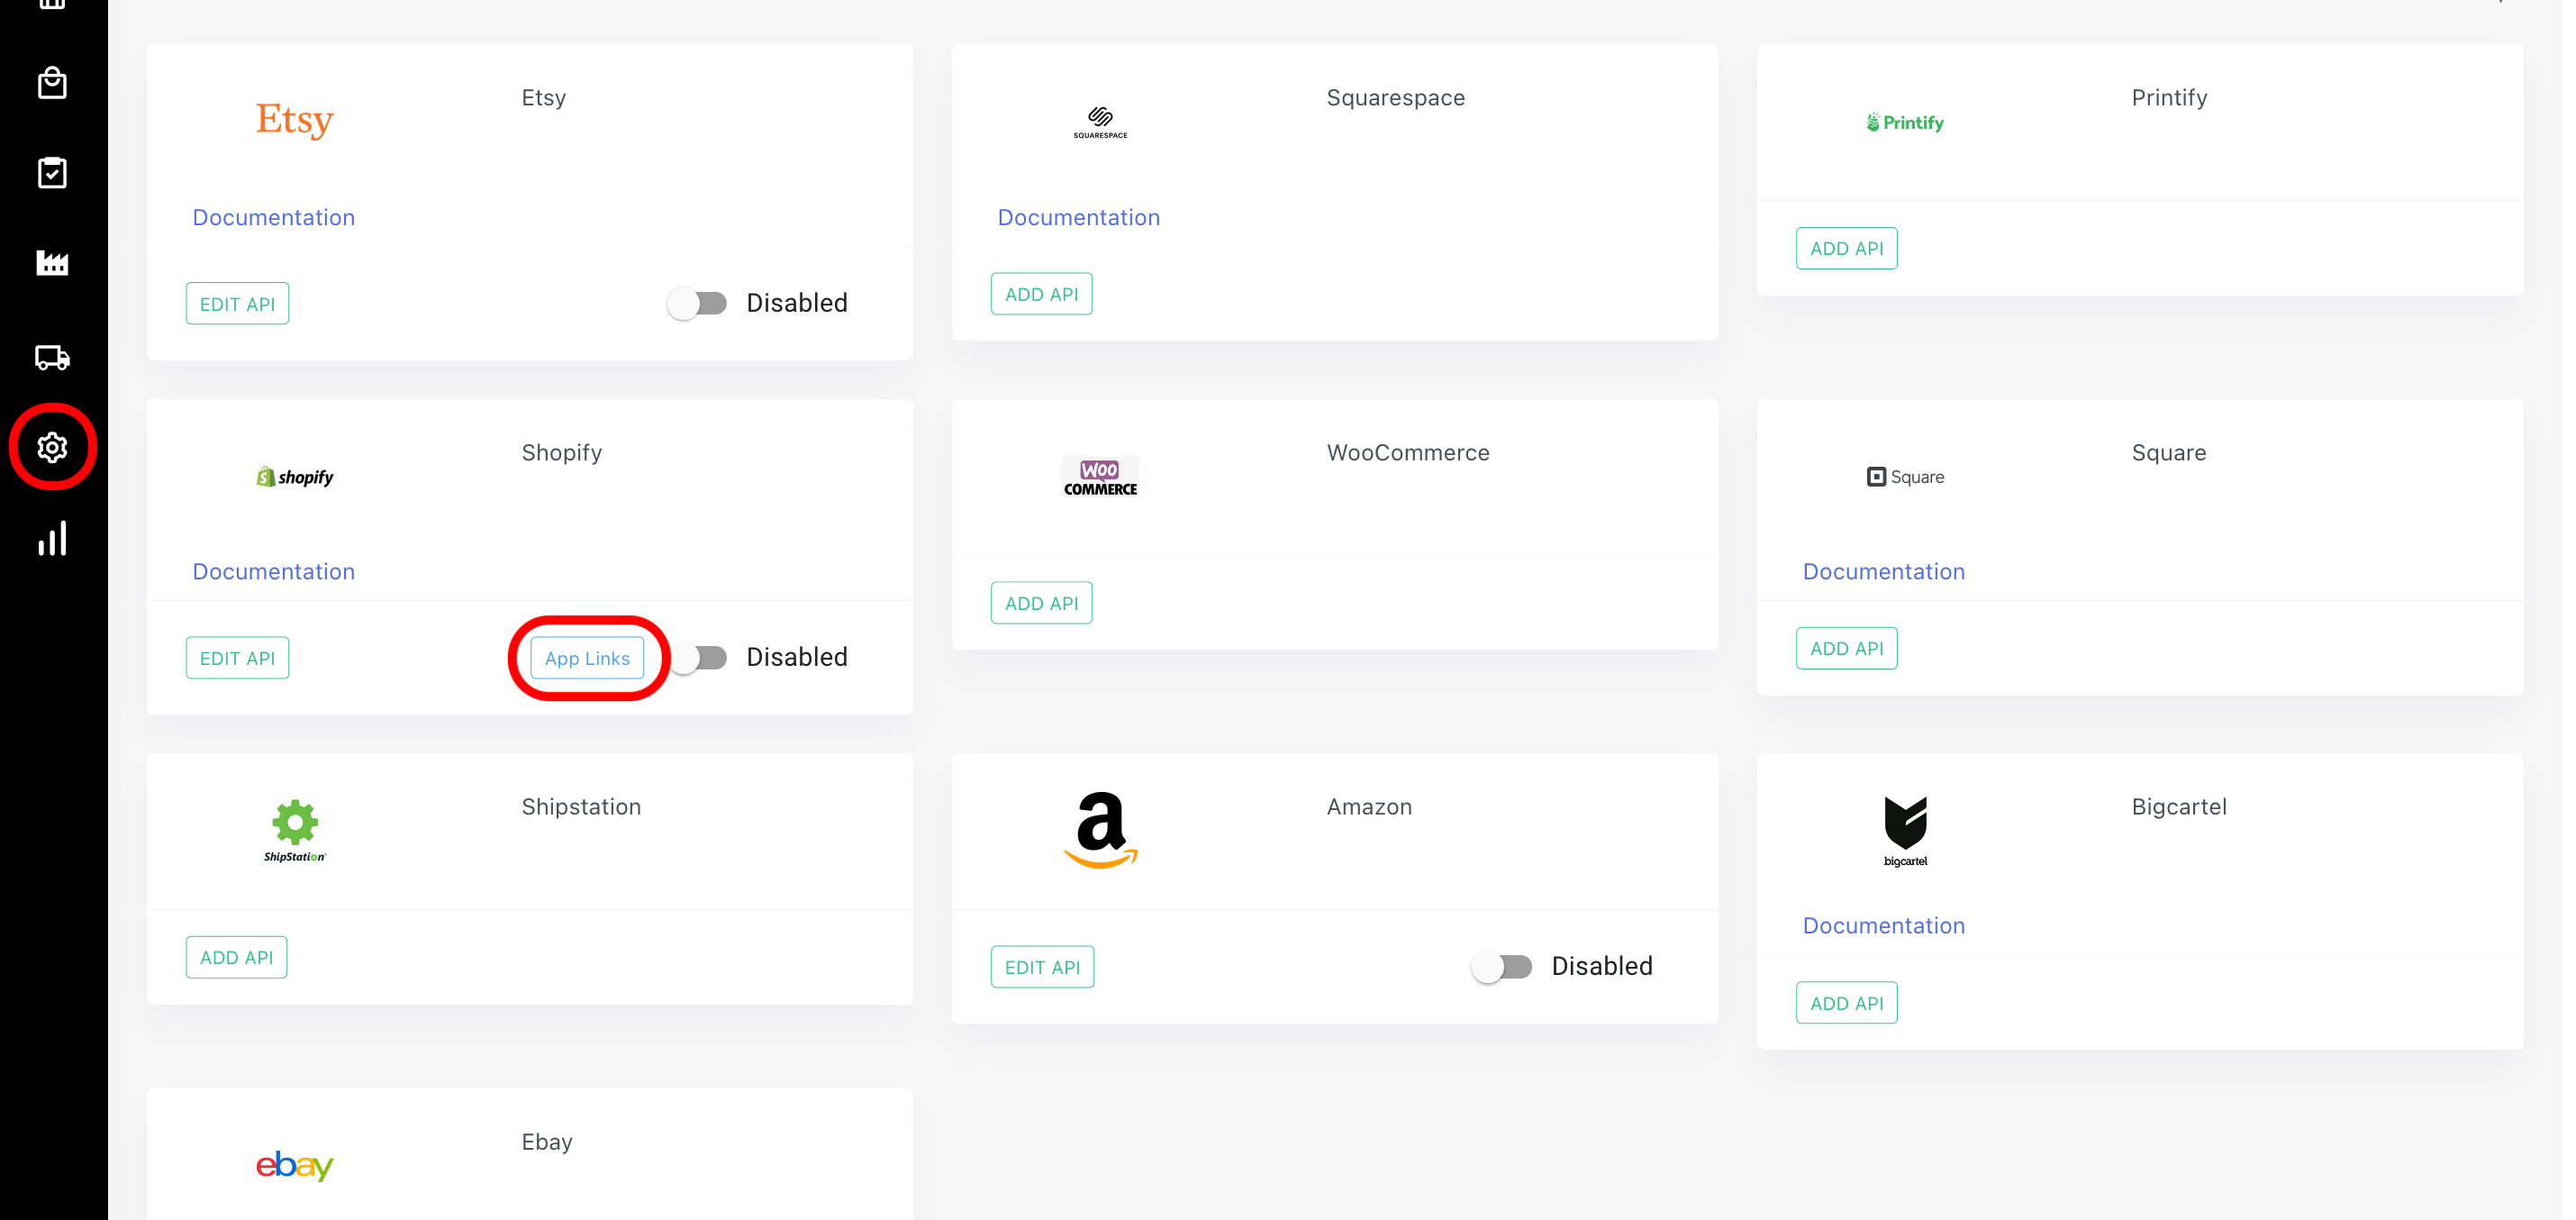
You can find the URLs for #8 and #9 on your "Shopify Card" in the Ecommerce Integrations tab in the Riverr admin portal.
8. Add your "App URL and "Allowed redirect URL(s)."
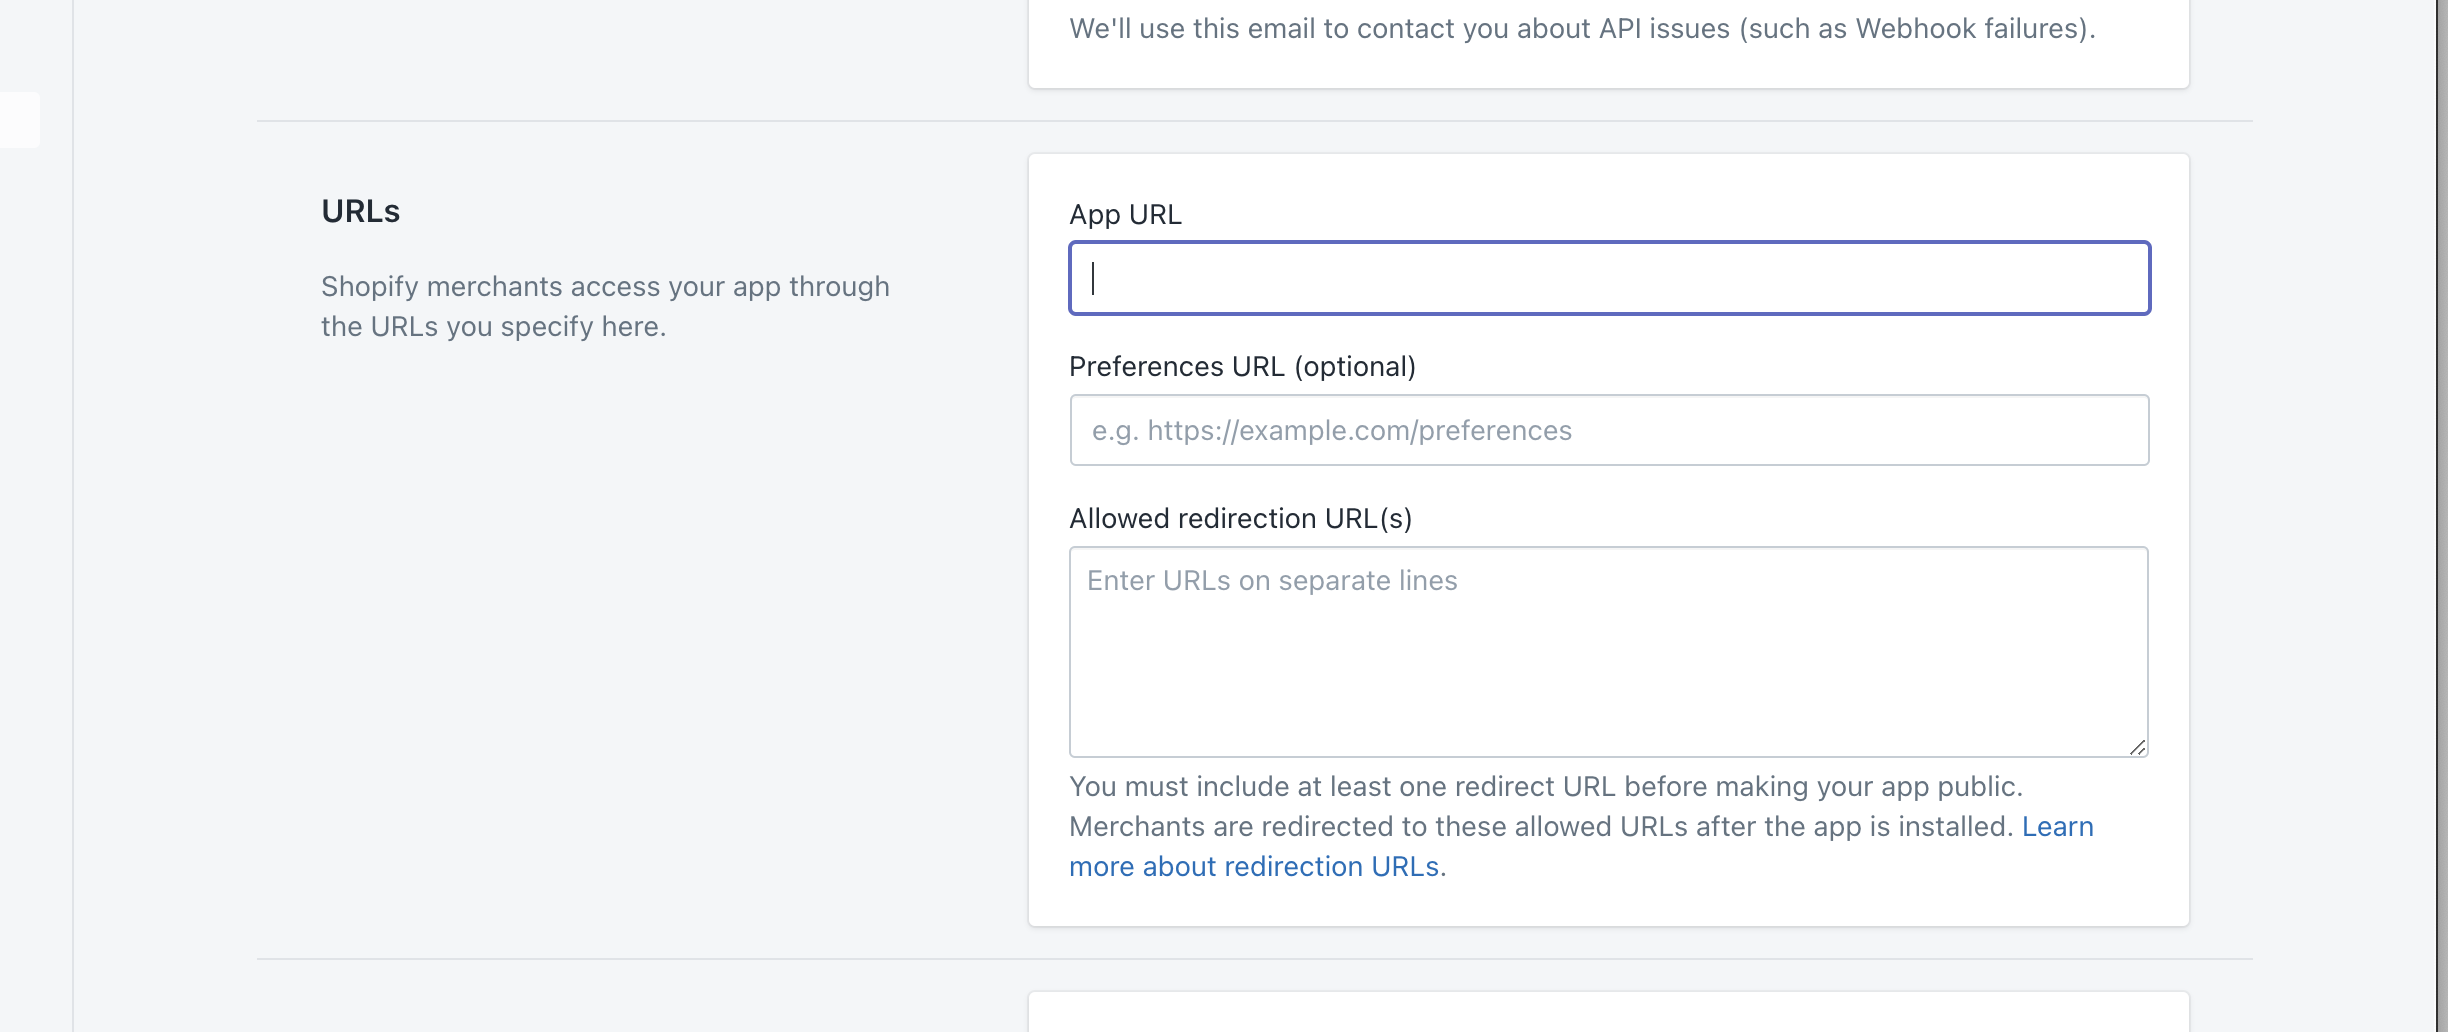
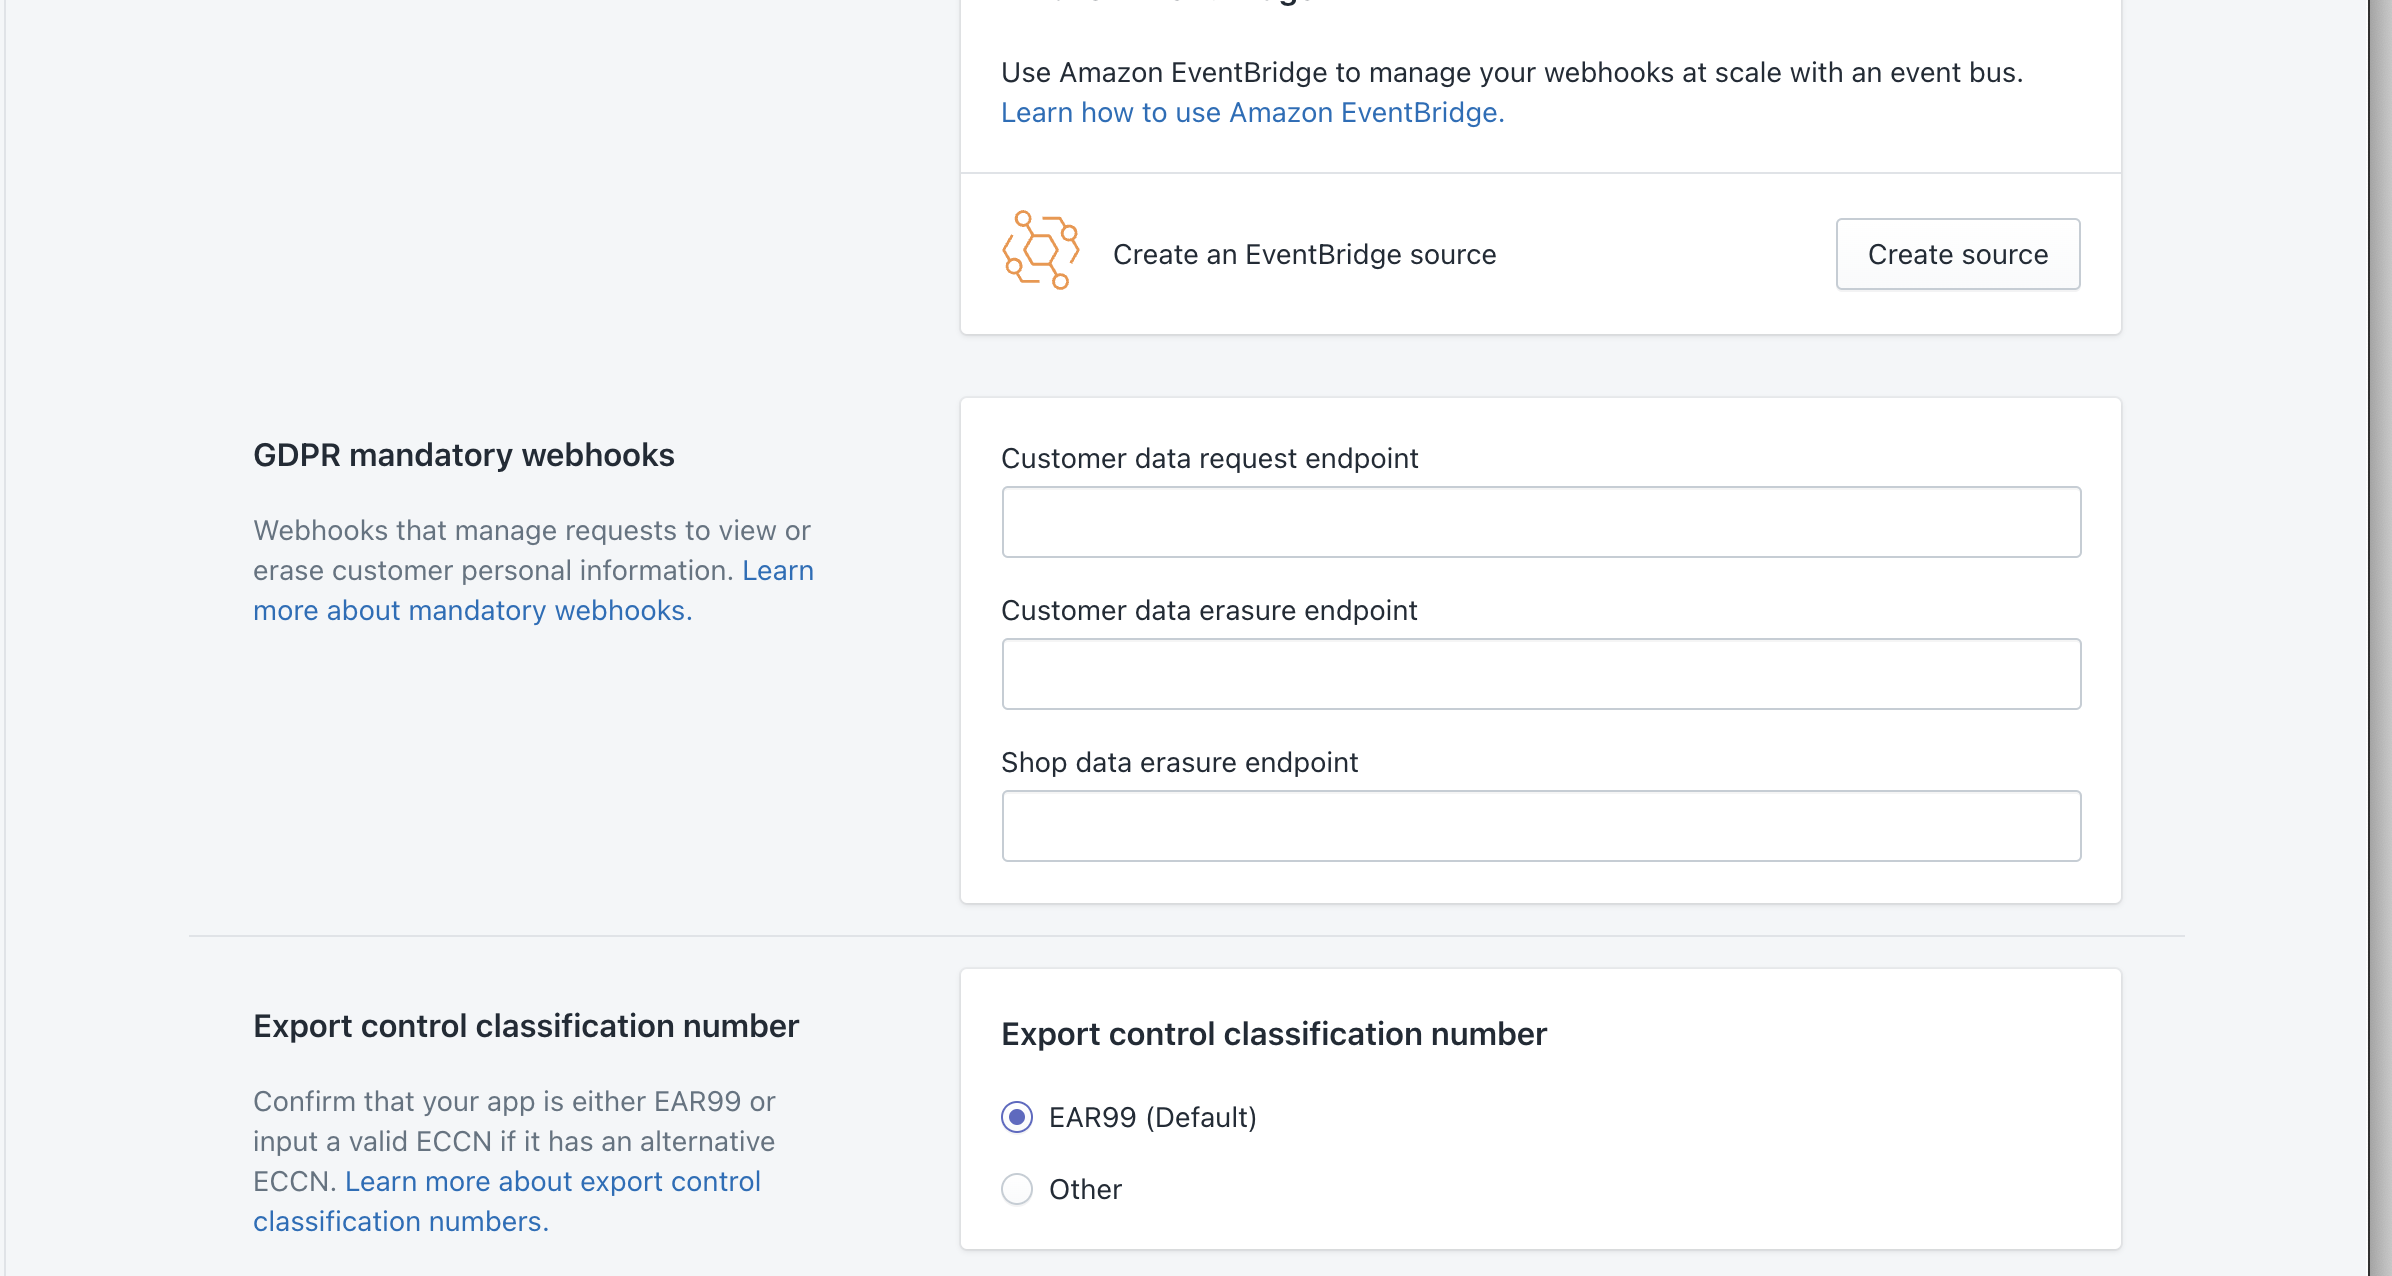
9. Add your GDPR mandatory webhooks
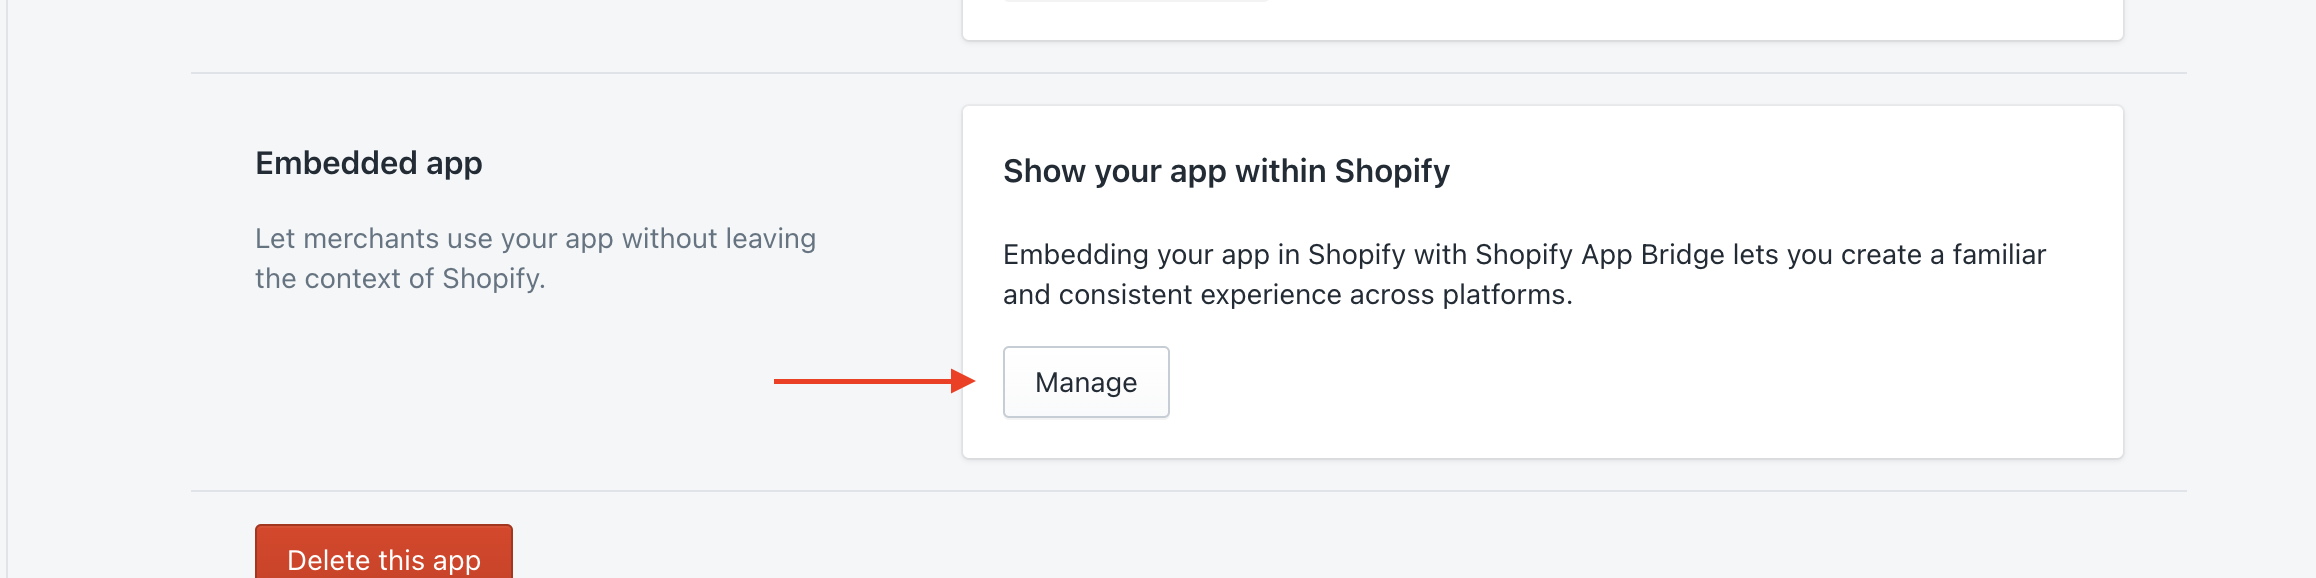
10. Next you will need to disable the embedded admin for the app.
Click "Manage"
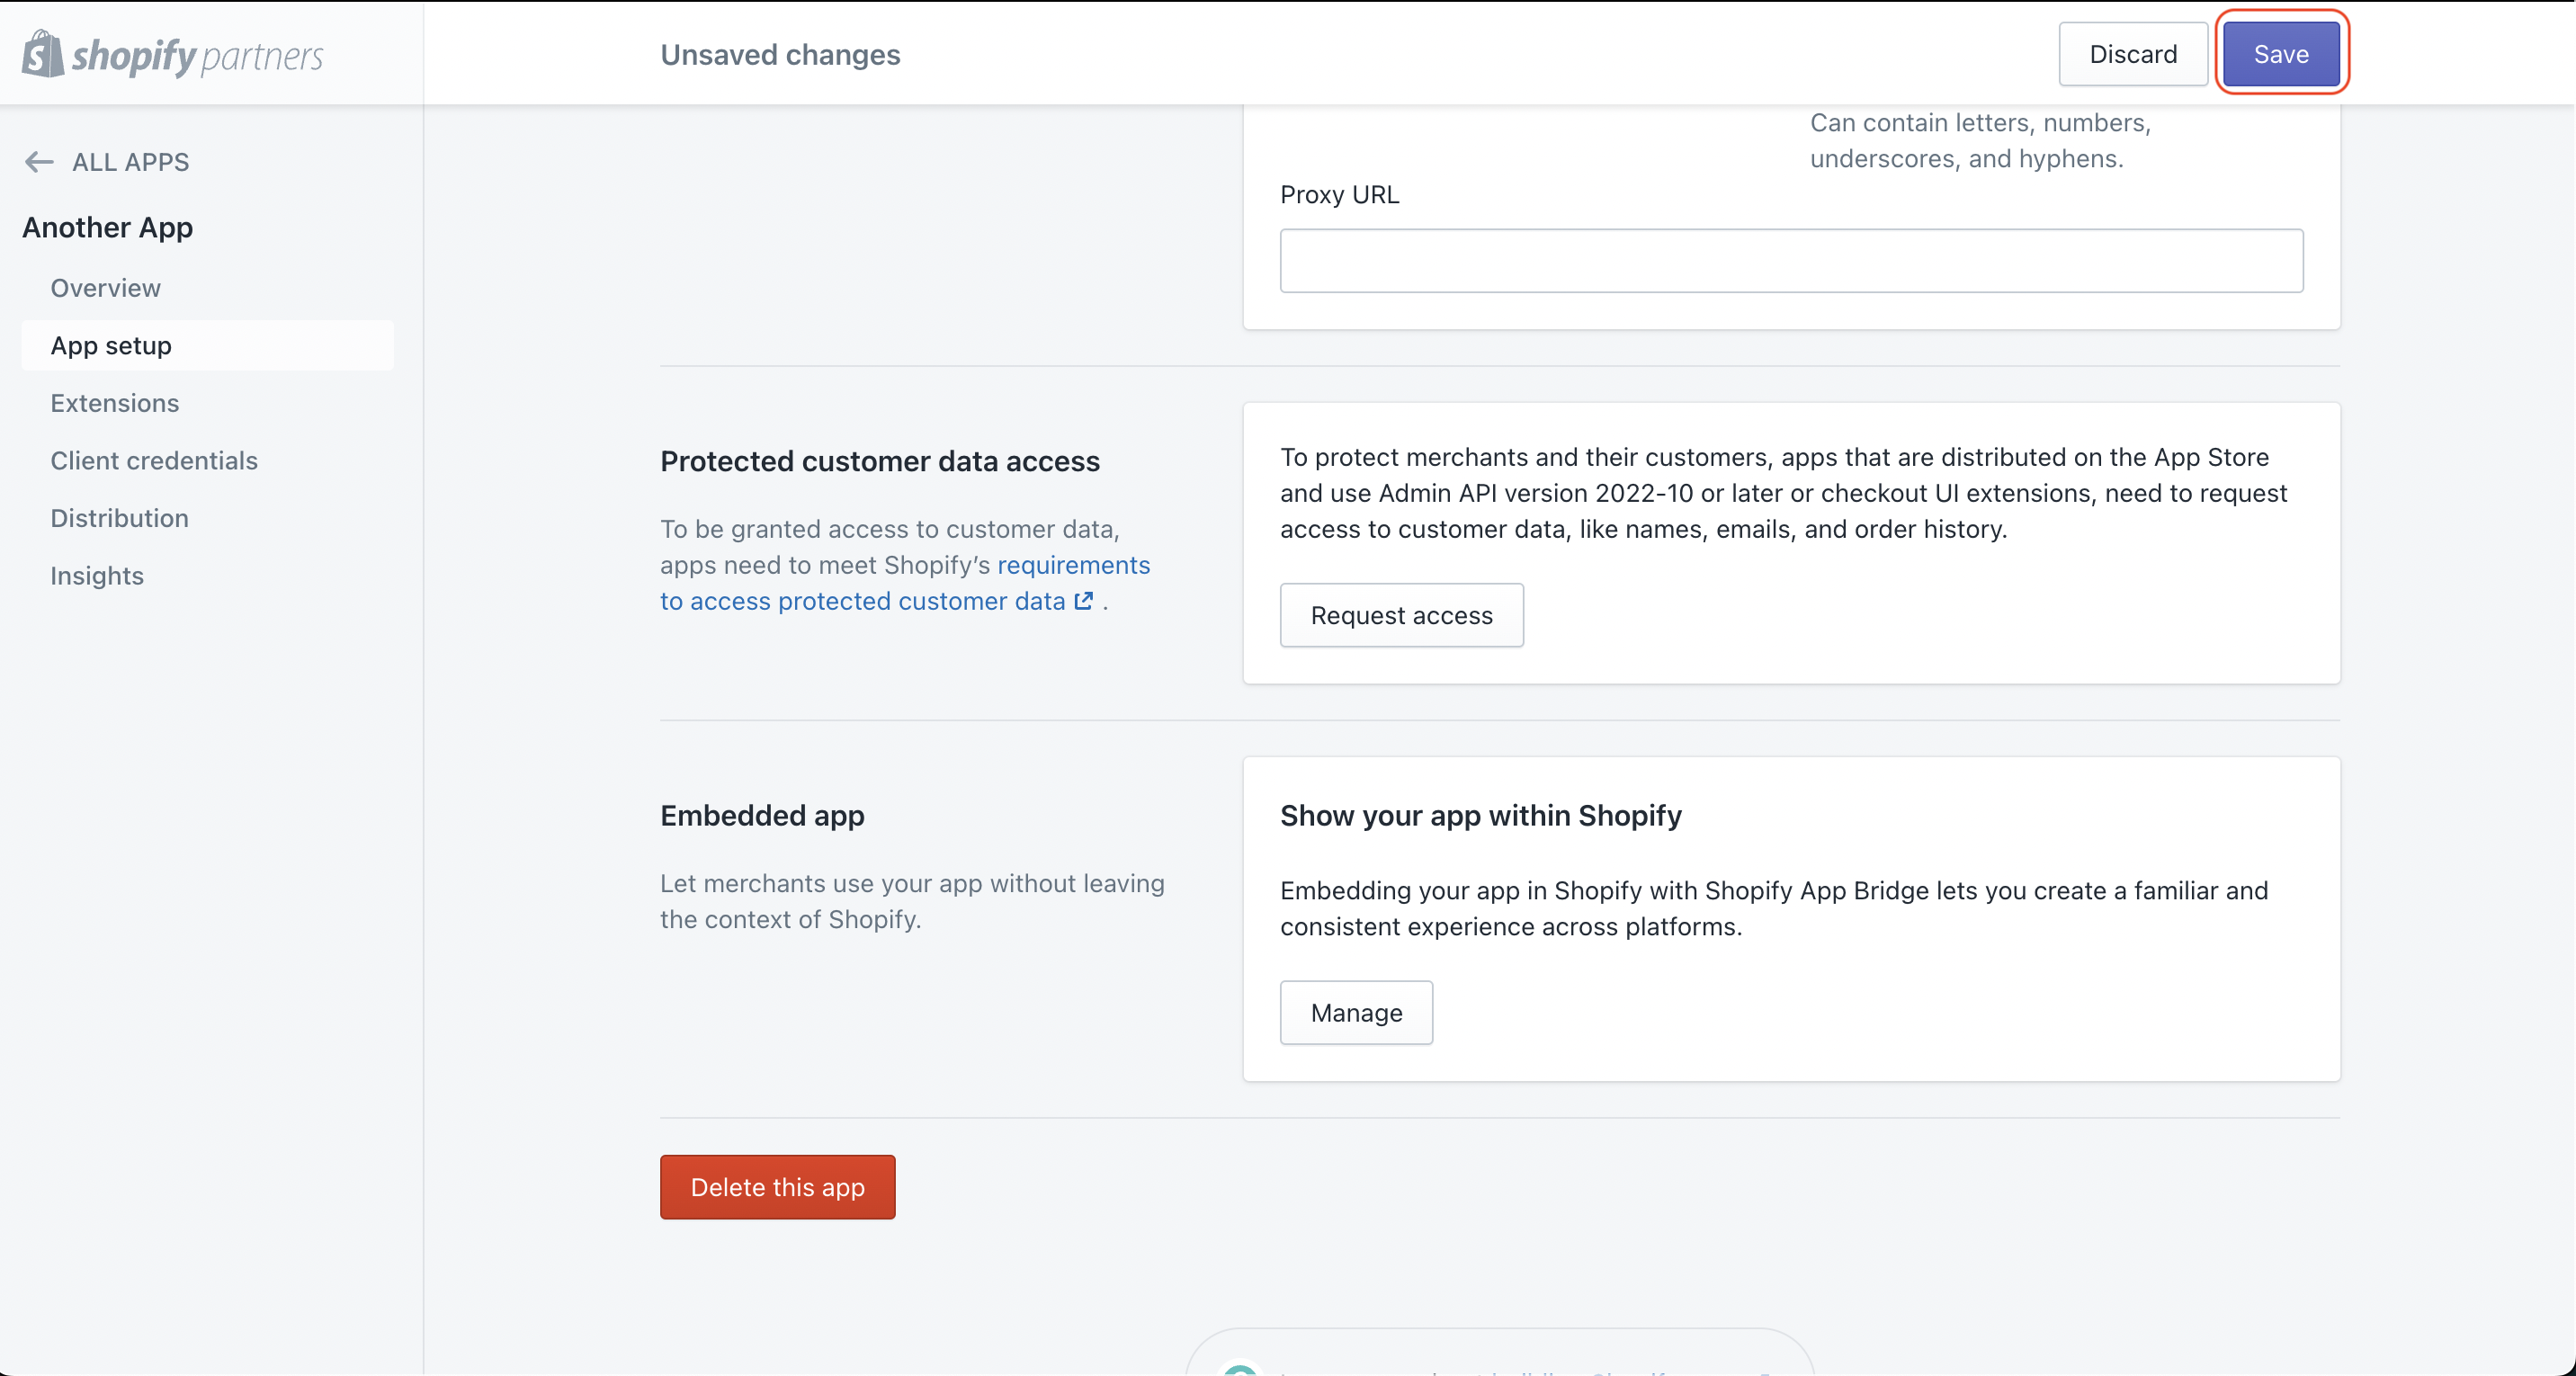
Then "Disable"

11. Save your changes from this page
Now we are going to move on to the actual app listing page. This is where the information that users will see when they click on your app in Shopify.
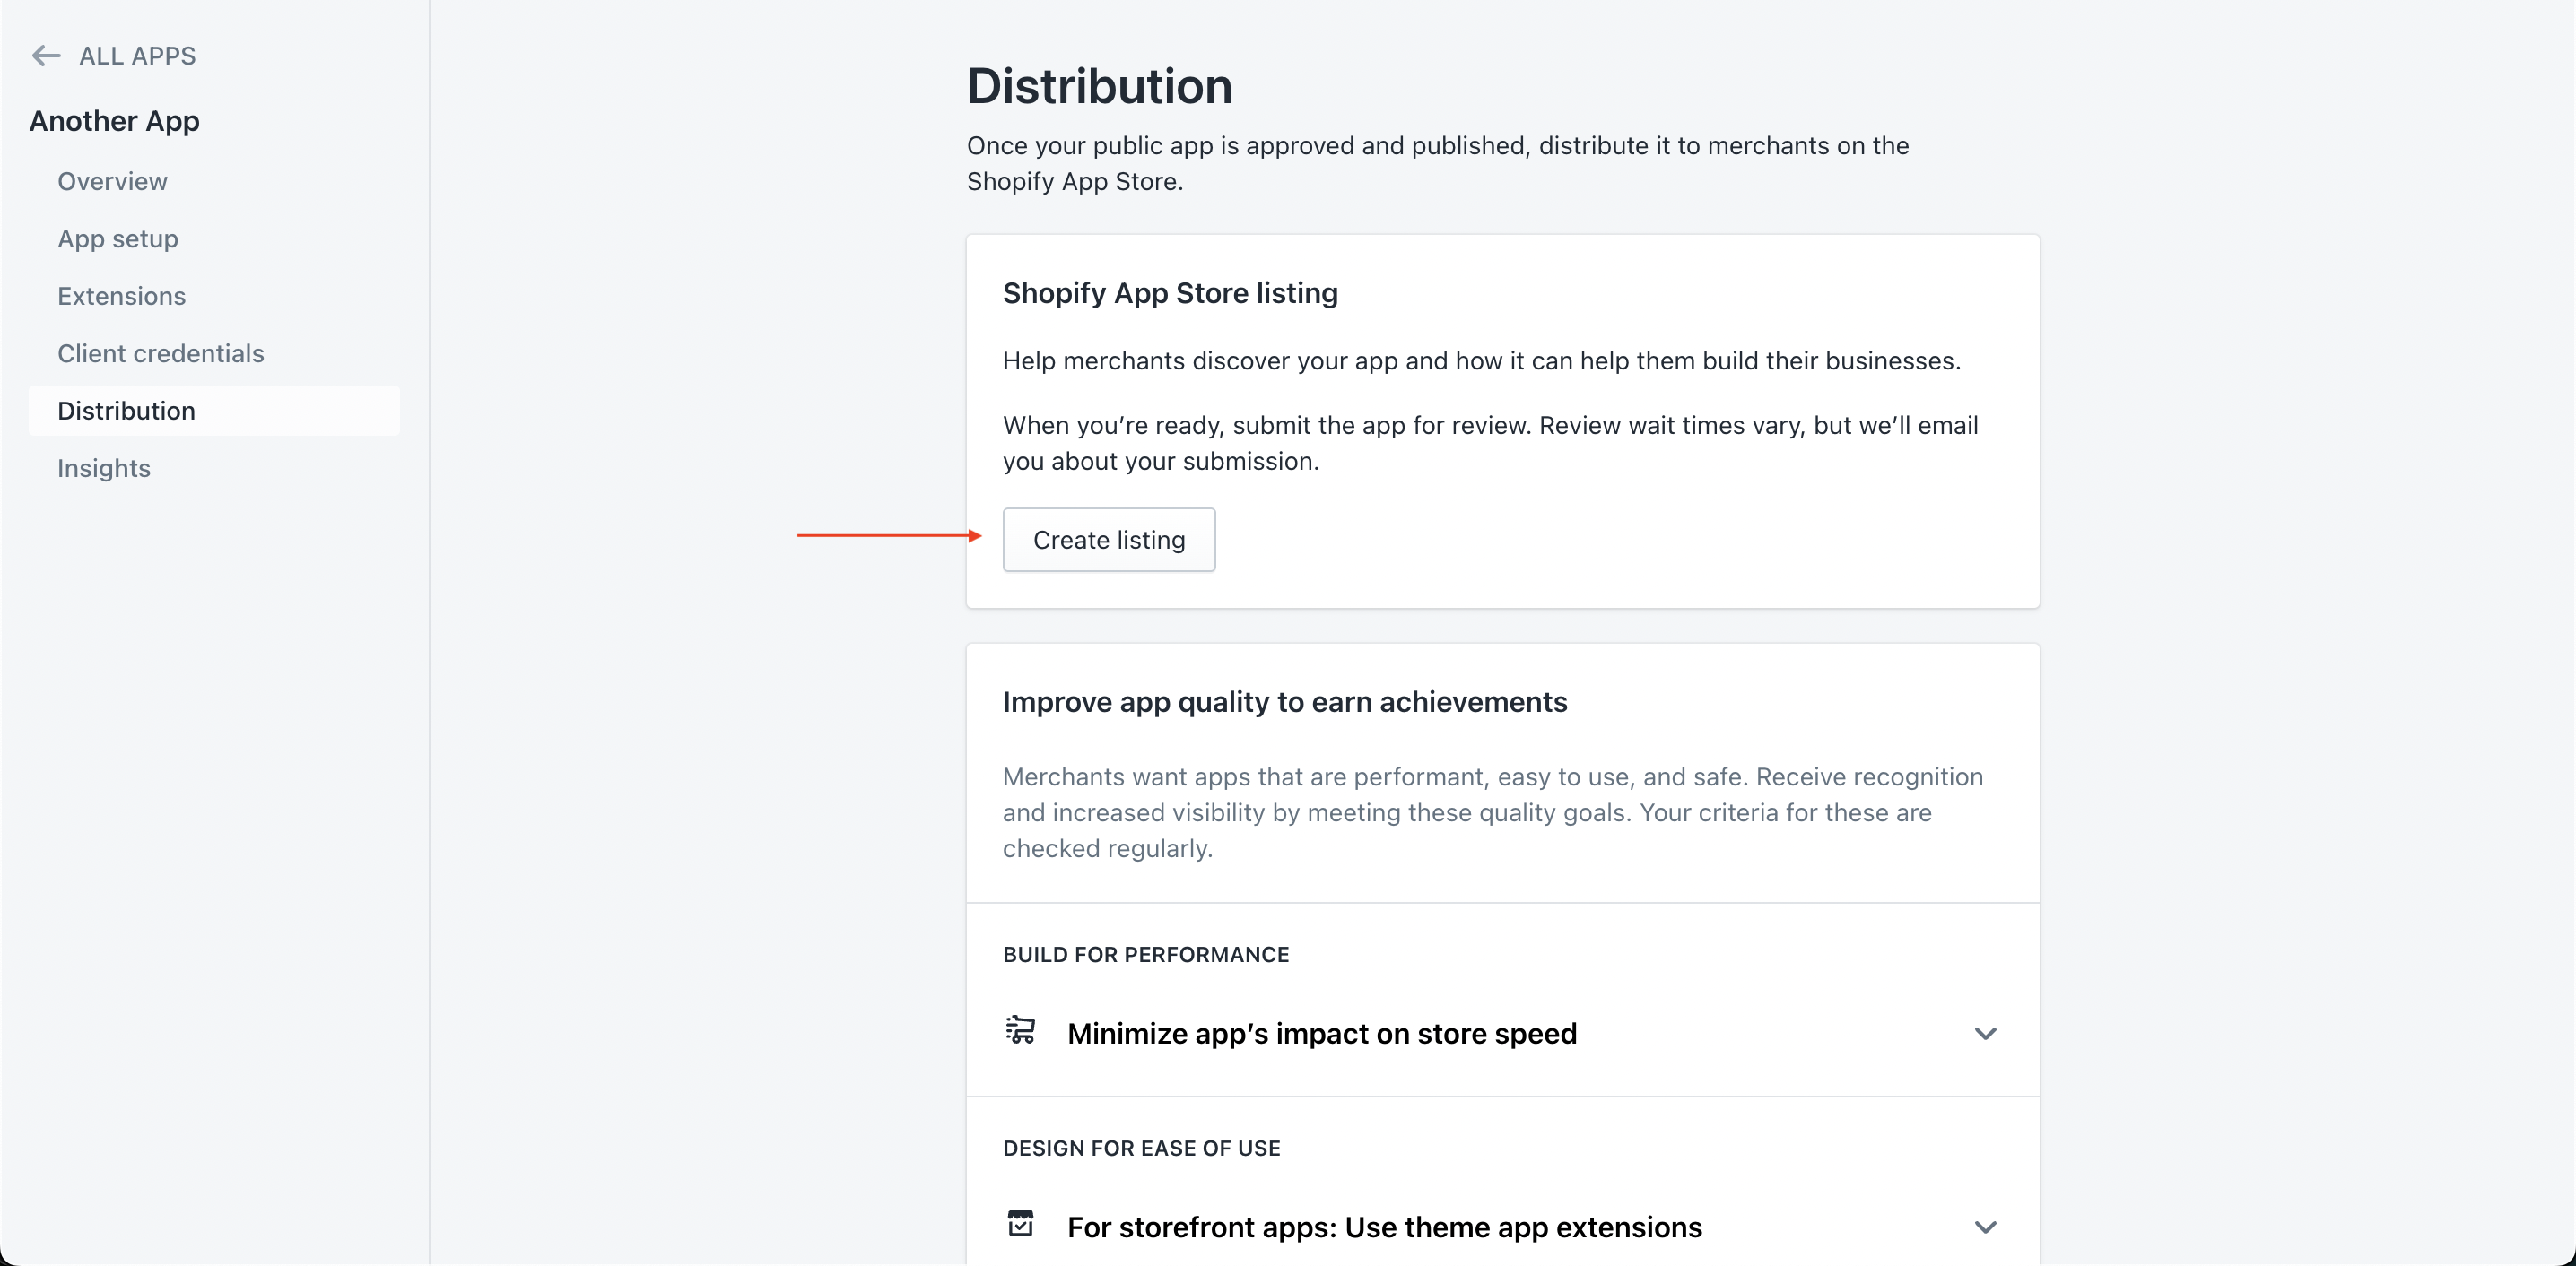
1. Click on the tab named "Distribution
2. Click the button that says "Create Listing"
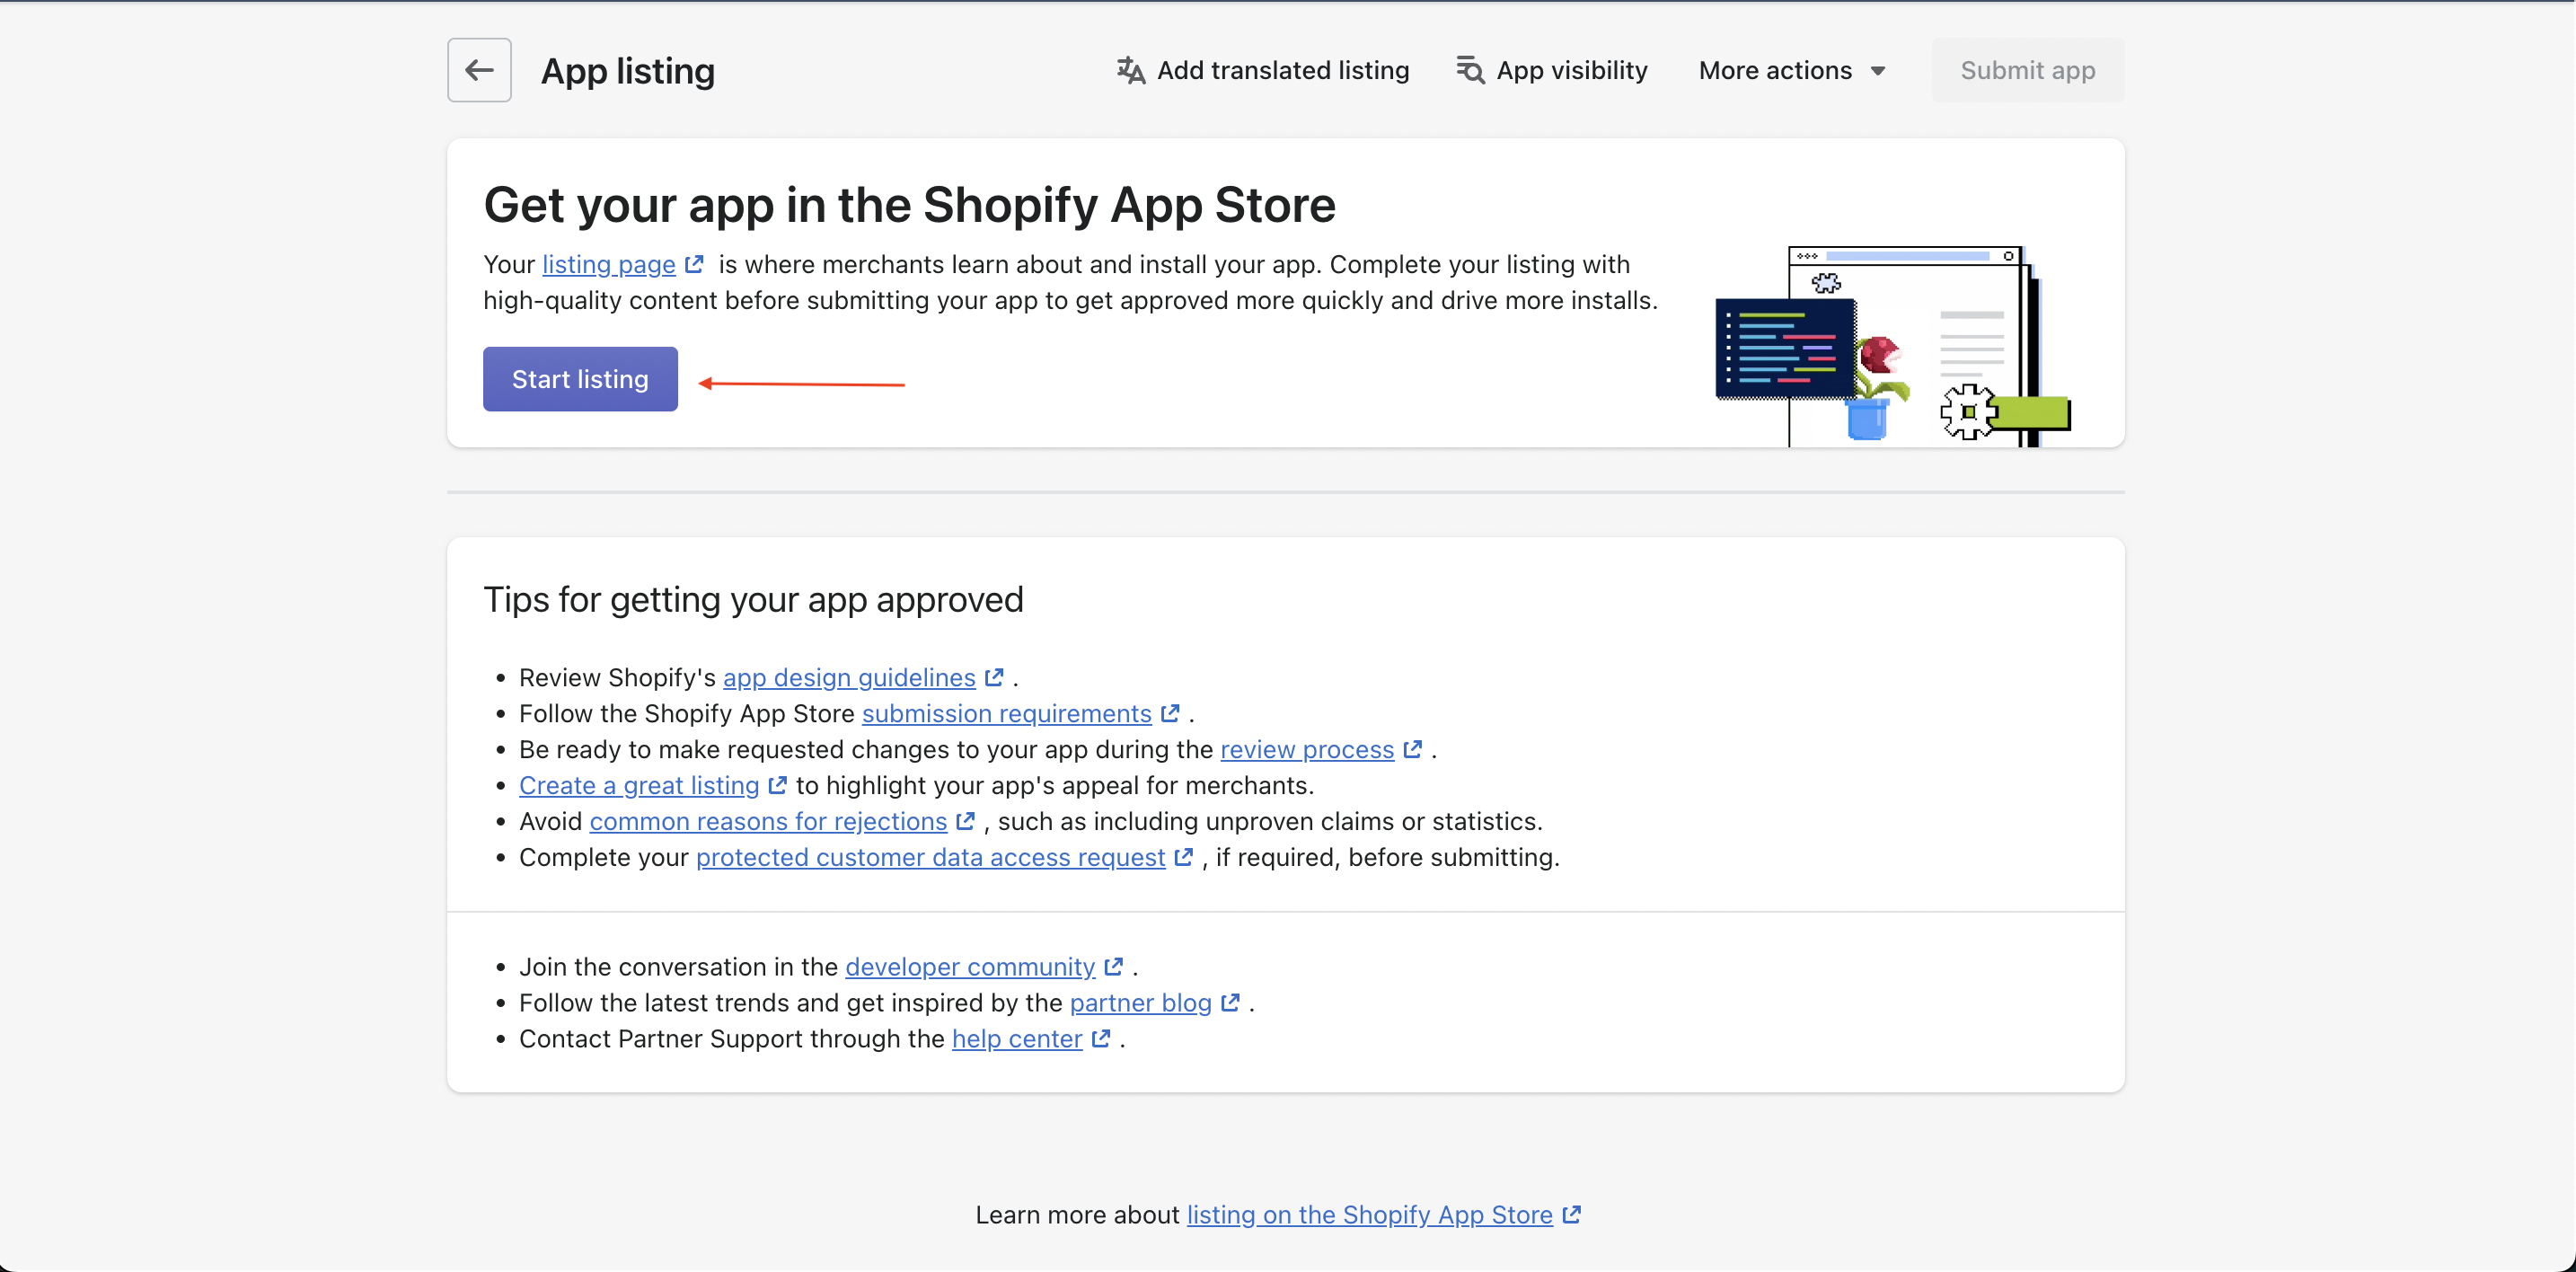
3. Click the button that says "Start Listing"
4. Fill in your brand information
Most of the information in the top half of this page is specific to your brand. Fill out as much of this area as you can.
*Note: For the Logo icon, make sure that you use the same one that you added on the App Setup page. Also, make sure it is a jpeg. Shopify will not allow images with transparencies.
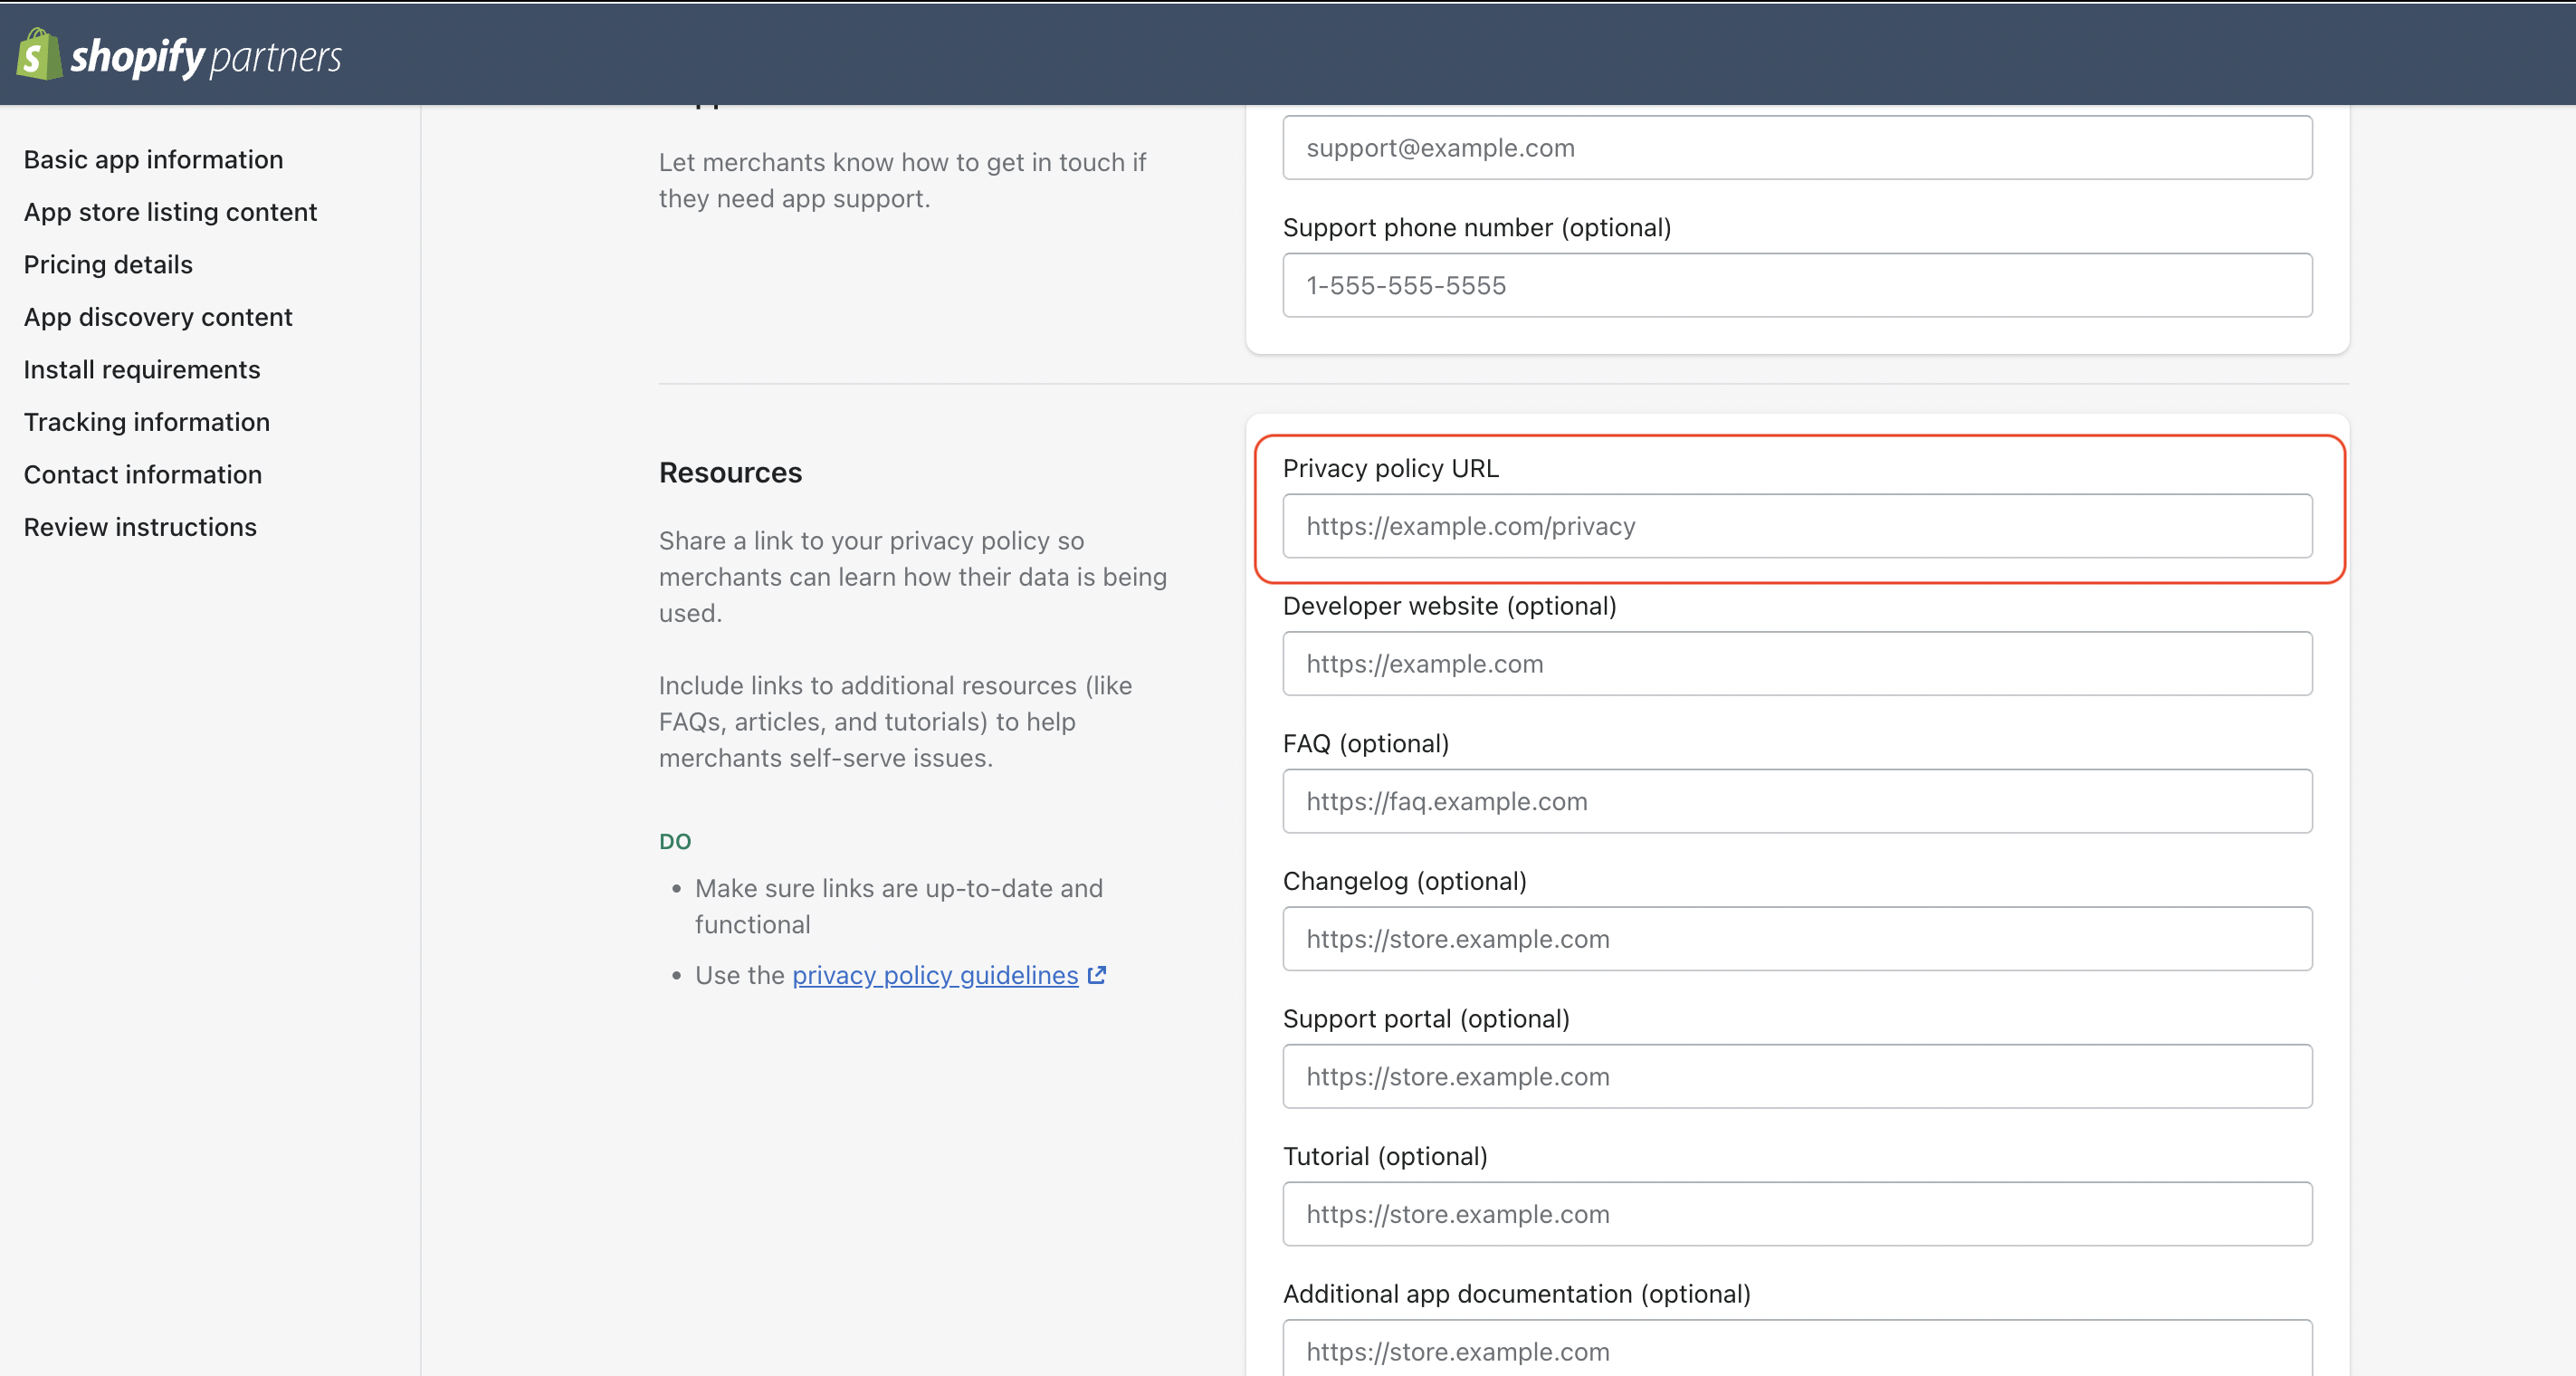
5. Add your Privacy Policy
If you do not have one, you will need to make one. You can find generic ones by searching in Google.
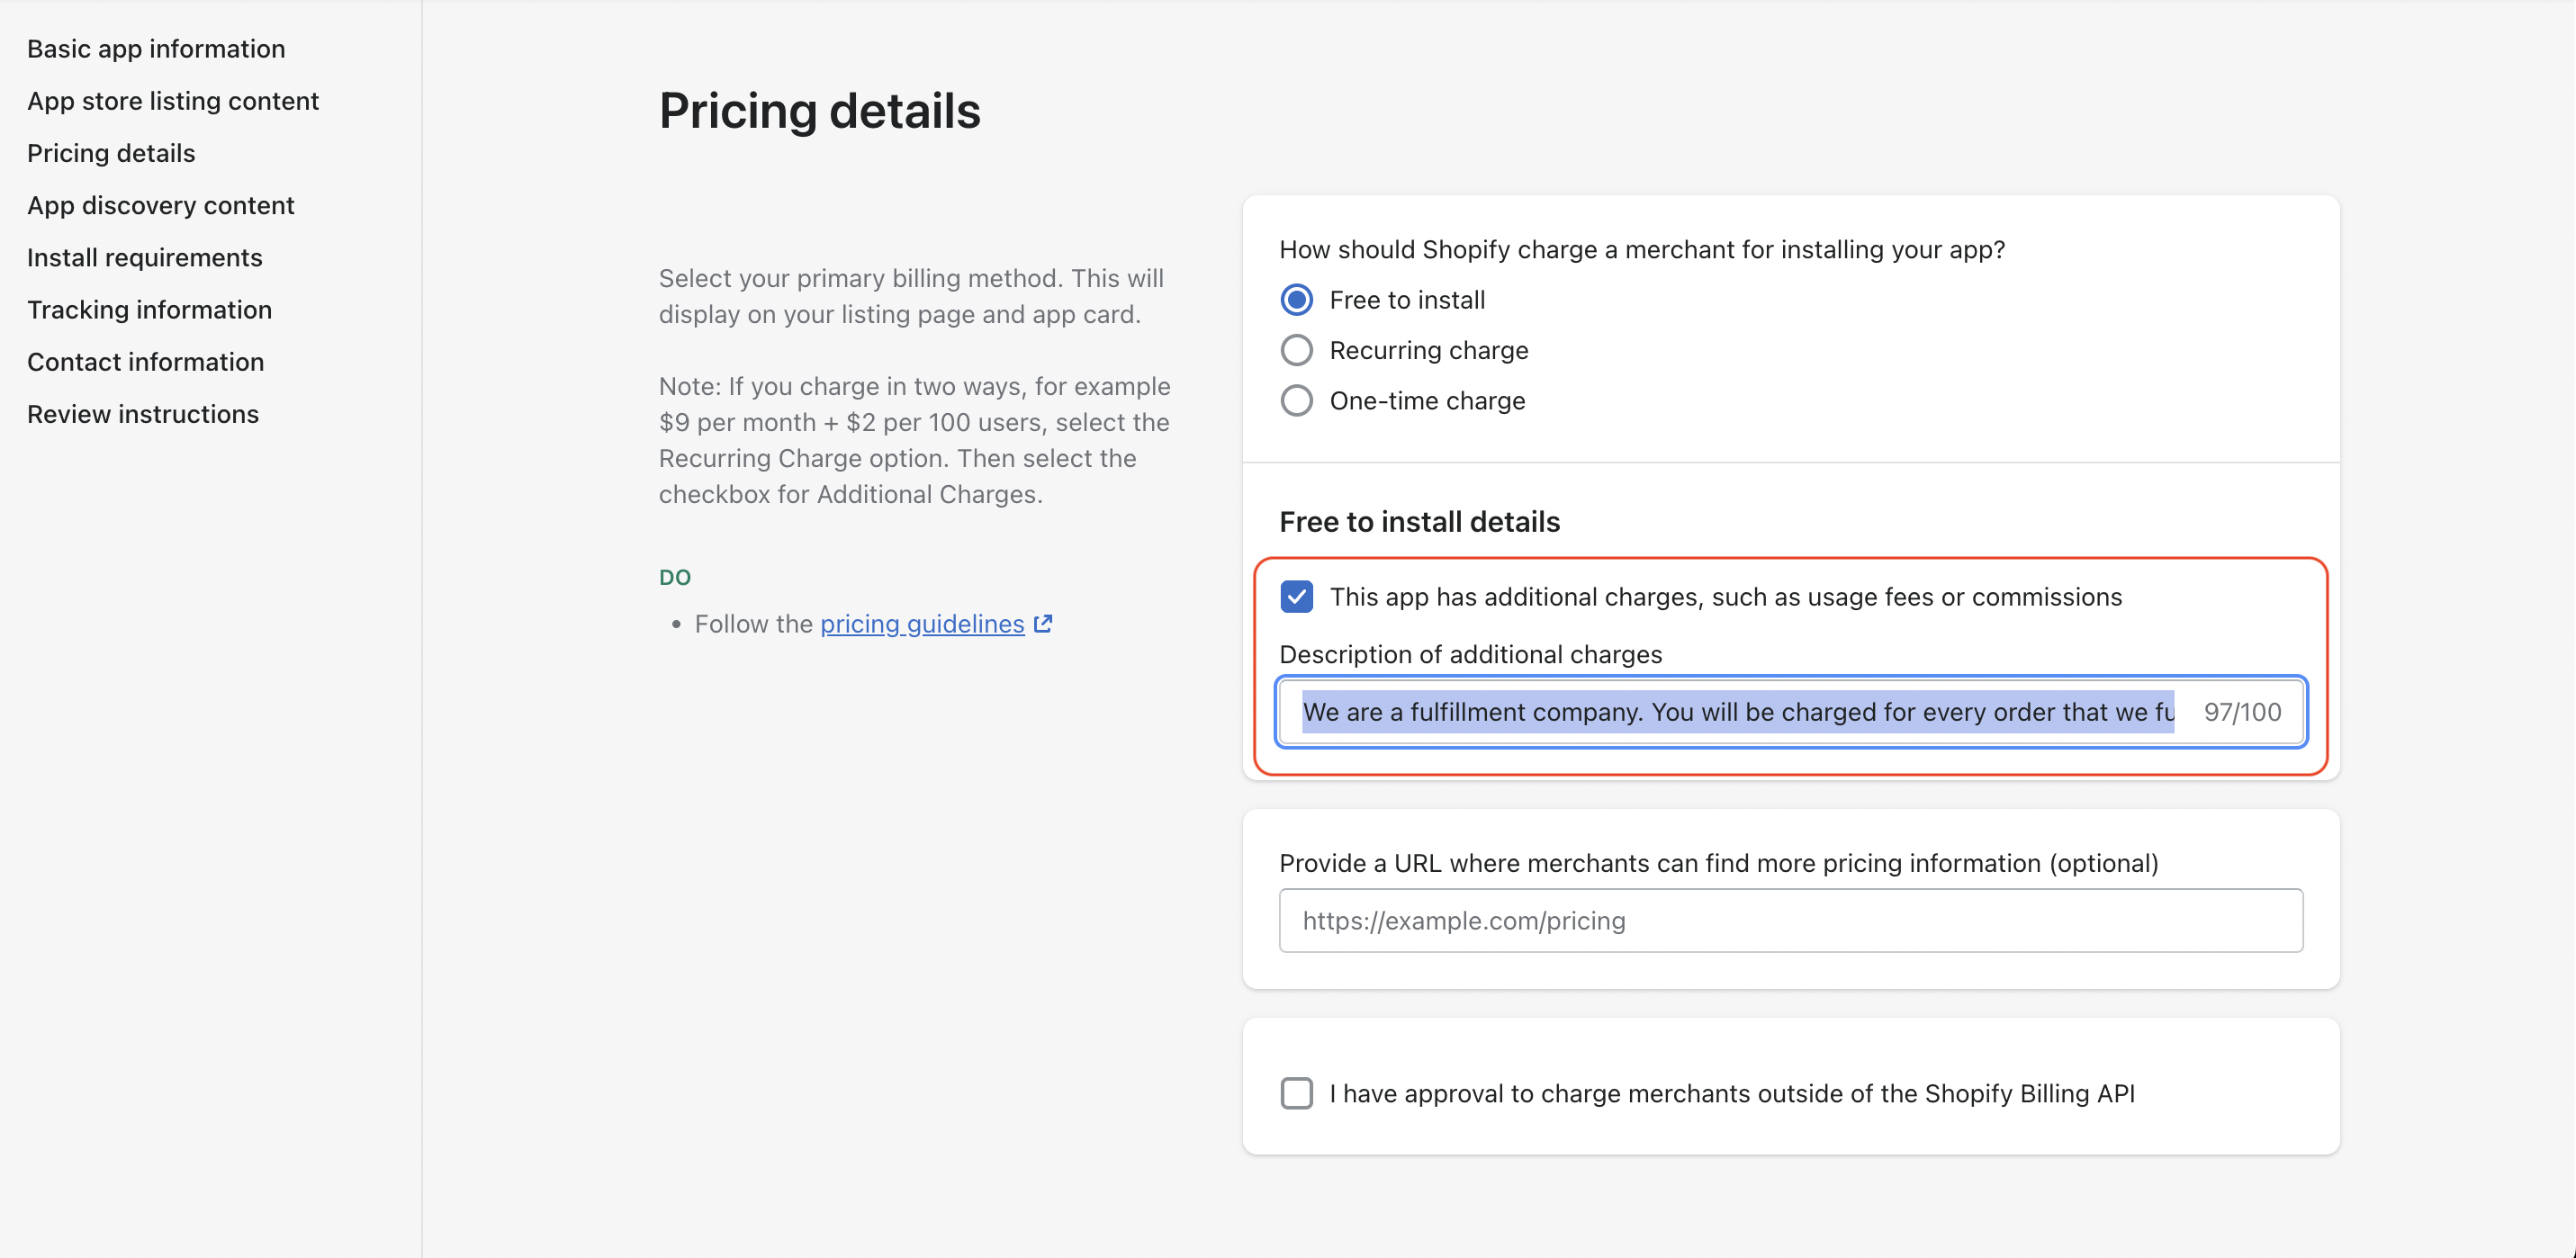
6. Add information about your "additional charges".
Because you are fulfilling for users, you have to let them know that you will charge them for those fulfillment costs. Click the checkmark box that asks this question and then fill in the description. You can add a disclaimer that looks something like this:
We are a fulfillment company. You will be charged for every order that we fulfill on your behalf.
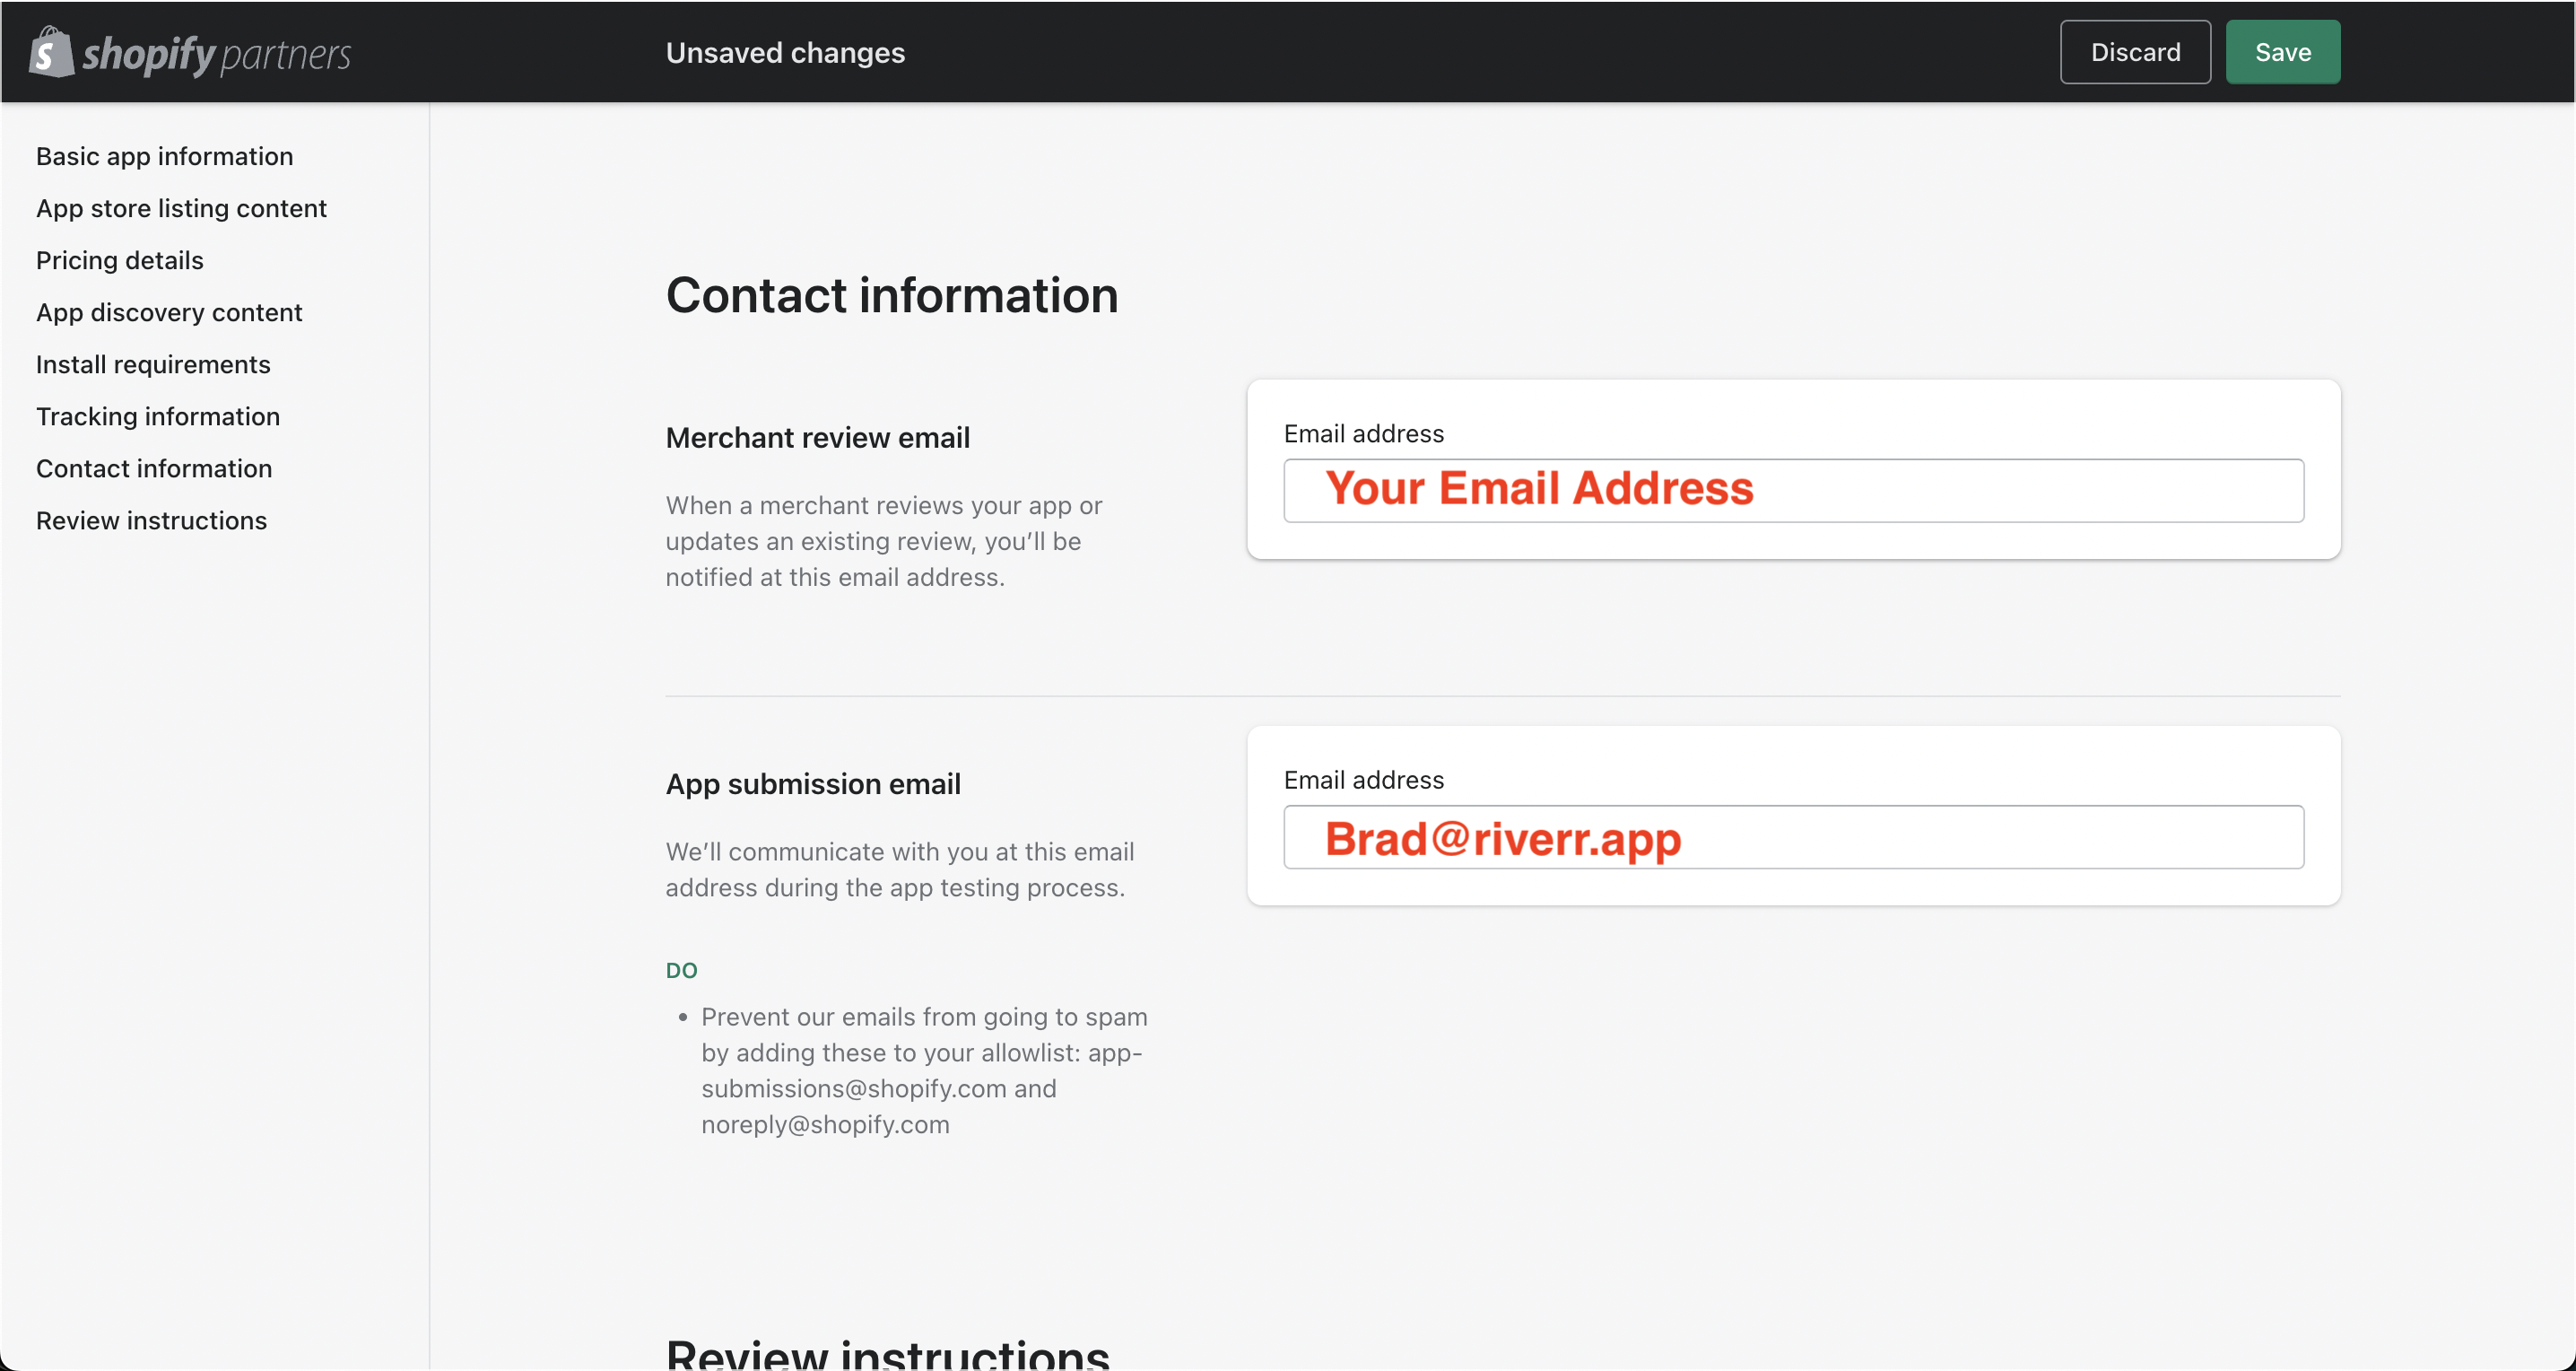
7. Add Contact Info
Add your email in the area that says "Merchant review email". Add our email in the area that says "App submission email."
8. Add review instructions
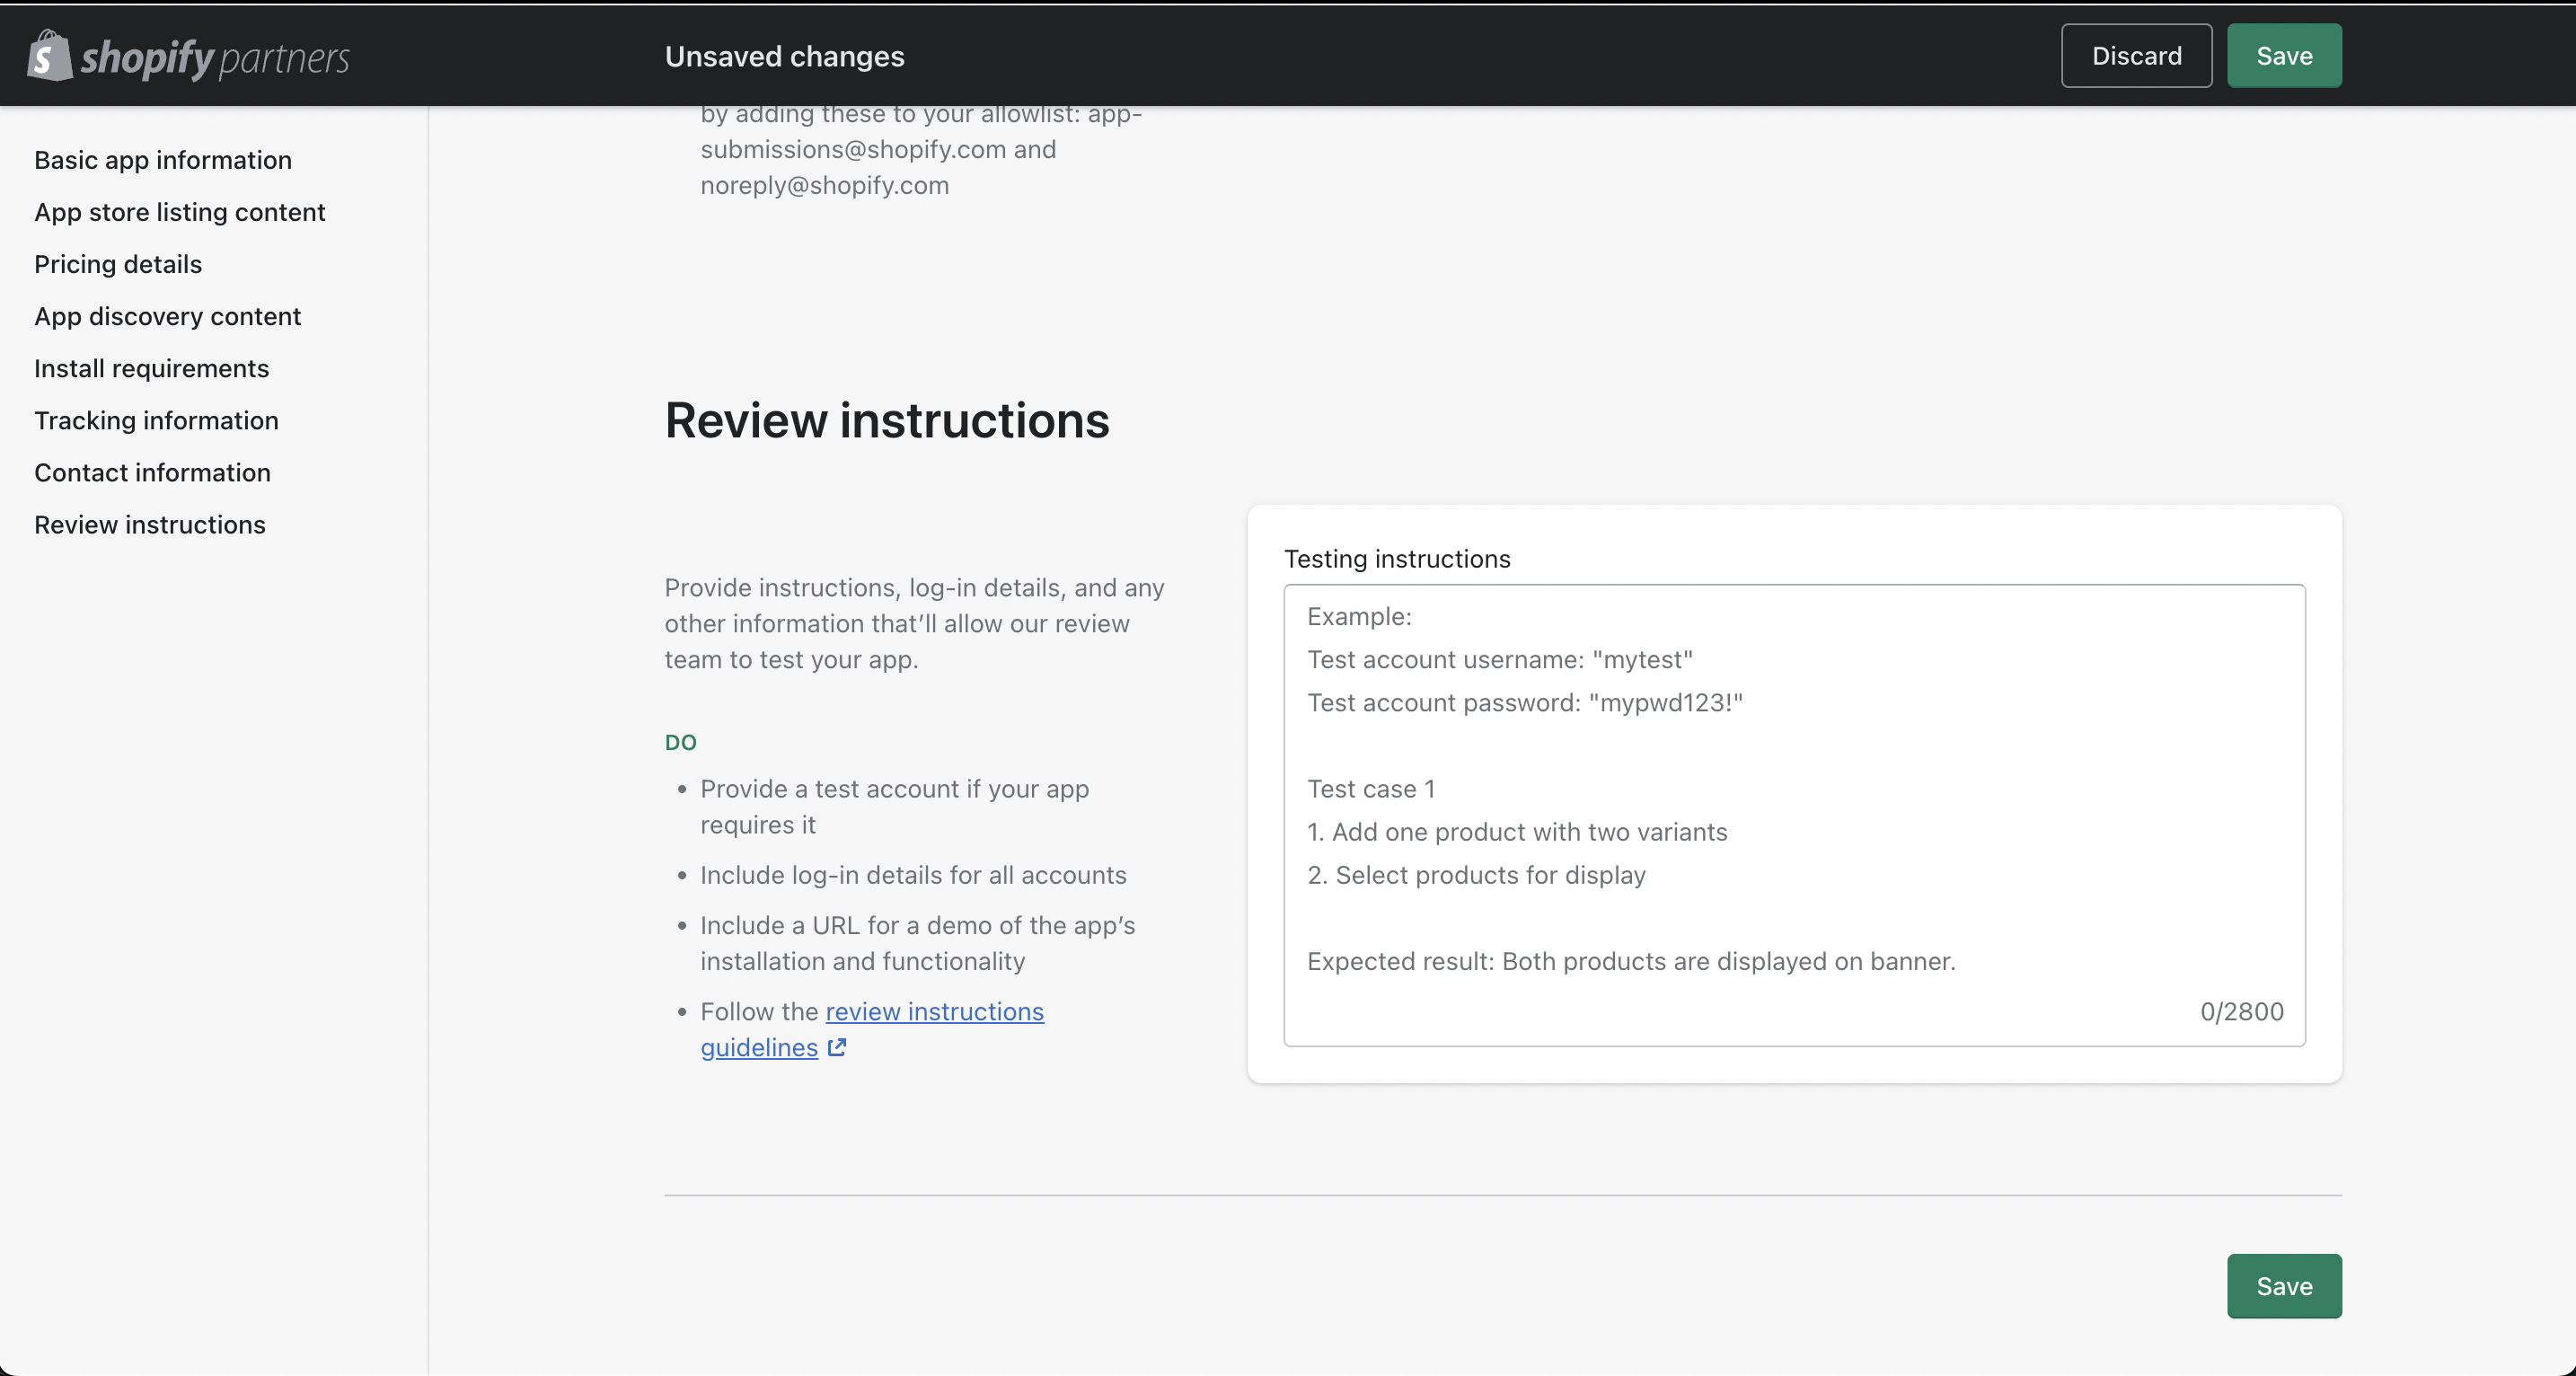
You can copy and paste this information for the final question:
1. Download the app from Shopify App Store.
2. You will be automatically taken to your dashboard.
3. Your orders and listings will start to automatically import.
4. When orders first start coming in, they will be in the "unsynced" tab under "Orders." This means that they cannot yet be fulfilled. They must move to the "Active Orders" tab for them to be usable for the admin.
5. In order to sync listings, simply click the "Sync Listing" button on the order details page and begin to add the necessary information. When everything is filled in, save the listing. Once the variation is saved, the order will automatically go to the admin account, and will be available for fulfillment.
Here is a video showing how to sync a listing that is connected to an unsynced order: https://www.loom.com/share/e5d1870a0696489fa501825be2b06d3b
Email me at [email protected] when you think you have completed this page.