One of our favorite parts about Riverr is its ability to generate purchase orders automatically. It will tell you exactly which items you will need to buy to fulfill your orders, and it will bring in all the information you will need to make the purchase, including prices and stock levels at your favorite distributors.
Before we get to the fun part, though, we need to make sure that everything is set up correctly so that our items will naturally flow into the generated purchase order. Below are the mandatory steps you will have to work through before you will start to see any content on the PO page.
Step #1: Sync your listings!
Step #2: Add your distributor account information
You add this information by navigating to the "Integrations" tab. On this tab, you will find all of the distributors that we integrate with.

After adding your credentials, you will also have to choose your default location. This is the location that Riverr will use when searching for inventory the first time. This can be changed on an individual basis a bit later.

Step #3: Add a shipping address
You can either do this on the first page when you are setting up your purchase order, or you can navigate to the Shipment>Settings page. There you can set up your address that you will use for POs and for making labels for your orders.
After you have finished these three steps, you are now ready to see your generated purchase order! Yay!
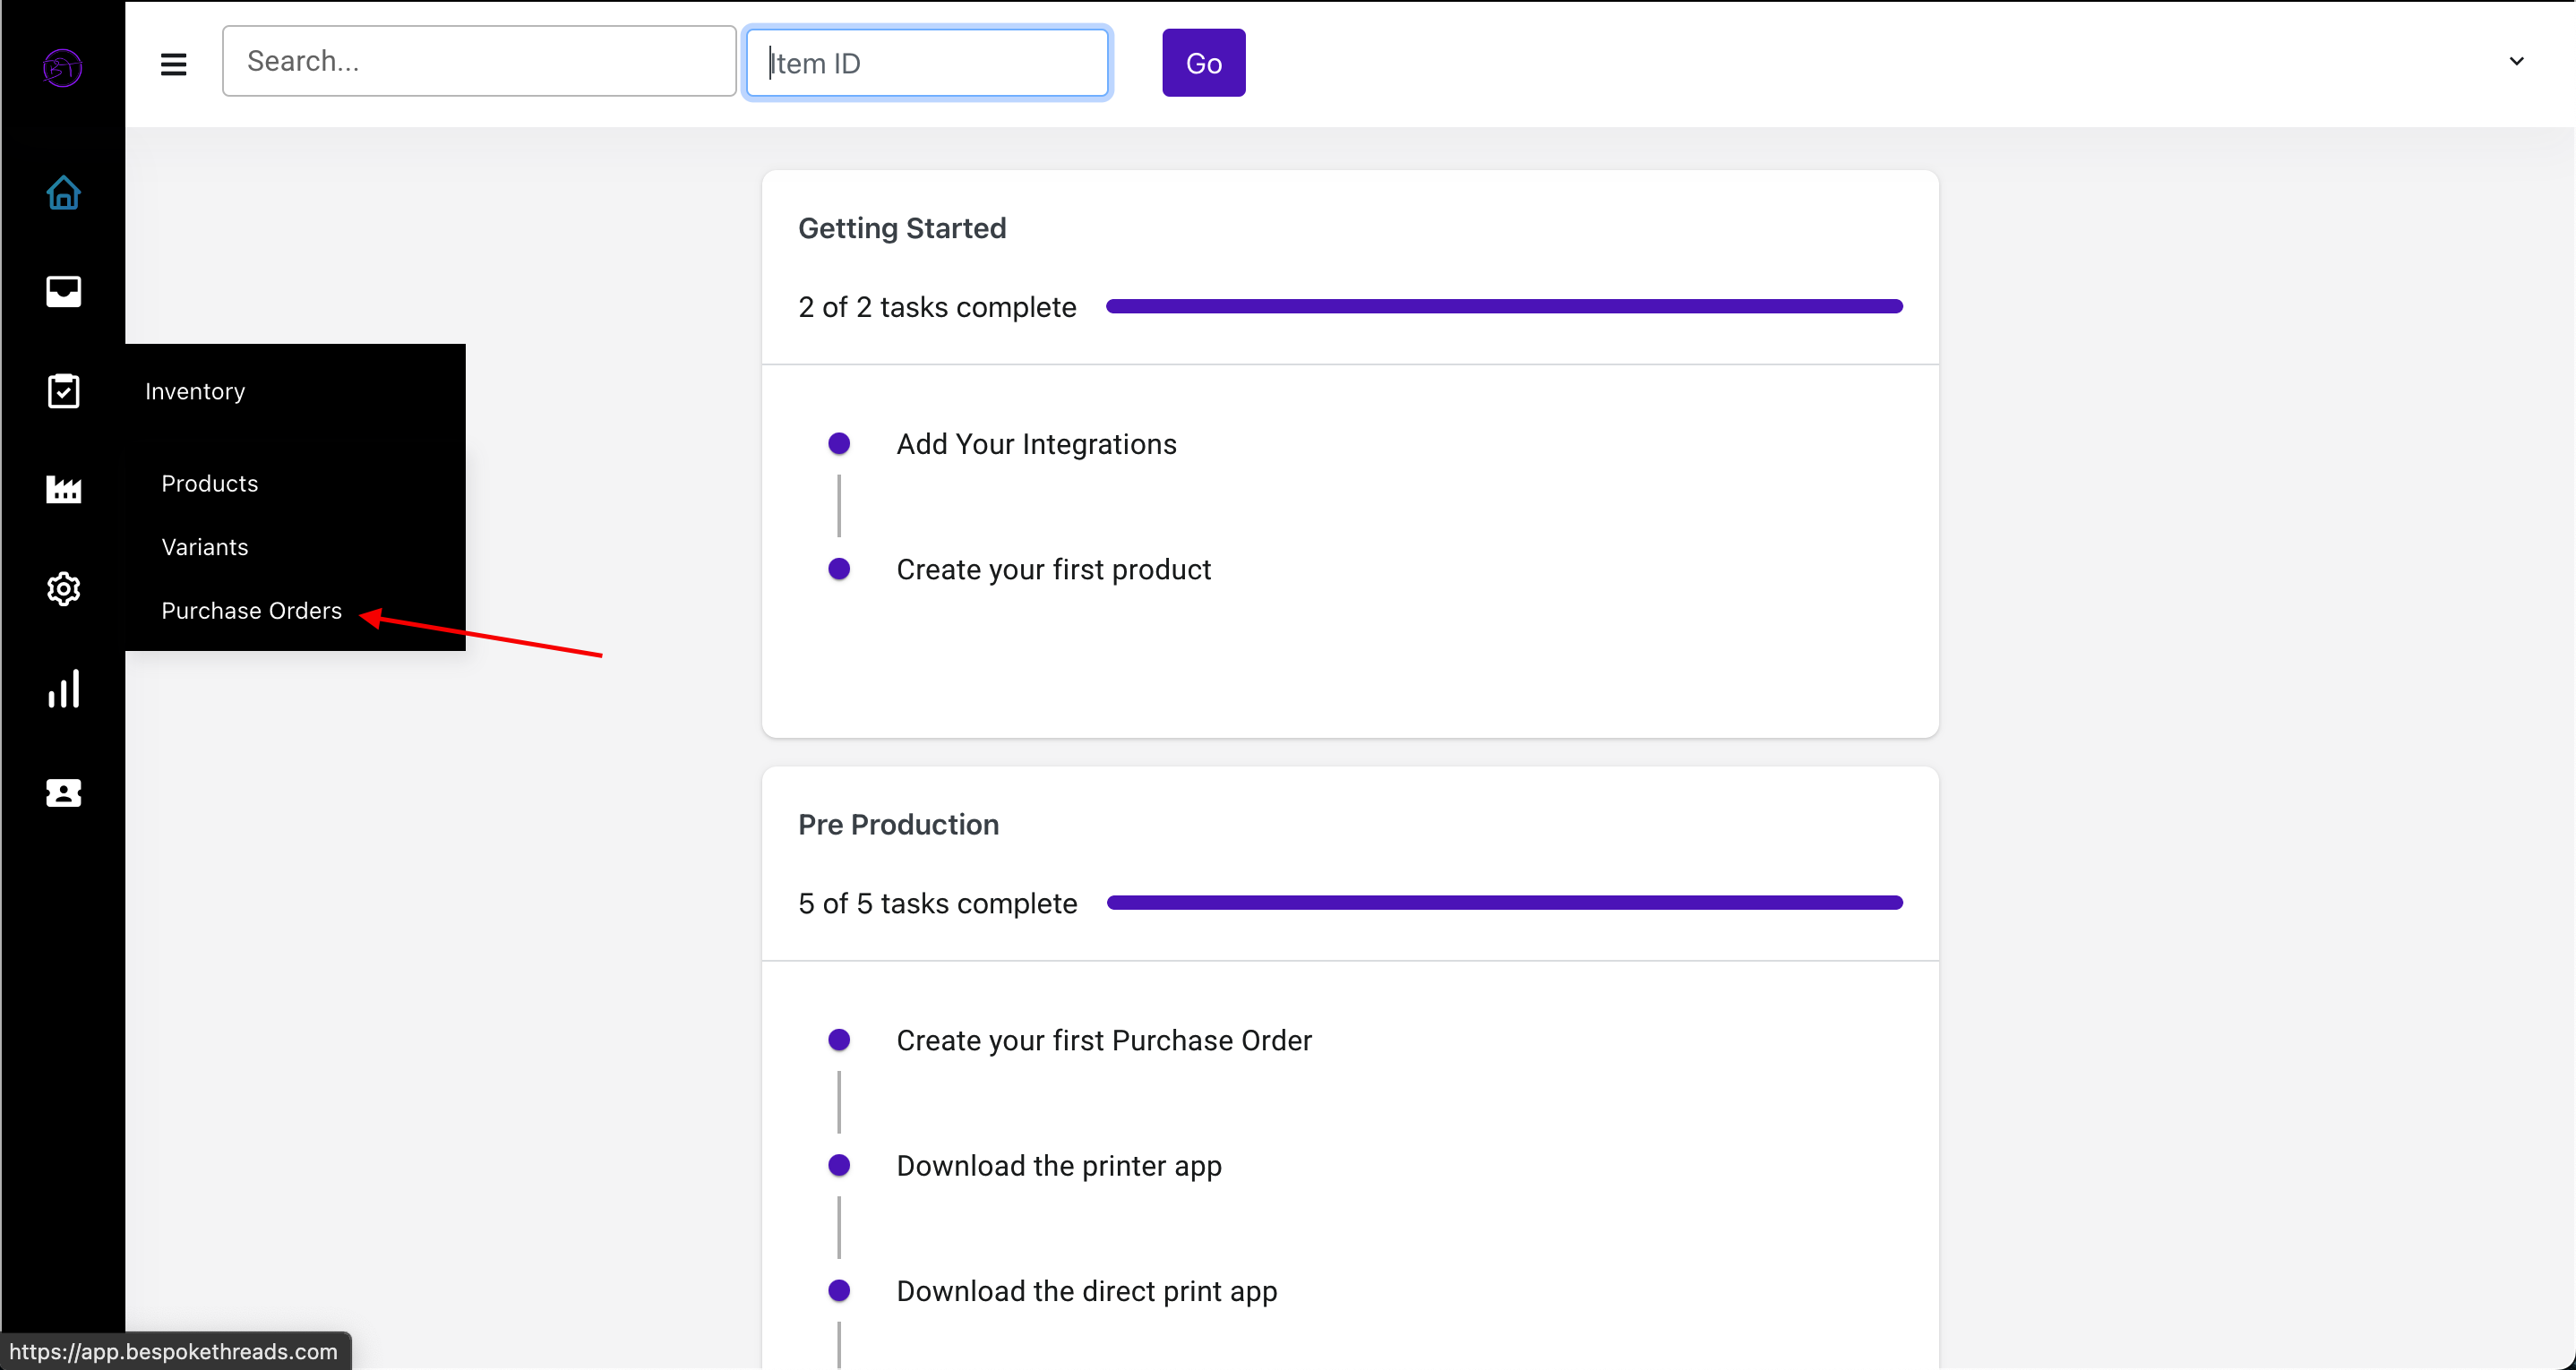
To do this, navigate to the "Purchase Orders" tab.
Next, you will click on "New Purchase Order."
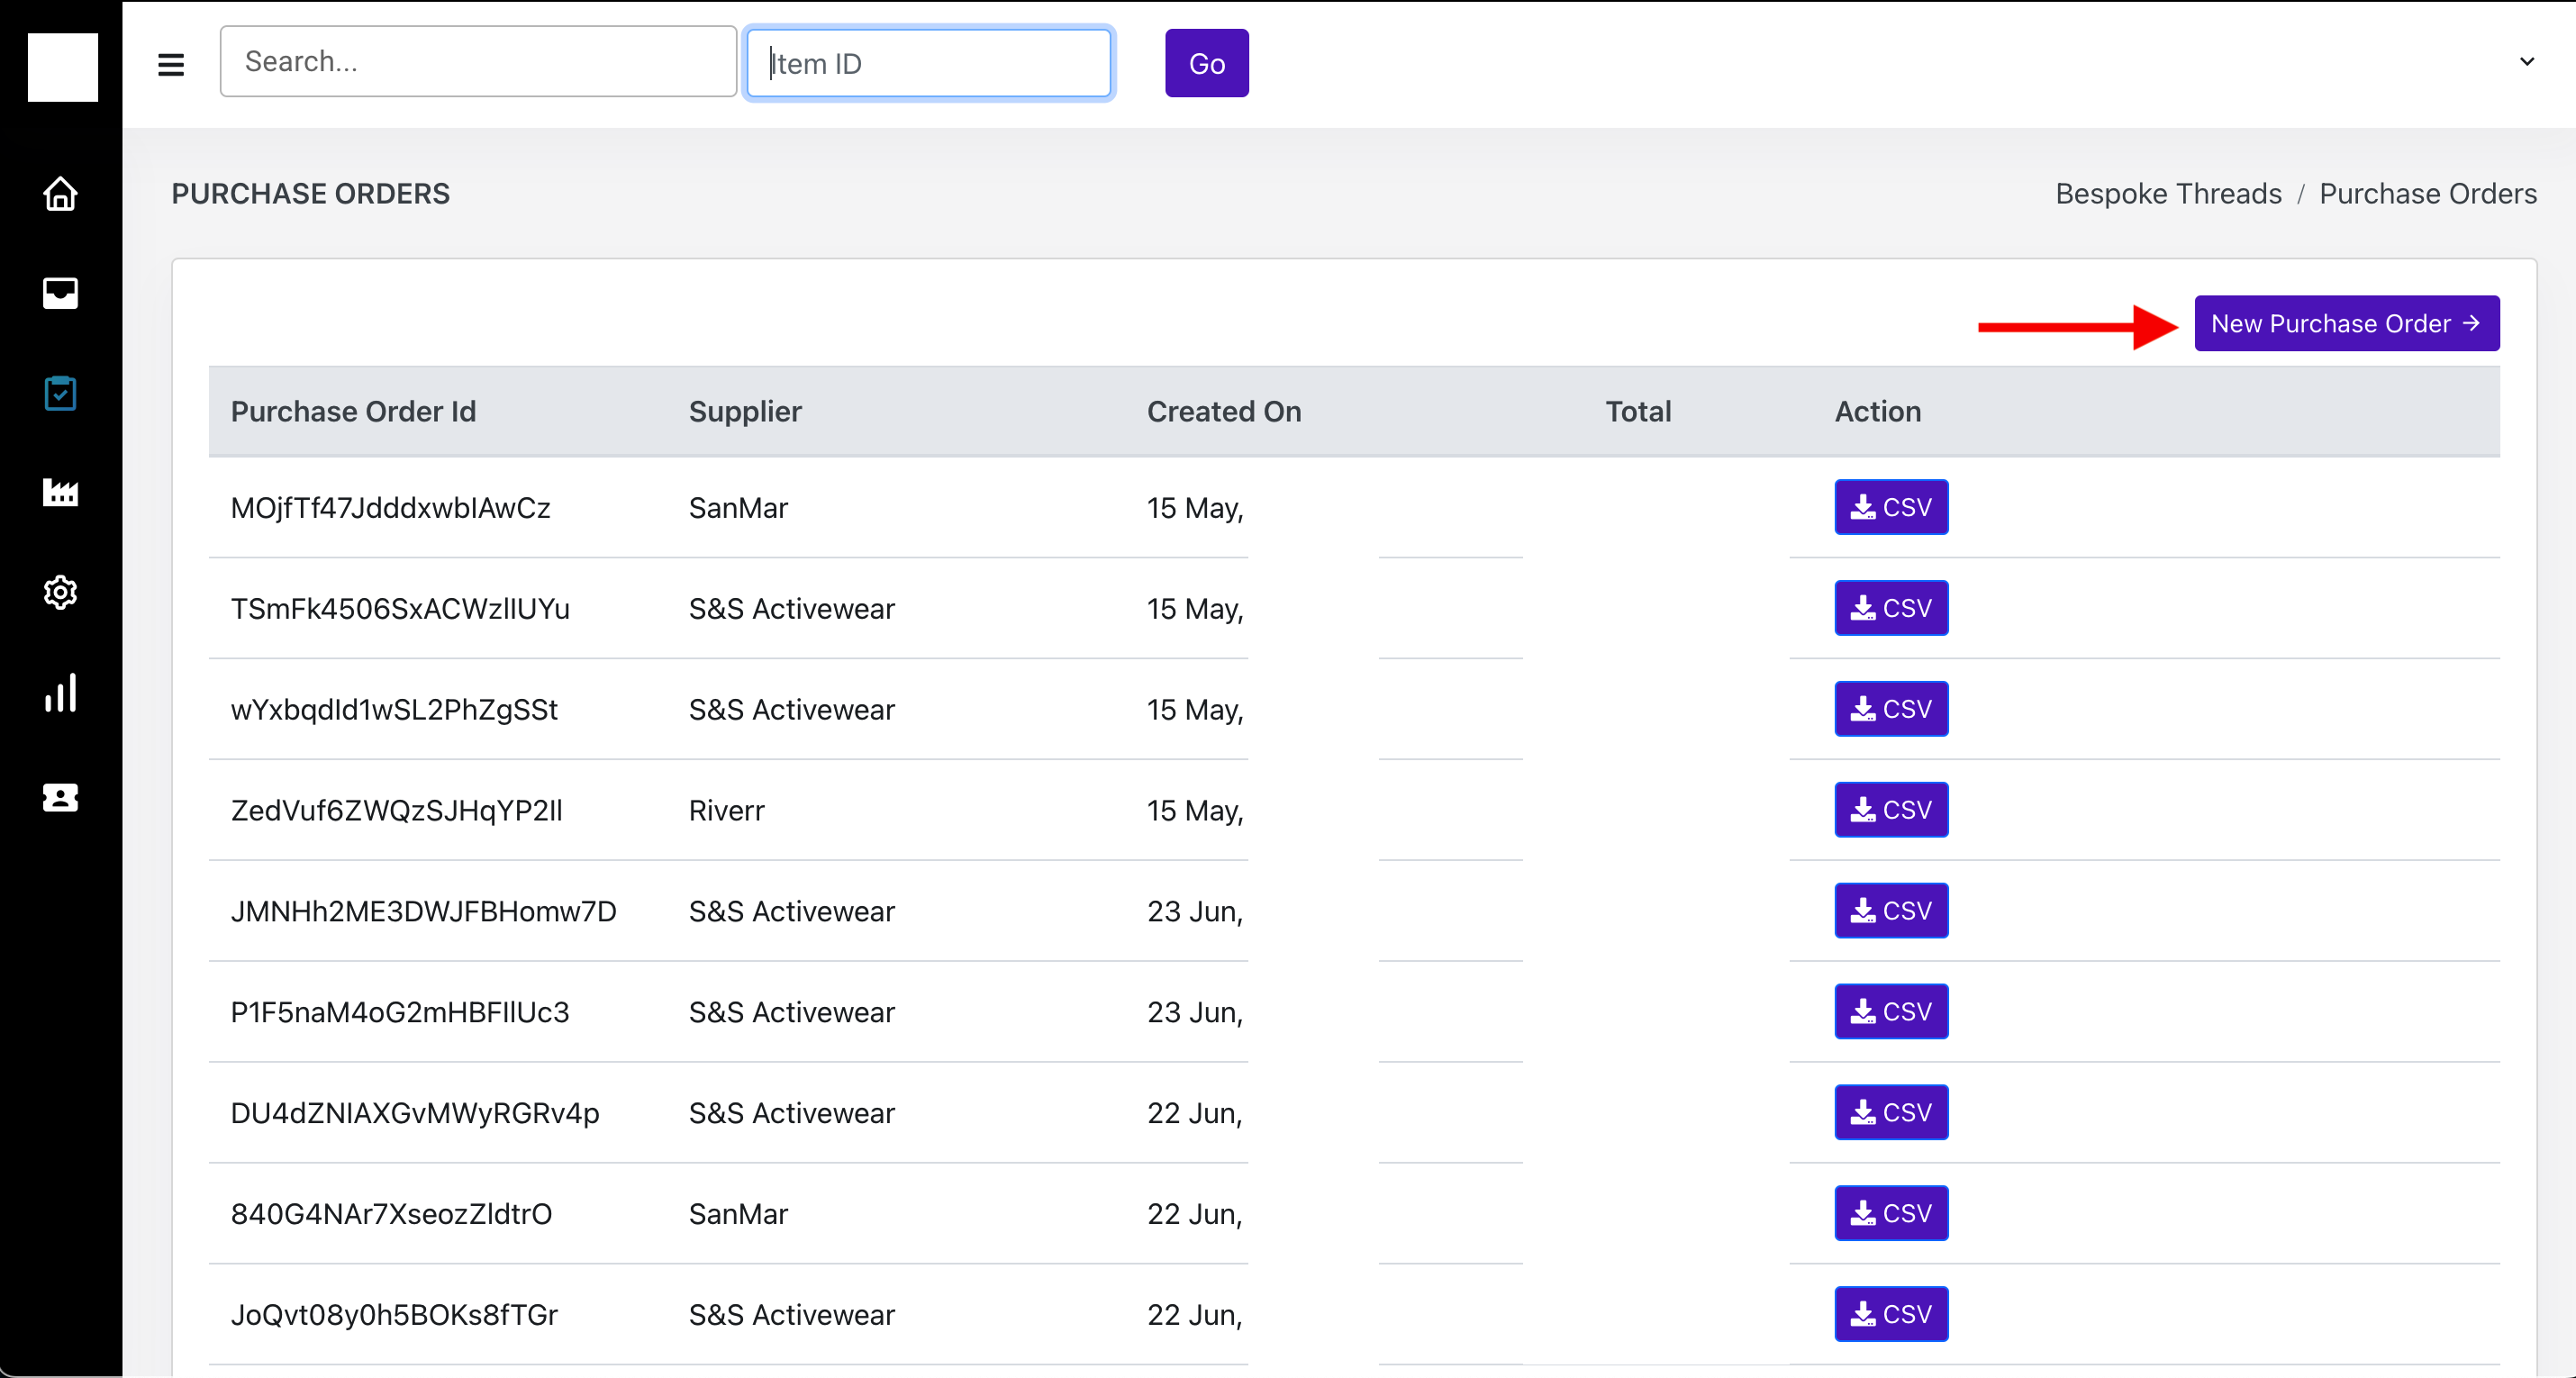
Now the page will load for a bit. This is because it is fetching pricing and inventory levels from the distributor for all of your items.
Next, you will enter your address or choose one that you created in the shipping settings.

After you have entered your address, you will need to click on next, which will finally bring you to the purchase order page! Here is what it will look like:
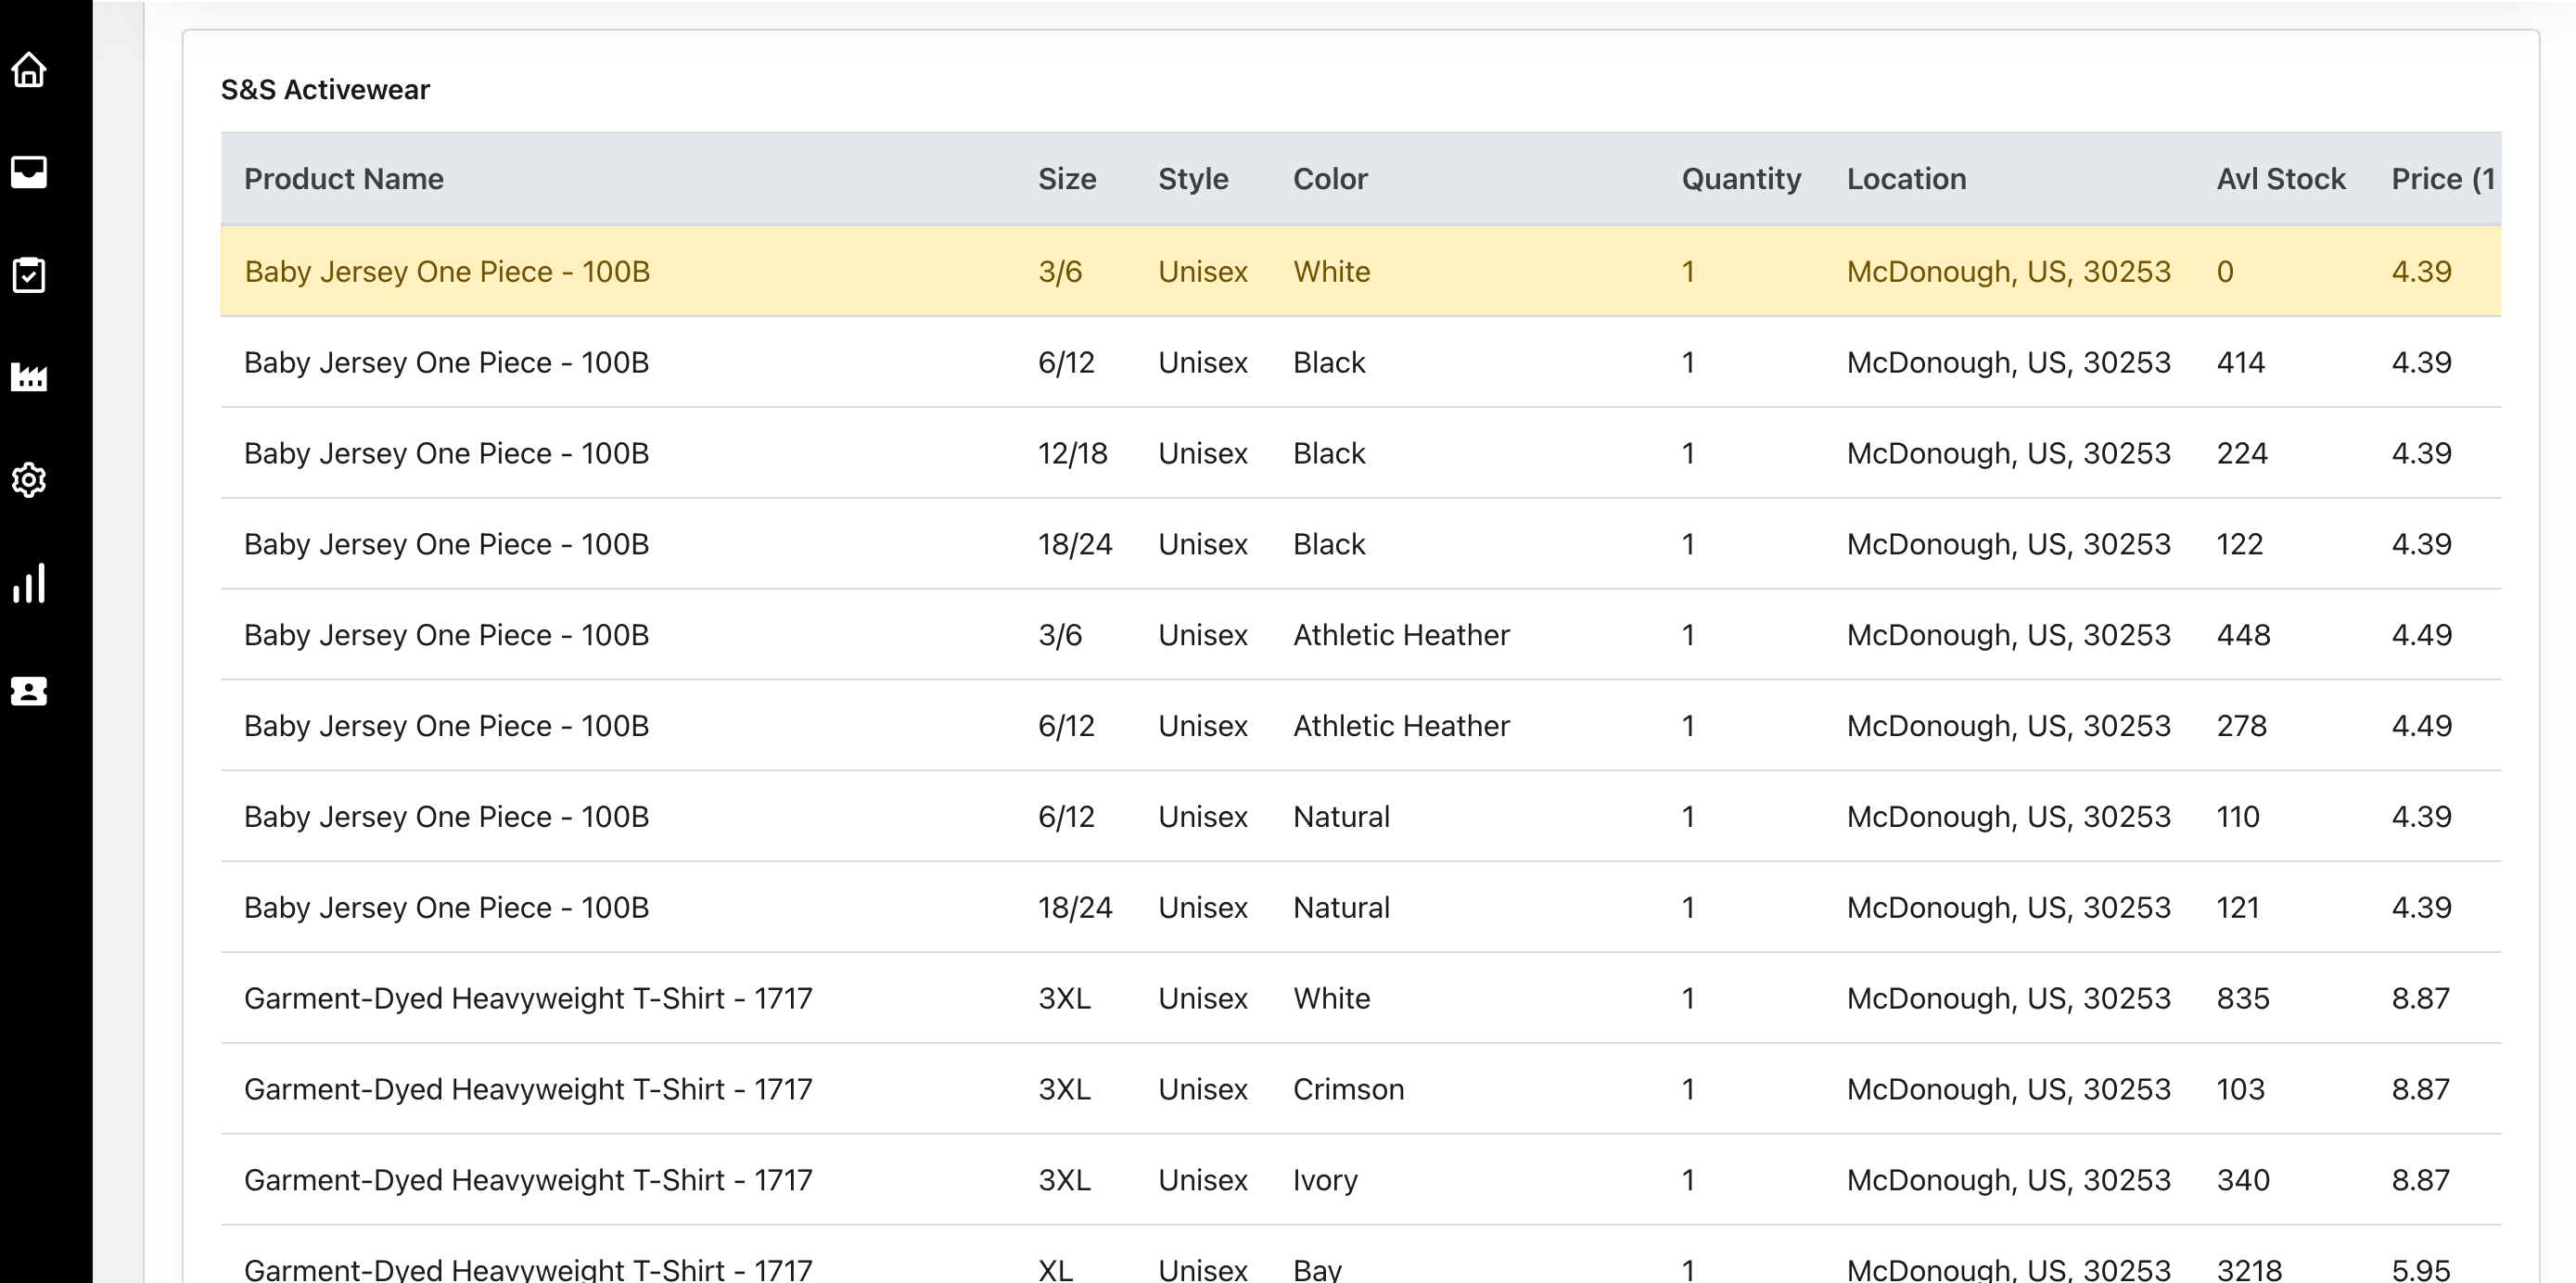
I want you to notice a few things on this page. First, you will see some white cells and some tan/brownish color cells. The tan one, like you see here, means that there is not enough inventory at this location to fulfill your order. (You will notice this under Avl Stock as well.)
If there is not enough stock, you can change the warehouse location, change the supplier, or even change the product.
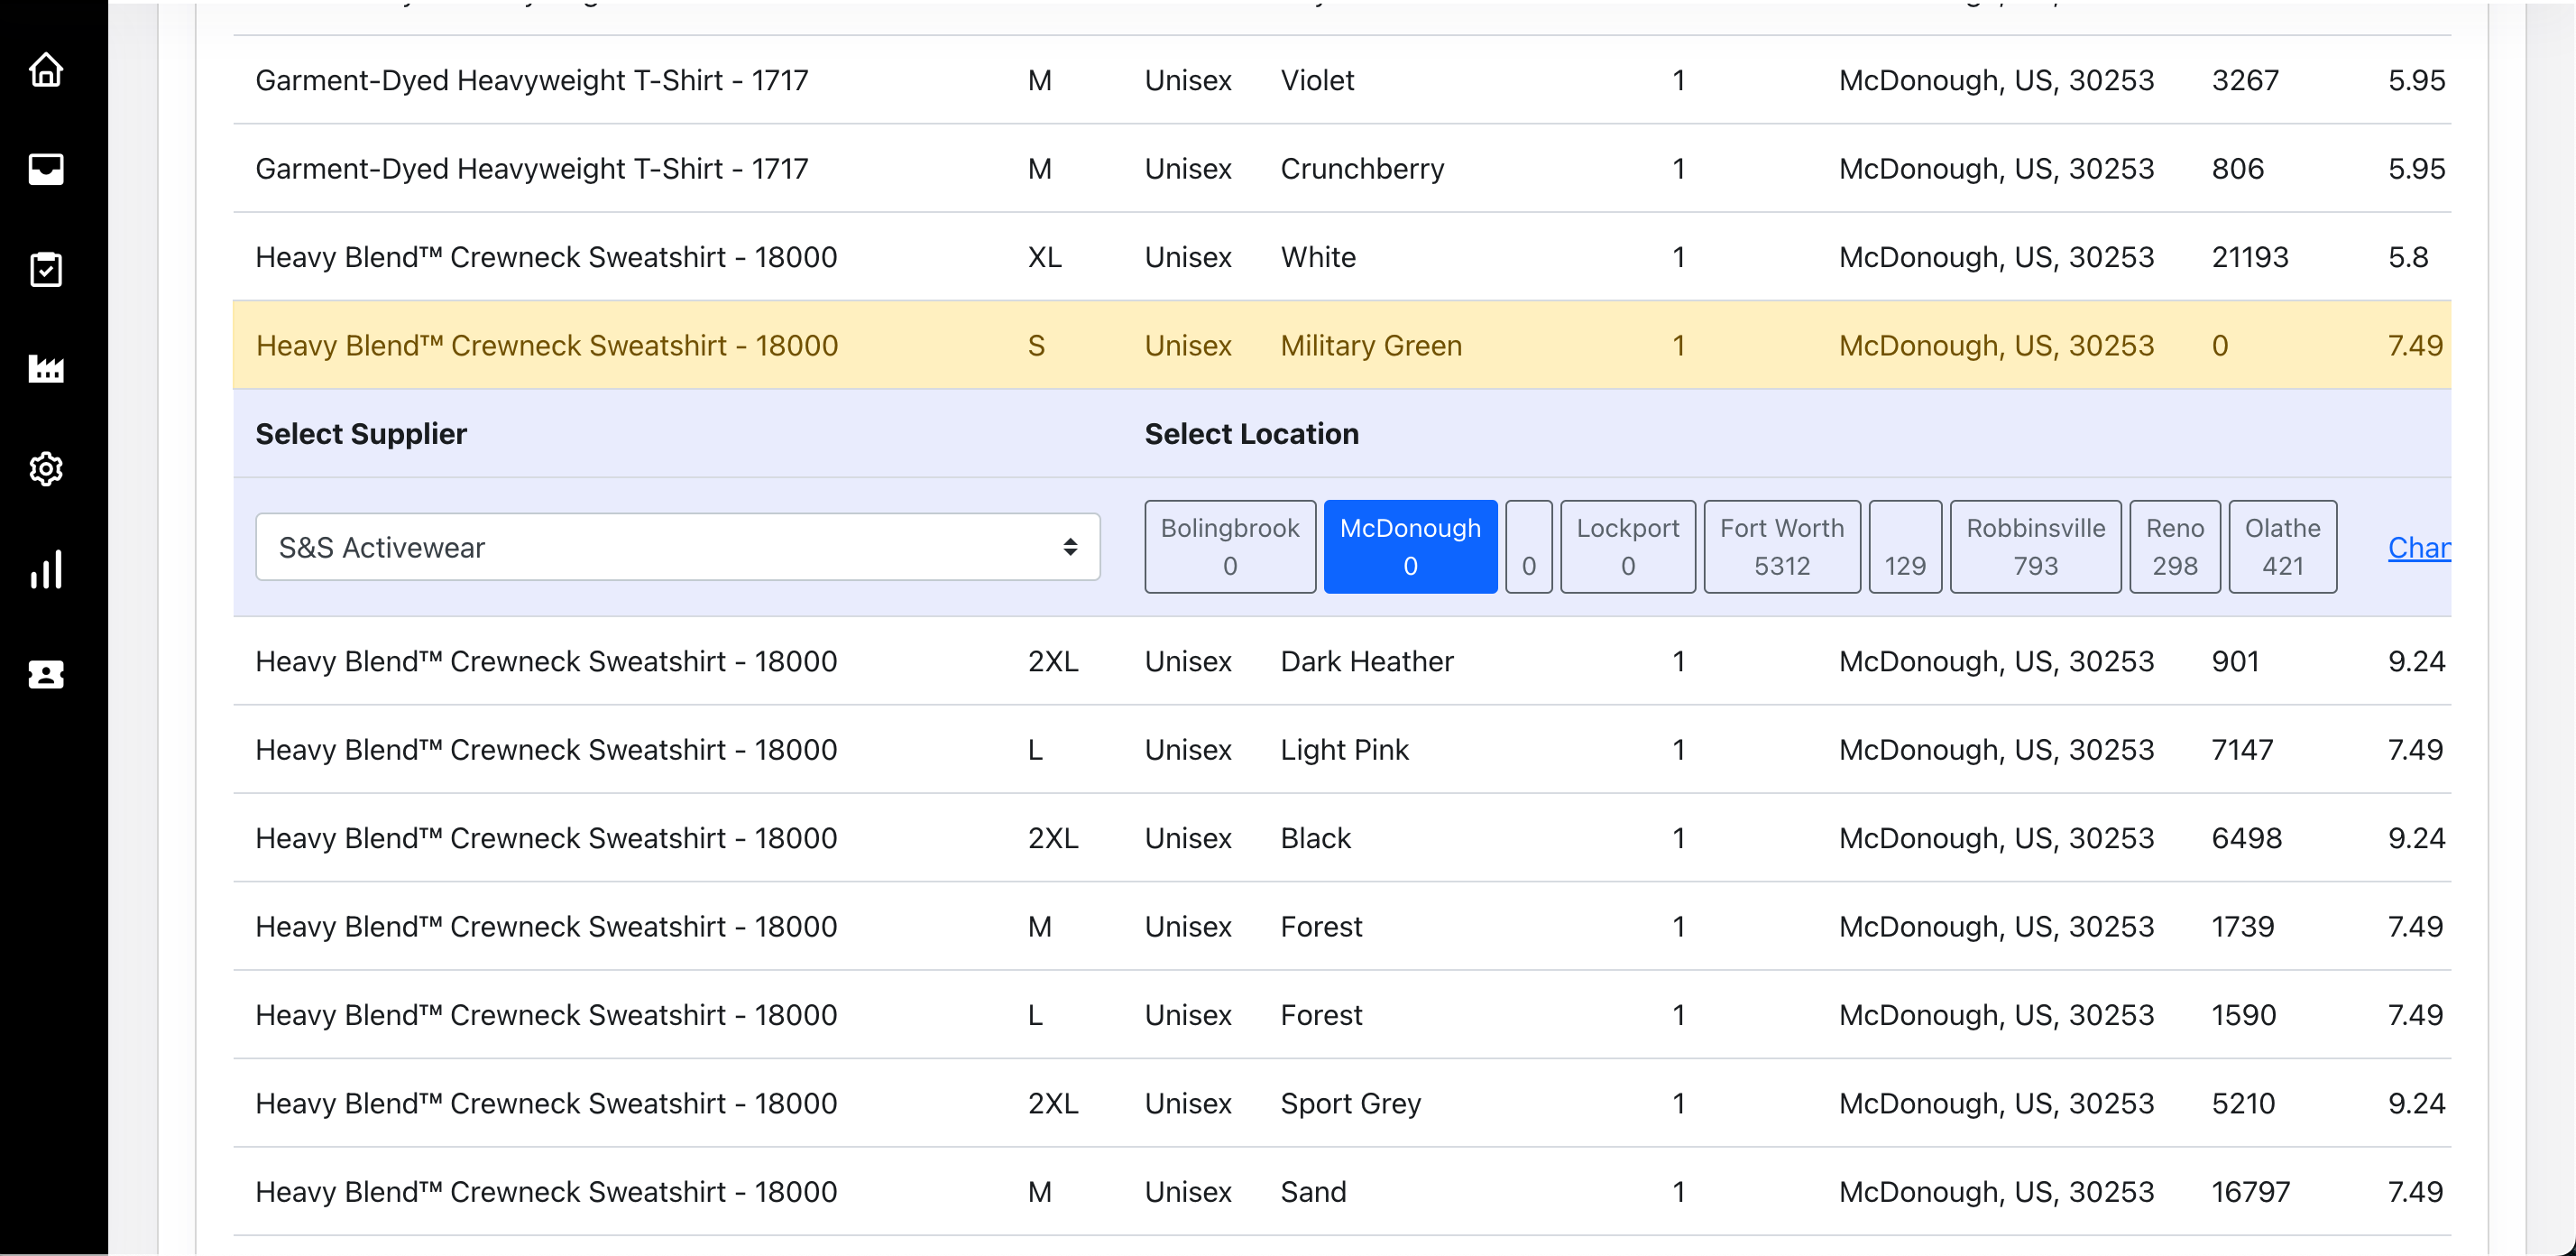
Option 1: Change the distributor warehouse location. This will keep the same product and the same distributor, but it will change the warehouse that you will be ordering from. This could mean that you will be waiting longer than usual depending on the location of the warehouse.
Option 2: Change the distributor/supplier. This is done by clicking on the dropdown button in the screenshot. If a different distributor carries this product and you choose that distributor (Such as Sanmar) it will then show the availability of the item at their distributor locations as well.
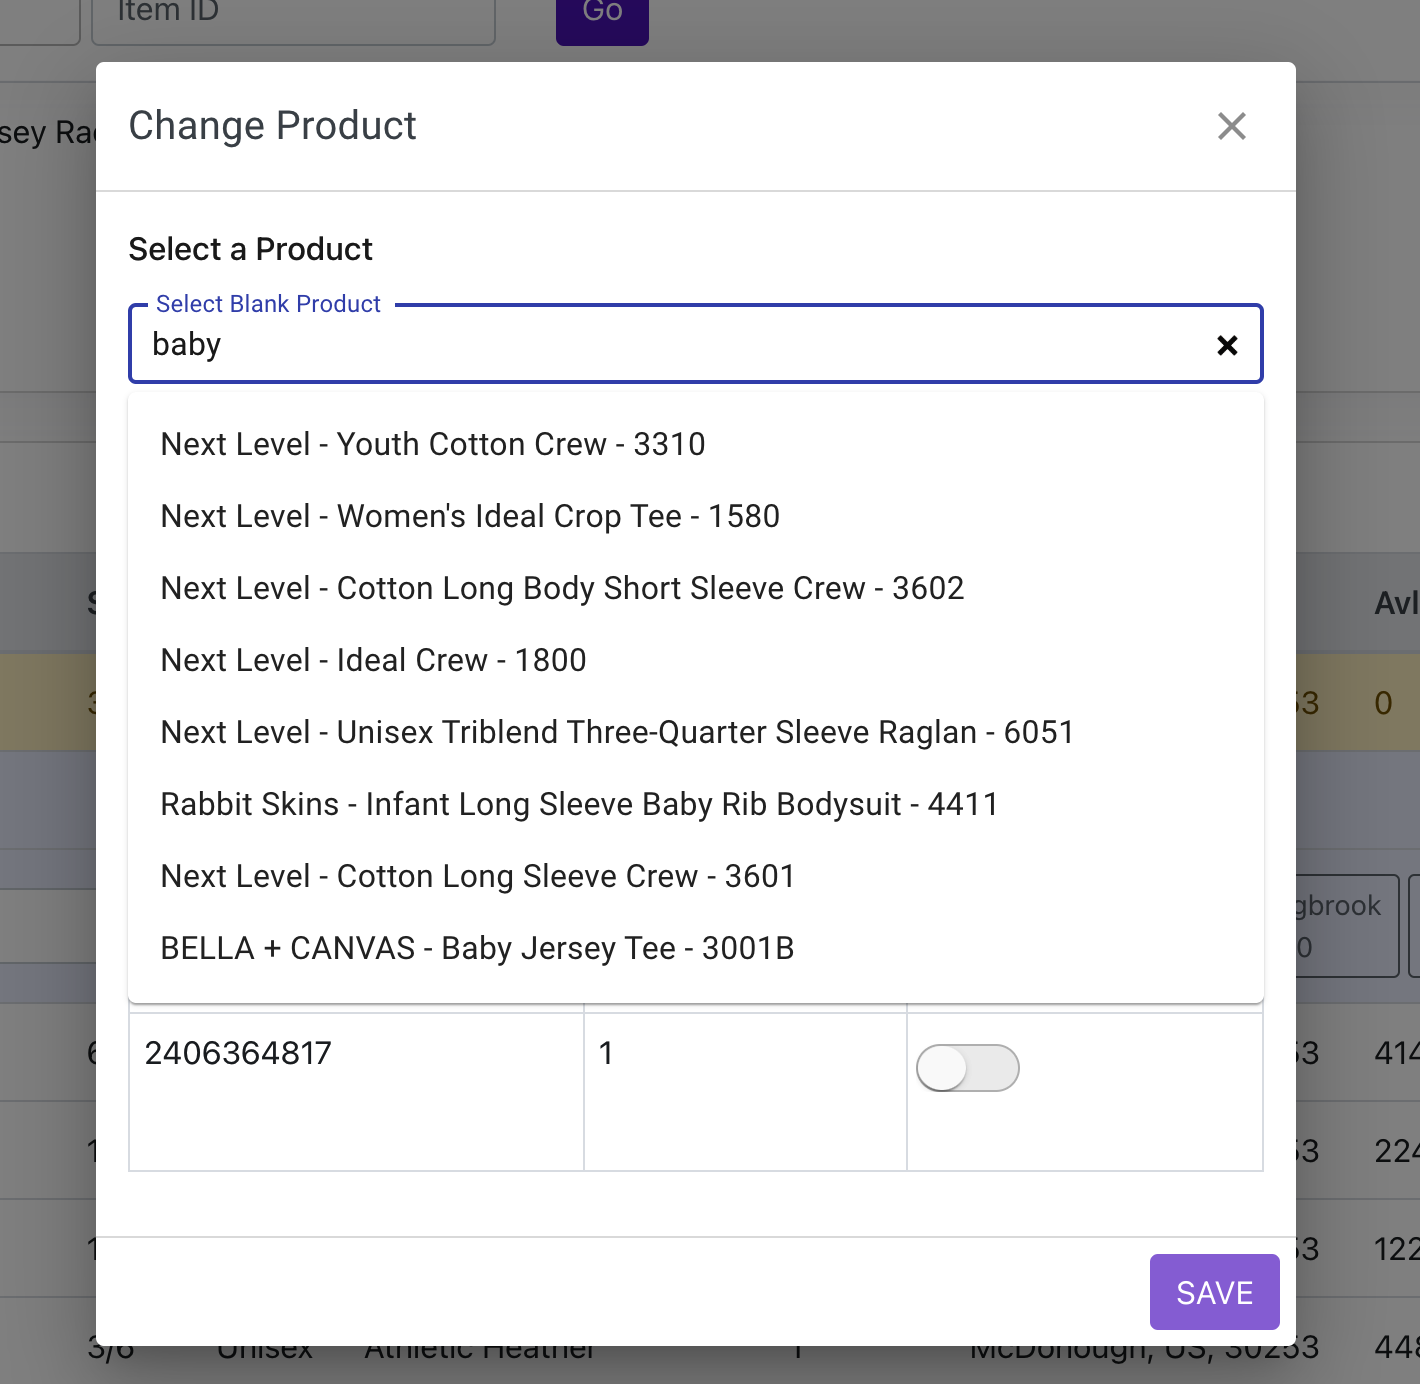
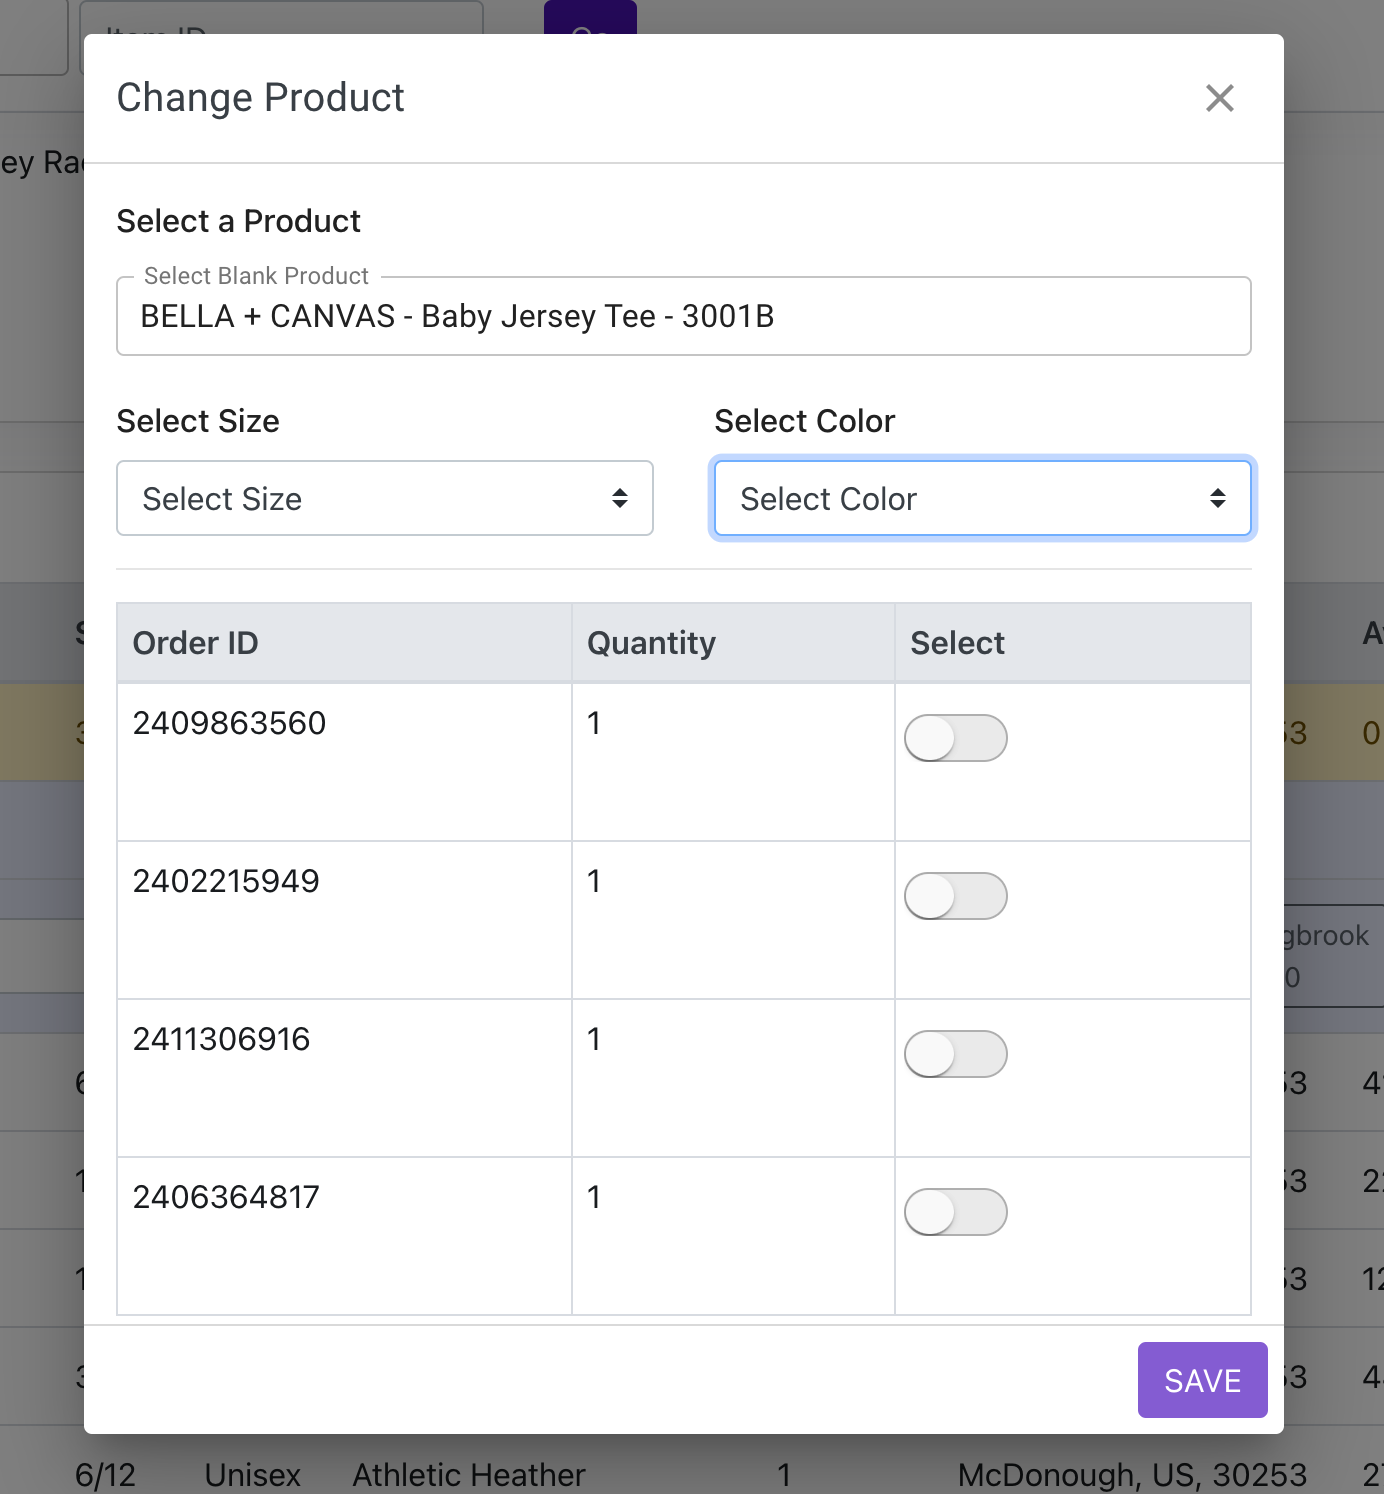
Option 3: Change the product. You can do this by clicking on the "Change Product" button.

Then you will be able to search your blank product catalog and find the product you would like to replace with the product you no longer want to use. You will also need to choose which items from each associated order you would like to change as well.
Once you are happy with all of your changes, you can click on "Next" at the bottom of the page.
This will take you to a confirmation page, where you can verify the items.
From this page, you can then download the CSV and mark the items as purchased. (When you mark it as purchased, it will remove these items from the PO list that was created)

After you have downloaded the CSV, you will then be able to email this directly to your distributor, and they will take care of the rest!