In an ideal world, you would have used Riverr from the first day that you started in the POD world. There are pretty high chances though that that did not actually happen and you may have hundreds of listings that are currently active across multiple ecommerce platforms. These listings need to be synced to Riverr so that you will be able to automate the rest of your processes, including purchase orders, batching, inventory, and your manufacturing workflow.
Not to worry :). We know that there is simply no way around this part, so we have optimized this in a way that allows you only sync what you need to, as well as bulk editing in any area we could.
To get started with this, you will need to have already synced an ecommerce channel to Riverr that has existing listings. If you have already done this, great. Move on to the next step.
Now that you have listings and orders that are coming into the platform, we are ready to get those listings synced. To make the best use of your time, we recommend that you only sync listings that are connected to current orders. Why? Let's say you have 300 listings currently. Do you know what percentage of those 300 you are actually selling? Statistically speaking it is not very high. This means that your focus can go to the listings that you are actually selling and leave the others to sit and wait. Where can you find these? Let me show you.
*Quick note: You only have to sync listings ONCE. After that, they will always stay synced unless you make changes to the listing variants.
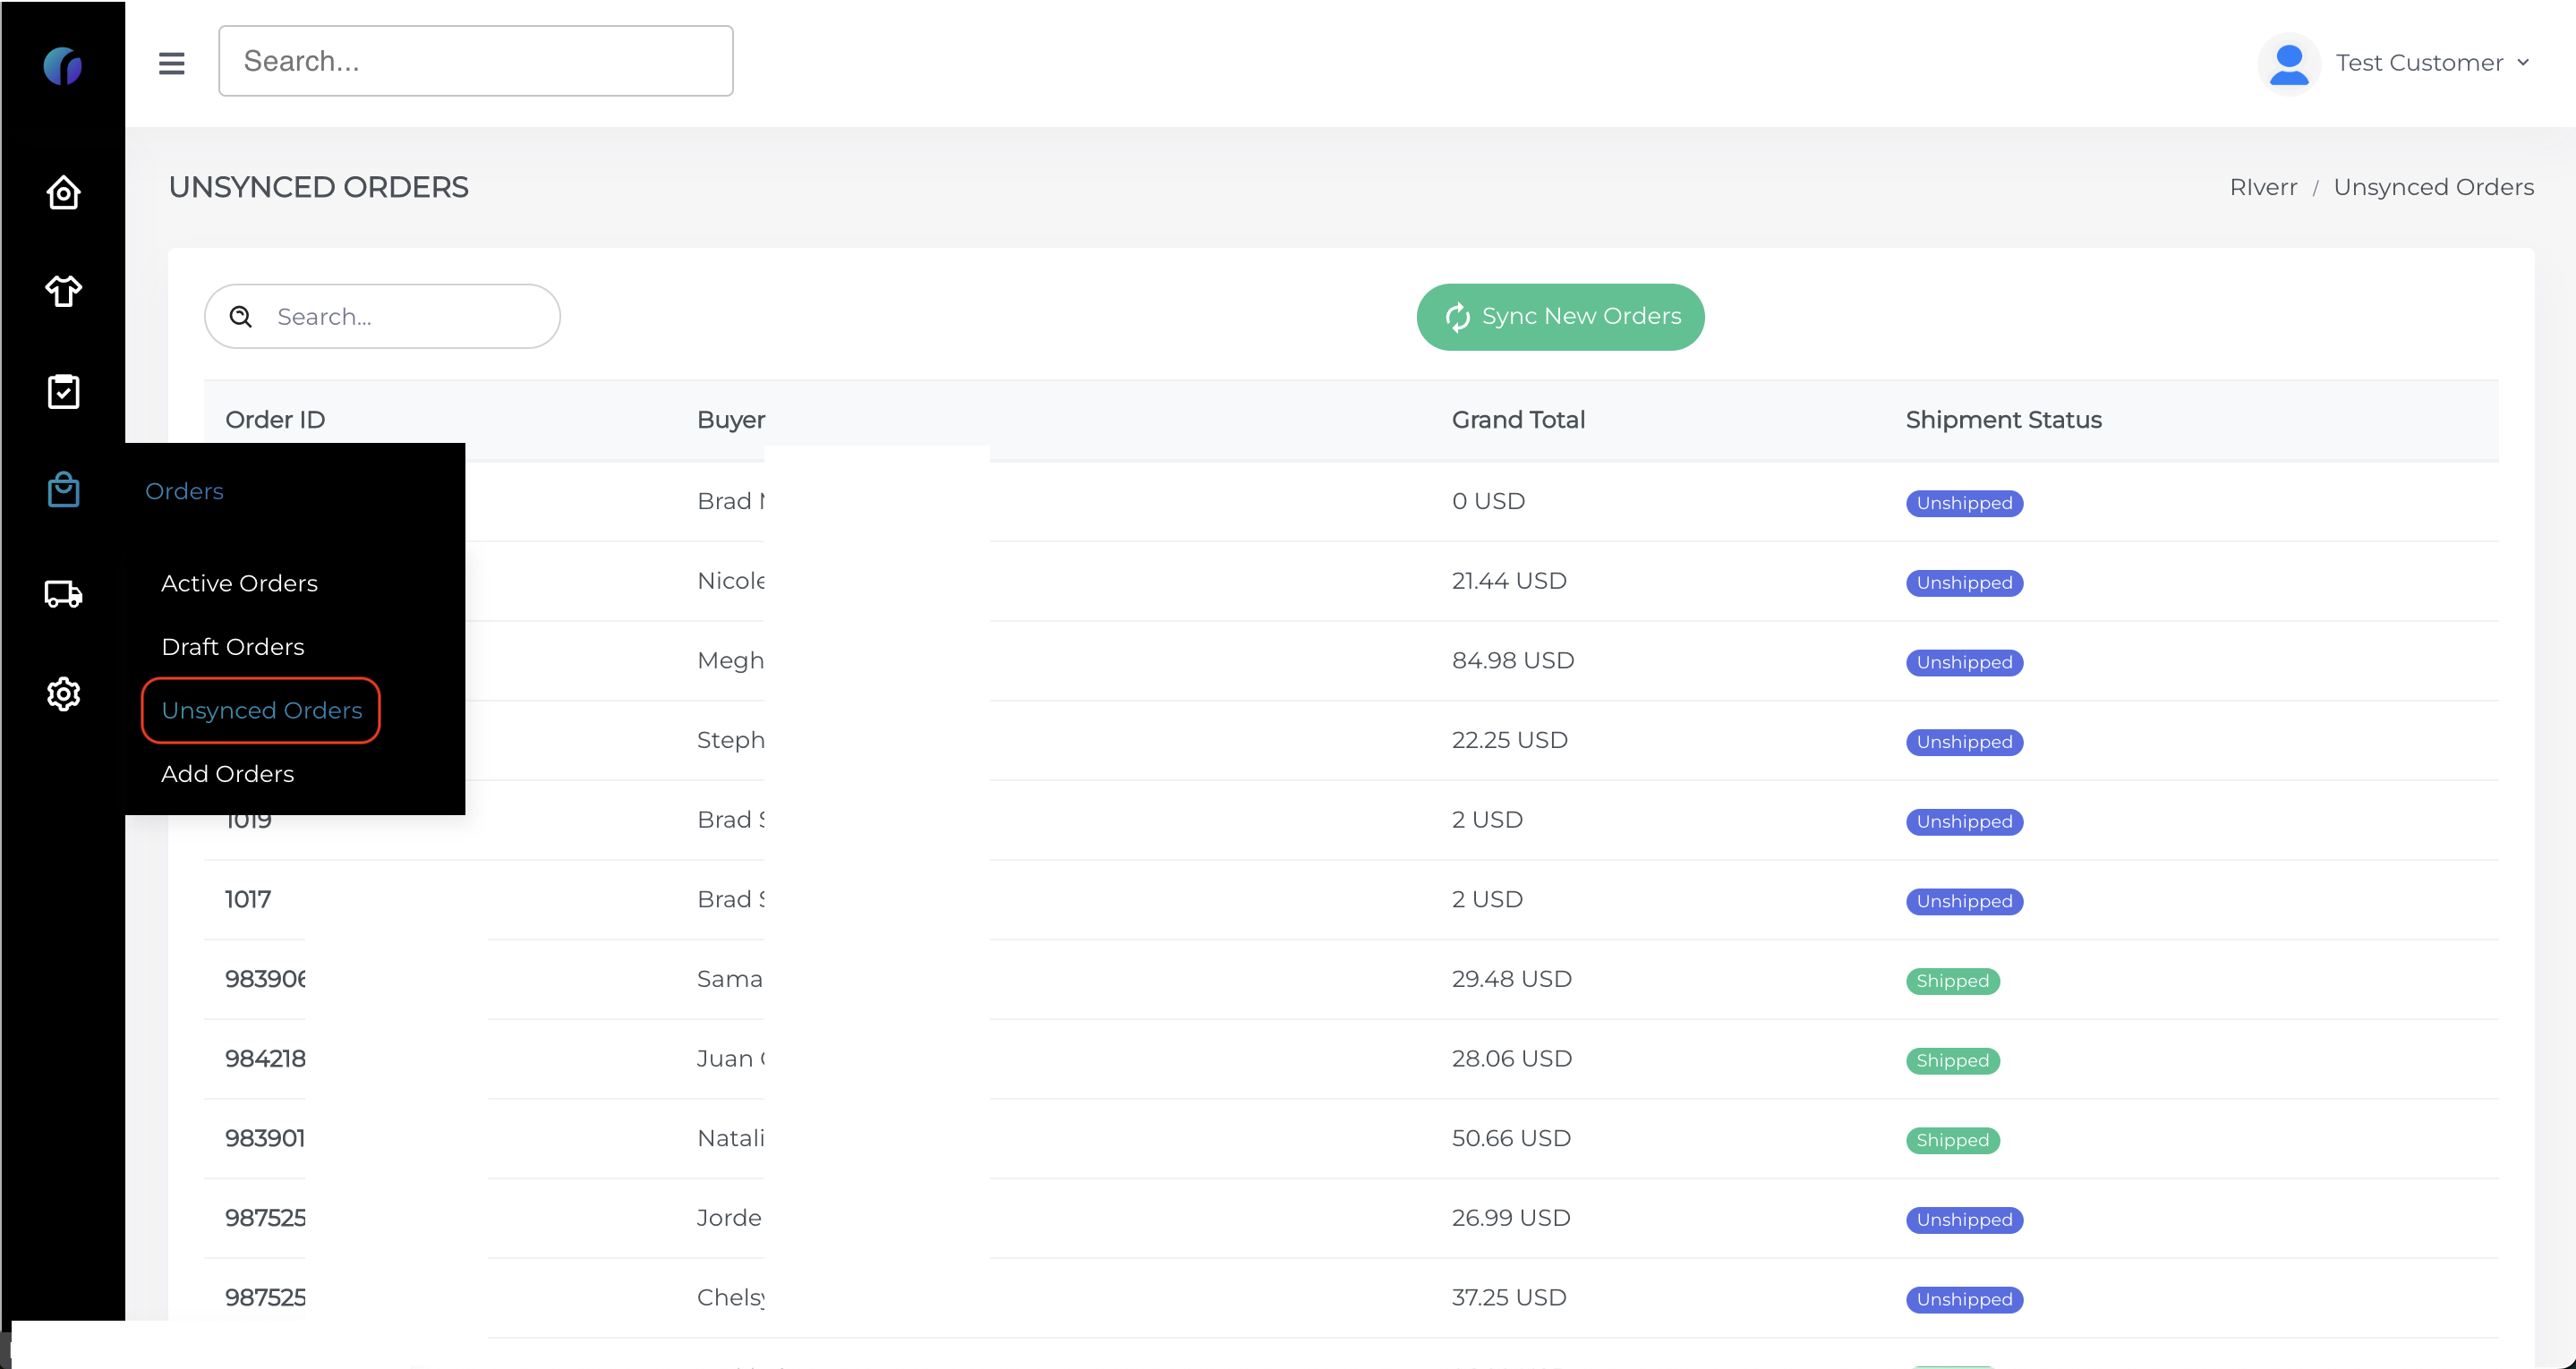
1. Navigate to the "Orders" tab and click on "Unsynced Orders."
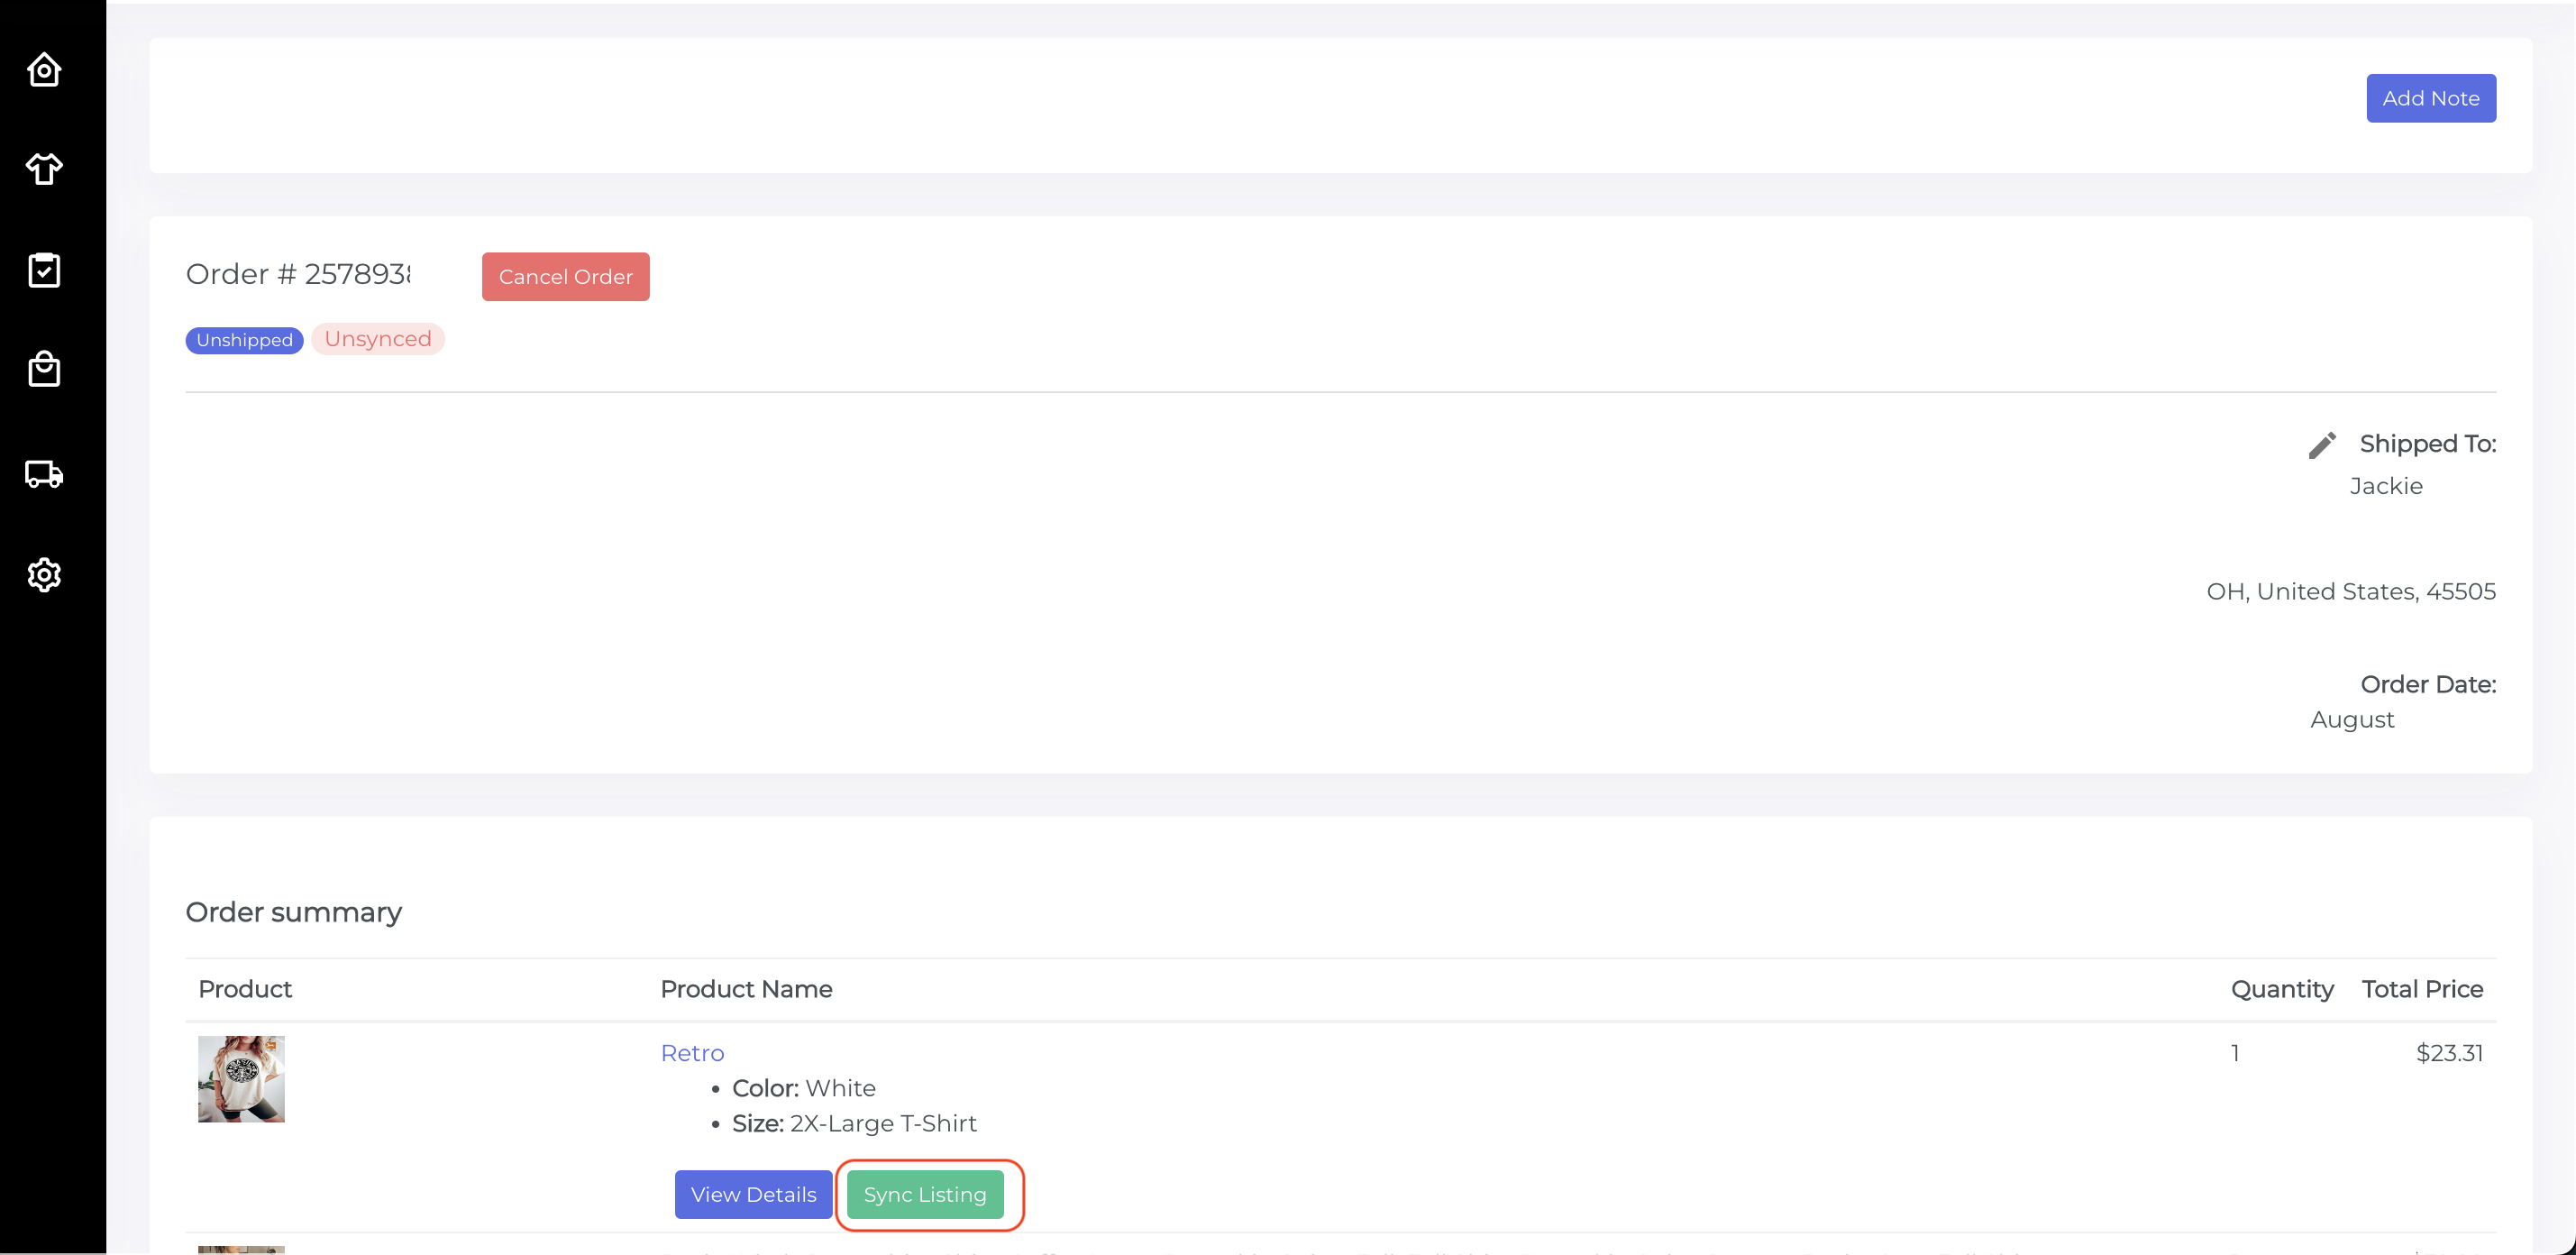
2. Next, it is generally good practice to work on orders that you would like to ship urgently first. Click on one of these orders. This will take you to the order details page.
3. Click on the "Sync Listing" button.
Now you are on the listing page and are finally ready to start syncing! We are going to start by choosing the "global" settings. This will help to minimize the work once we get down to the variation level.
4. Start by choosing if the print type.
Print on demand = This product will not have images that change for each order
Customized = This product has images that are custom for each user
5. "Ignore" Toggle: If you do not want to include this product in your workflow, toggle this!
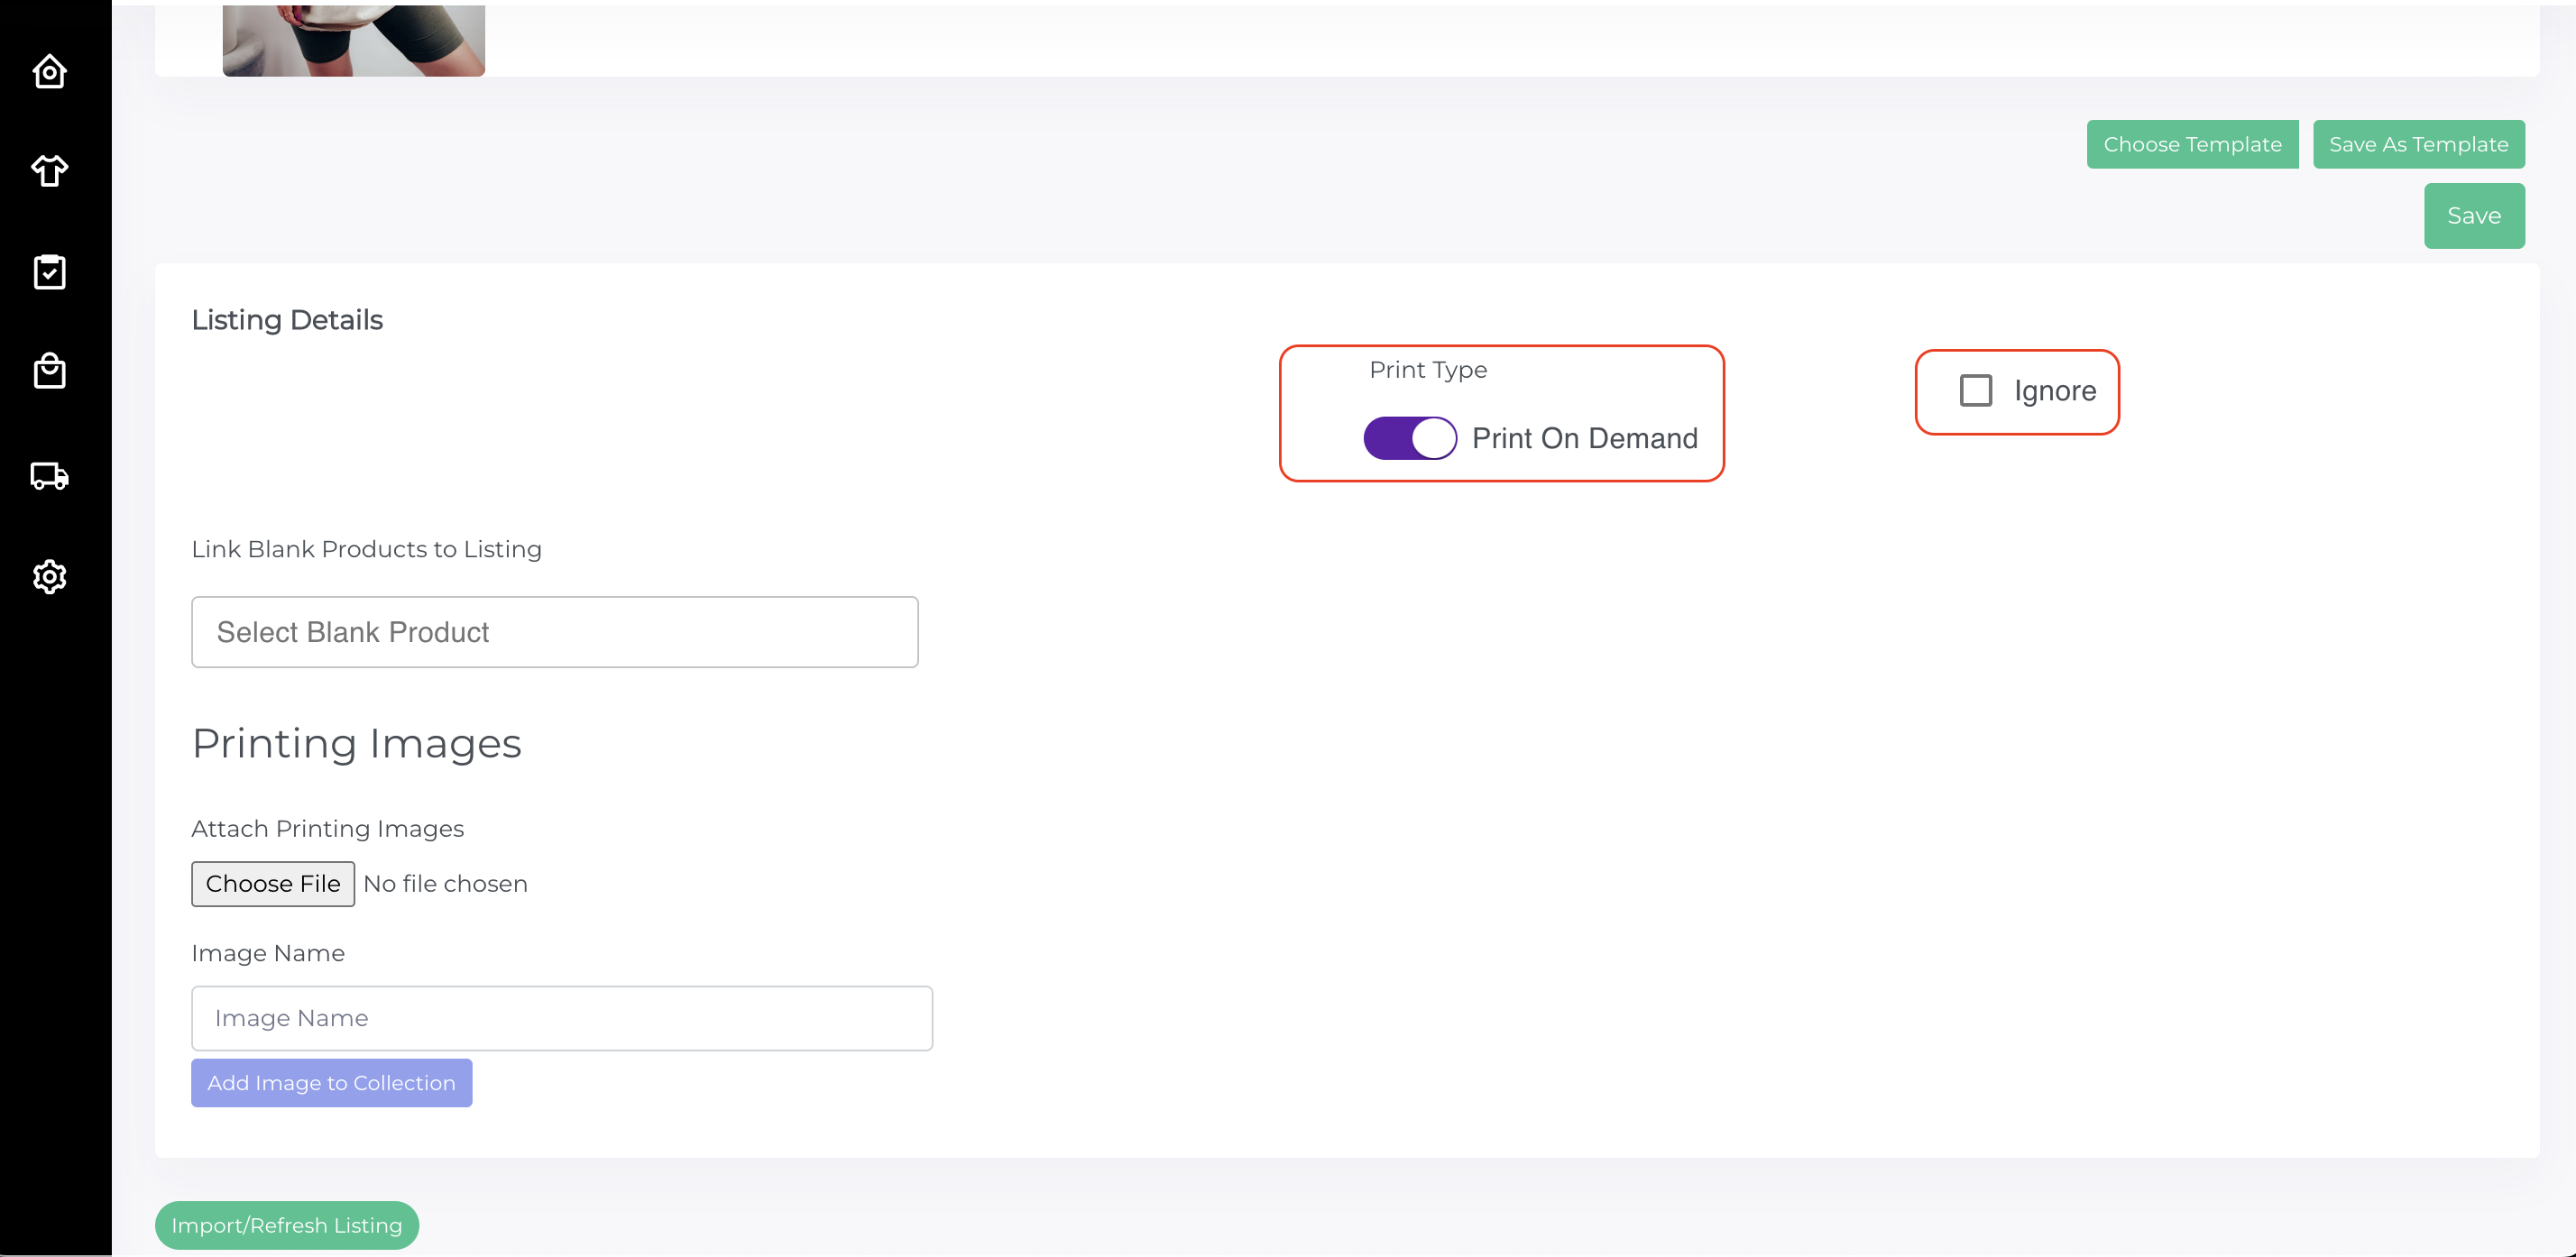
6. Choose the blank products that you are using to fulfill the variants of this listing.
![]()
7. After doing this, click on the button that says "Add Images." This will take you to the mock-up generator that will allow you to place your images in the specific area and the correct size that you would like it to be for that blank product (And for each product color).

Now you are done with the global settings. These will narrow the options and speed up our next job. Let's move on to the variation level.
8. Connect the correct attributes for each variation.
There are a few tools that will help you here.
Filter: The first is the filter on the left side. You can use this to filter items such as item color.
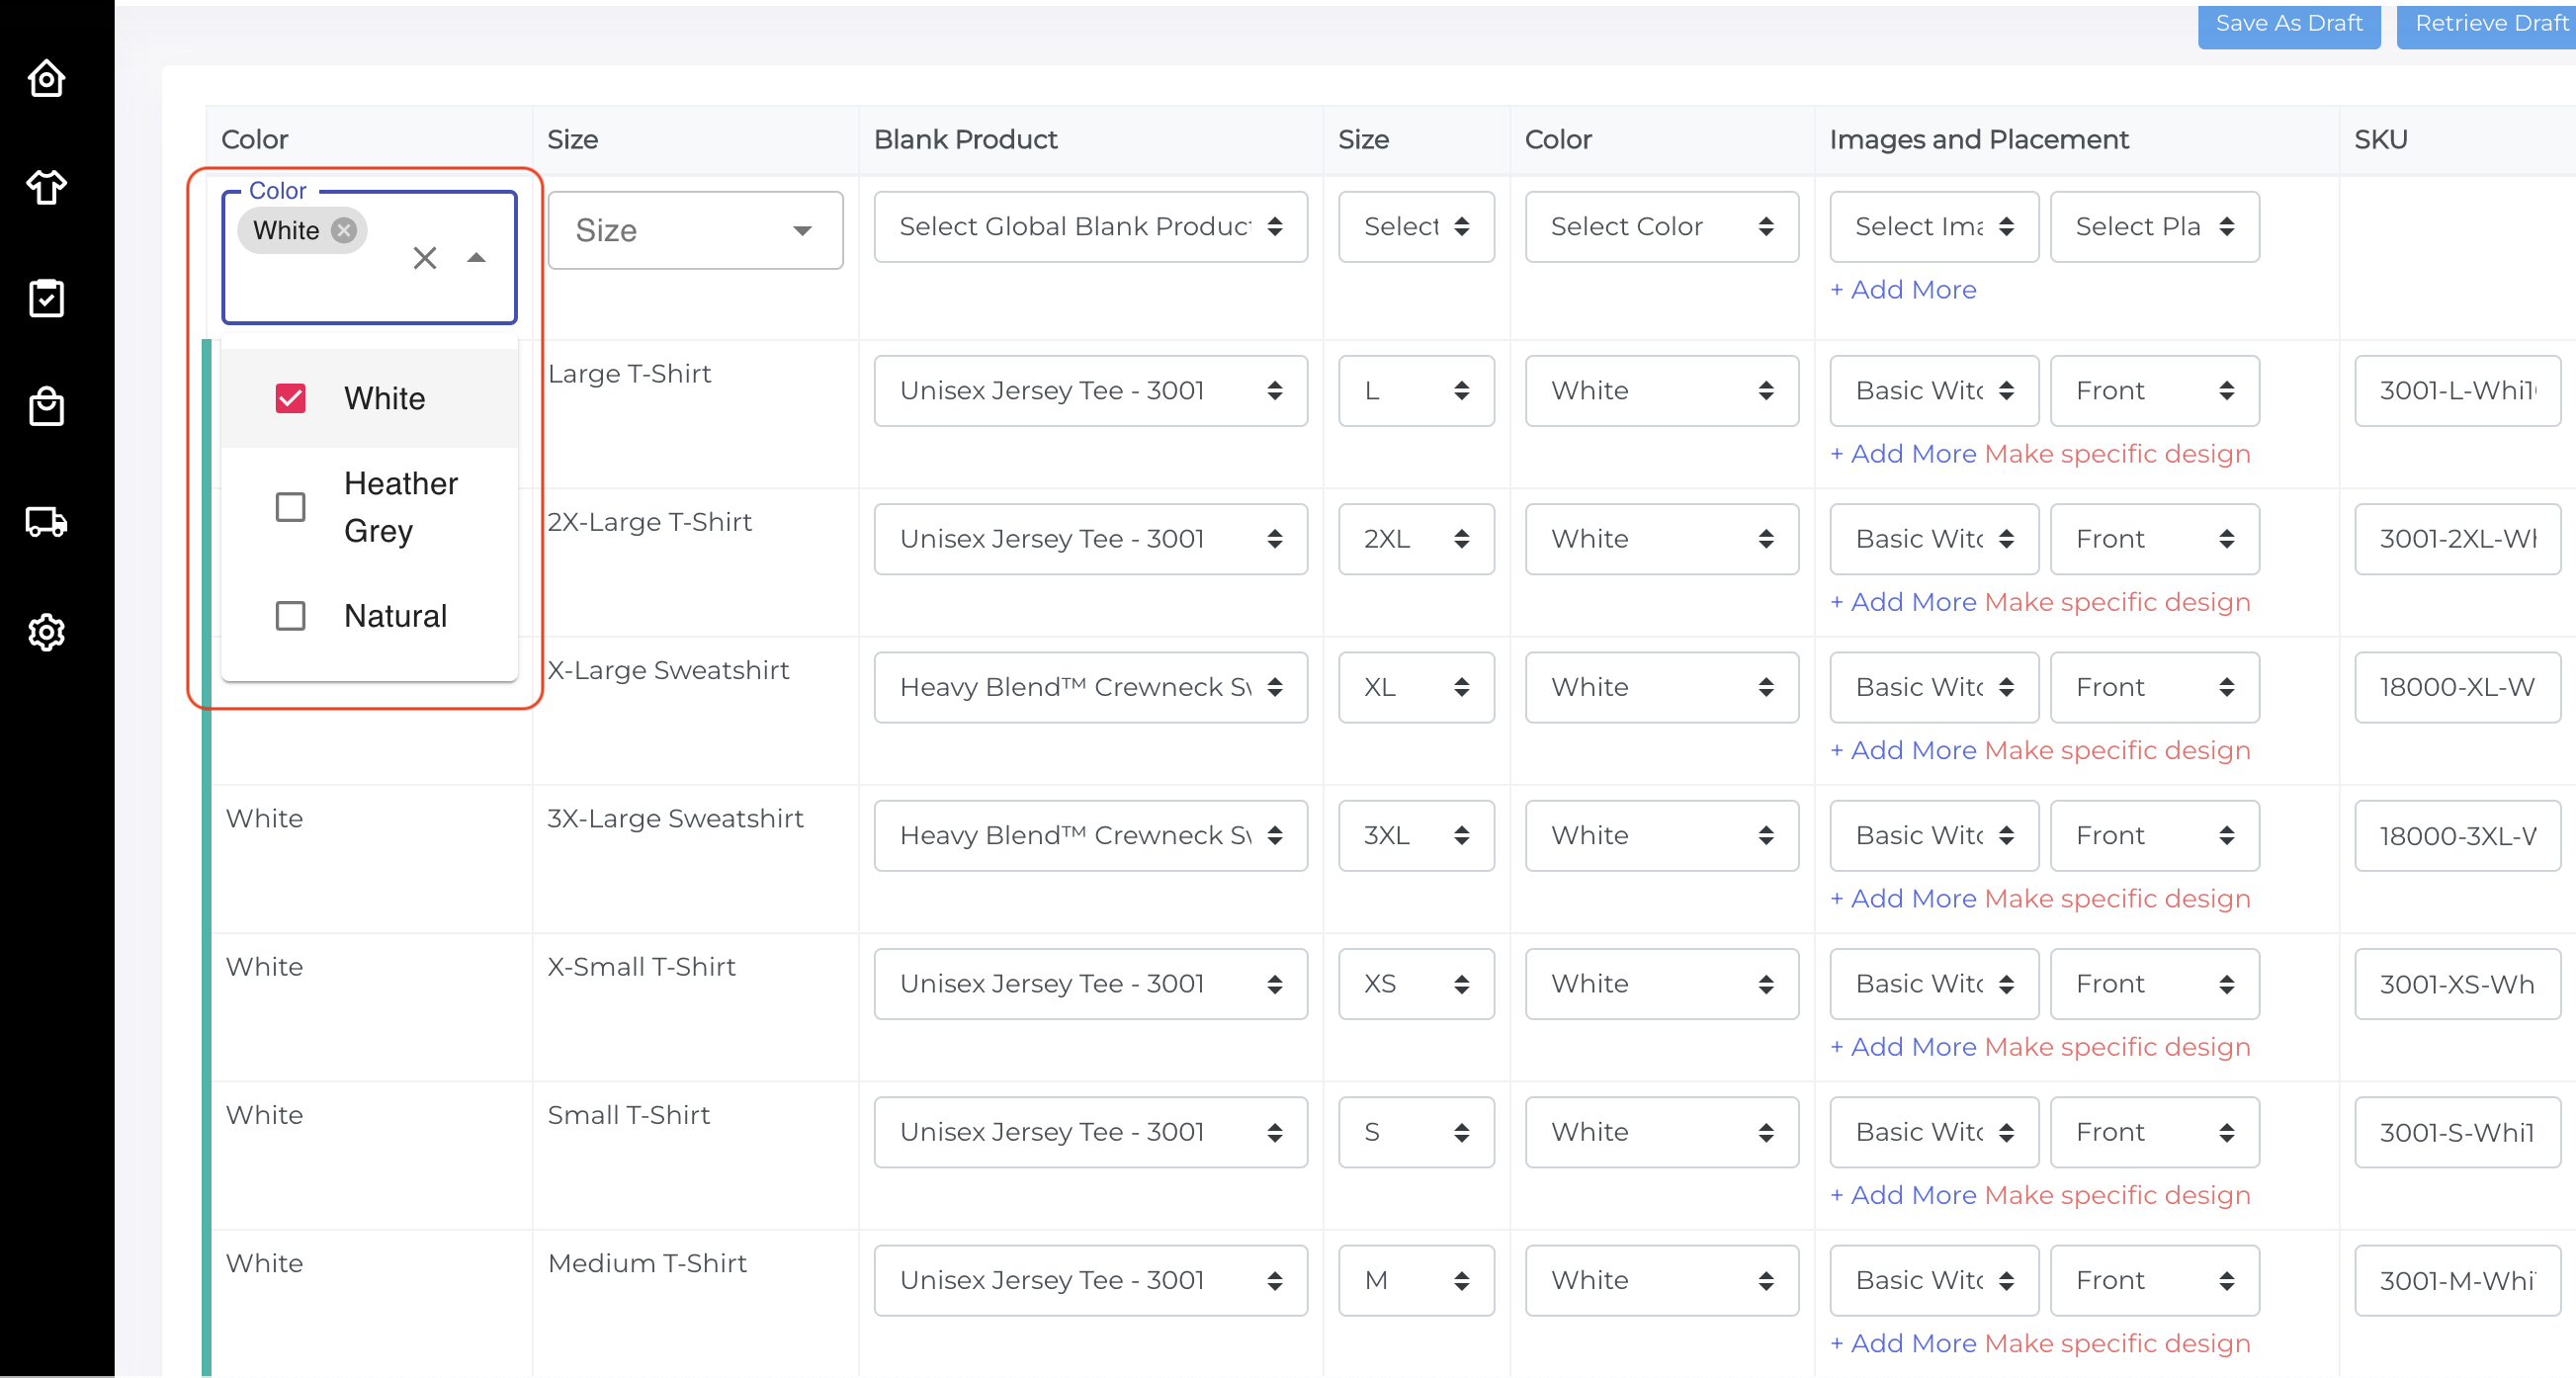
Global Select: Once that you filter a color, you can now choose one of the blank products that you added above from the global select at the top of this area.
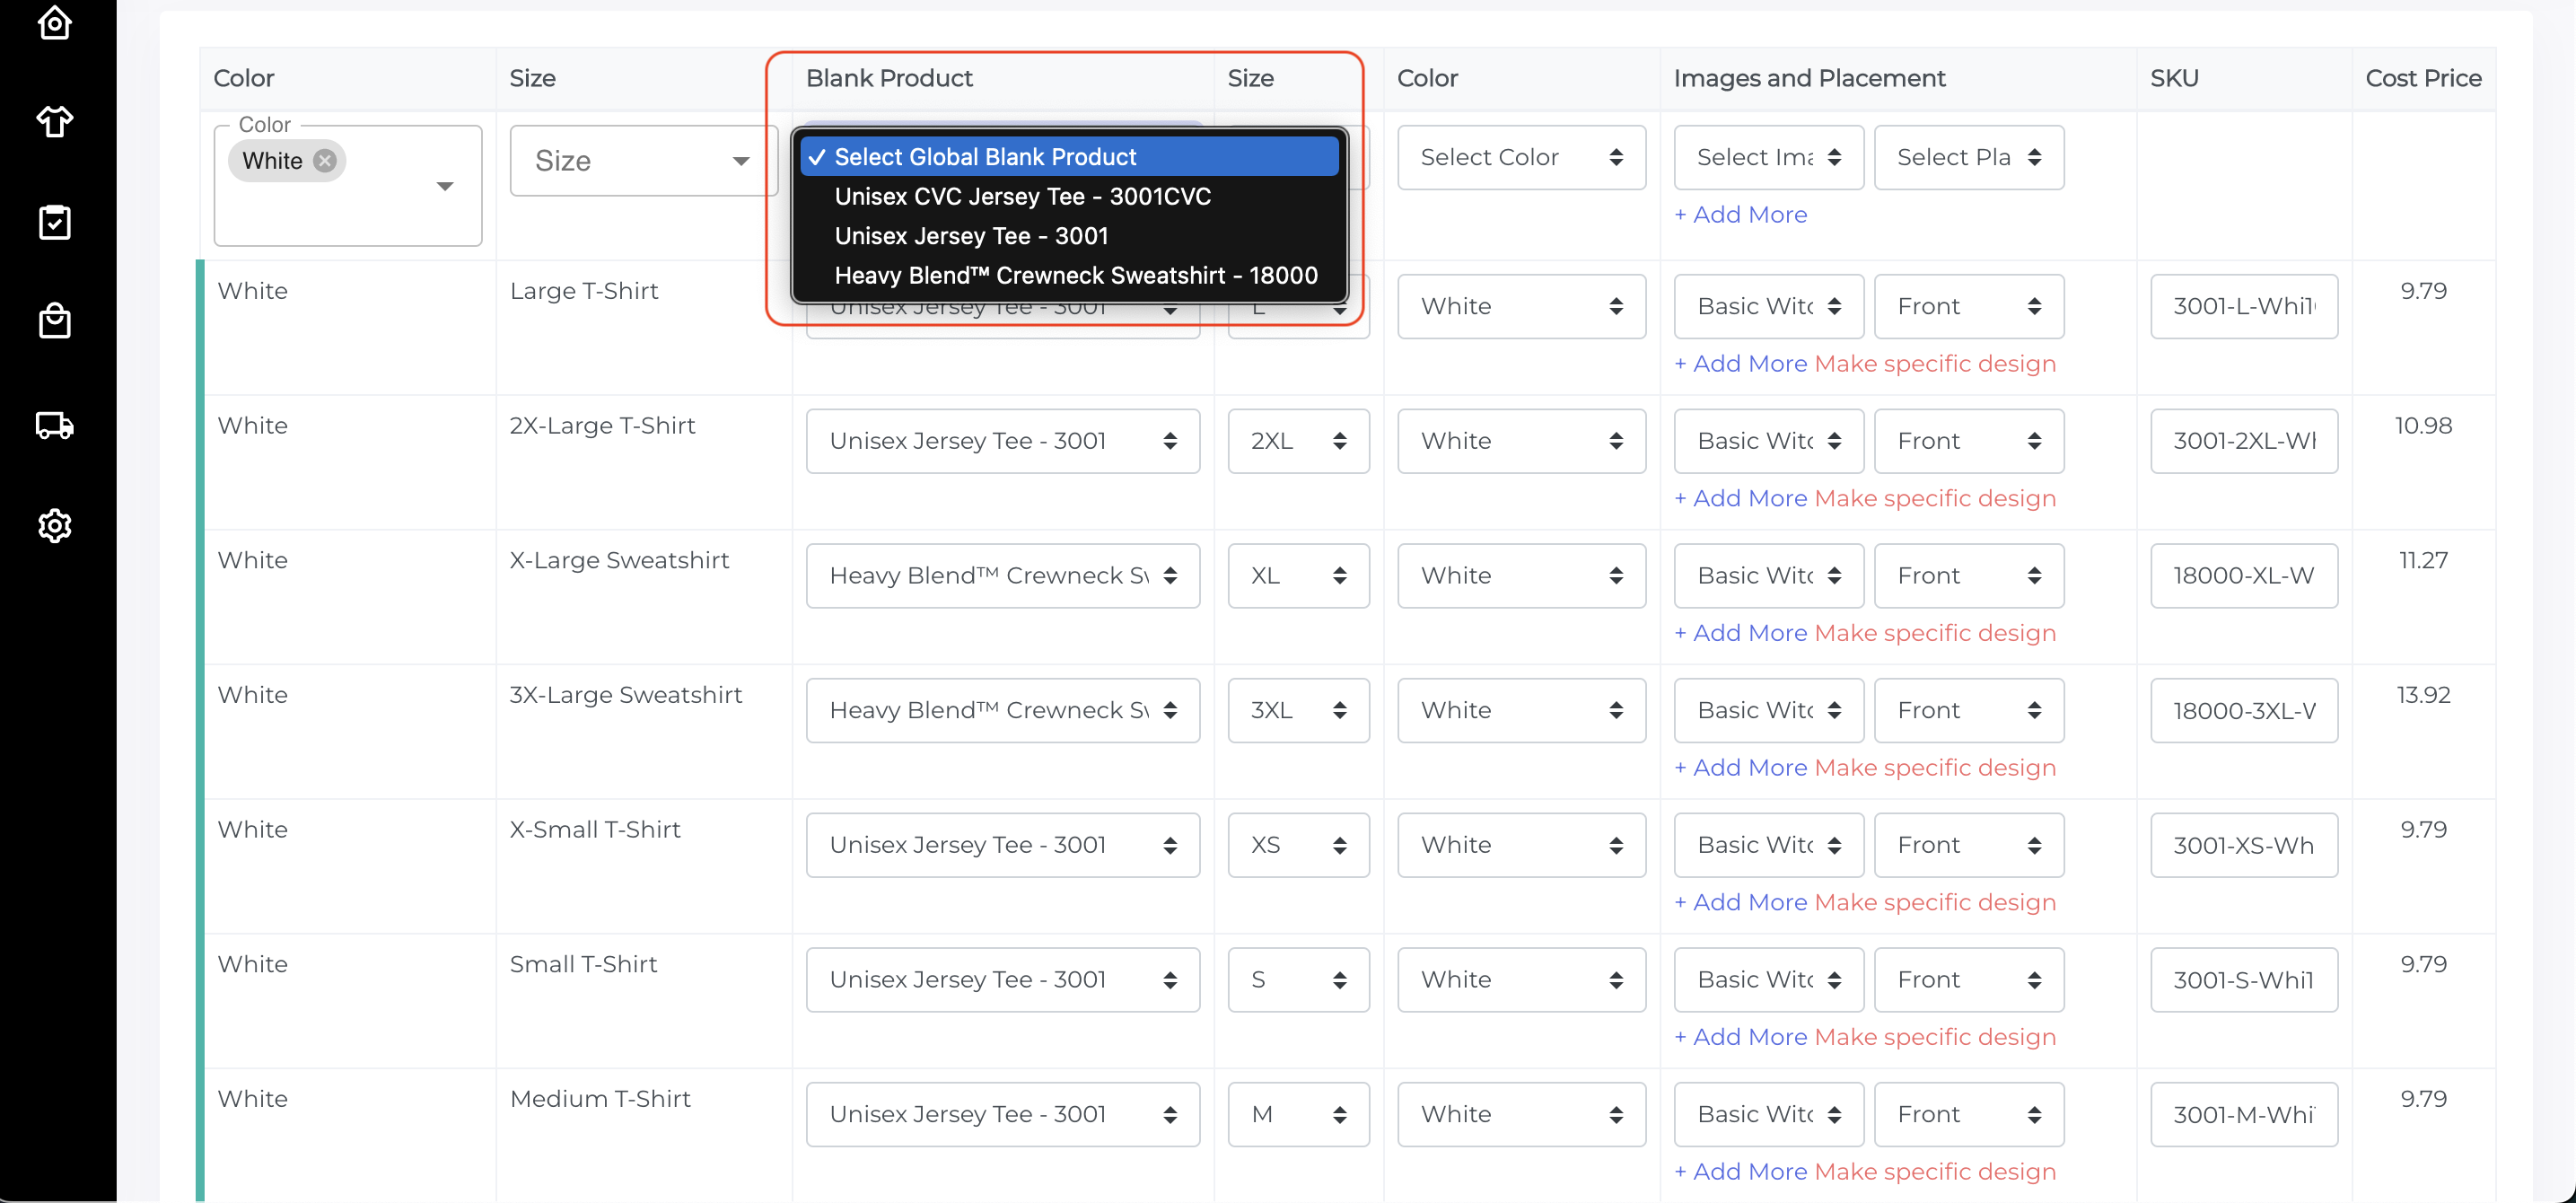
You will be able to individually make changes to variations as well. We have made this flexible and over time it becomes an easy and relatively quick process to complete.
9. After filling all of the information, click "Save."
After all of the listings in the order have been synced, the order will automatically move over to the synced tab...and your done!